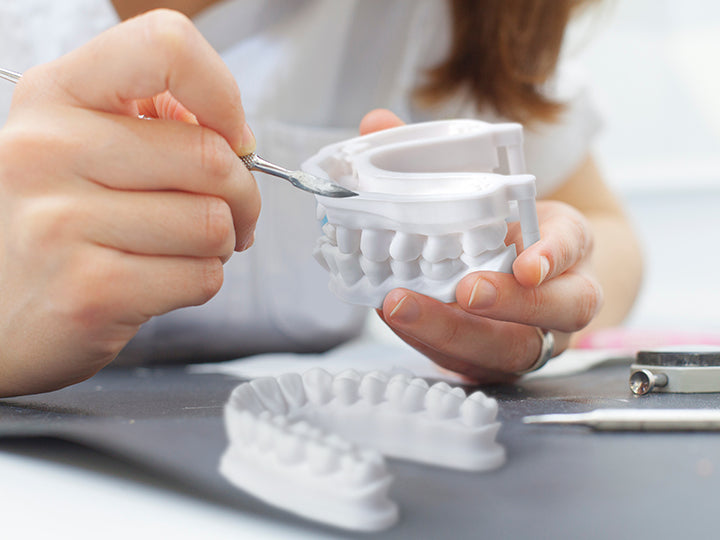
In this comprehensive guide, we will take you through a step-by-step process on how to 3D print soft tissue or gingiva mask for implant analog models. Whether you're new to 3D printing or looking to improve your current workflow, this guide will provide practical instructions that you can use immediately to 3D print gingiva masks.
Step 1: Scan
We start by acquiring a digital impression of our patient's intraoral condition. This digital impression serves as our basis for designing and creating our CAD (Computer Aided Design) models.
There are two primary methods you can use to obtain these digital impressions:
- Utilizing the intraoral dental scanner to scan the patient's teeth directly. The handheld scanner can be placed directly in the patient's mouth and captures images in real time, allowing for a comprehensive digital impression of the teeth and gums.
- Scan a physical model from convention impression using a desktop scanner. It involves taking conventional impressions using impression materials and trays and is often used in dental practices that do not have access to an intraoral scanner or for patients who are not suitable for intraoral scanning.
Regardless of which method is used, both are equally viable as long as the resulting digital impression can be saved in .STL file format.
Step 2: Design
Use dental CAD software such as Exocad or 3Shape to design your gingiva mask.
Begin by creating an implant model based on your scanned teeth impression. Then carefully select the specific area where you intend to place the implant and generate a gingiva mask right in that area. Save the gingiva mask as .STL file format before moving to the next step.
(Tips: set the wall thickness of the gingiva mask or soft tissue thicker than 0.6 mm to ensure successful printing and avoid any potential breakage)
Step 3: Slicing
Once the design process is complete, the next step is to prepare a 3D printing file. A process commonly known as slicing. This process will revolve around setting up the print orientation, print support, and the resin profile.
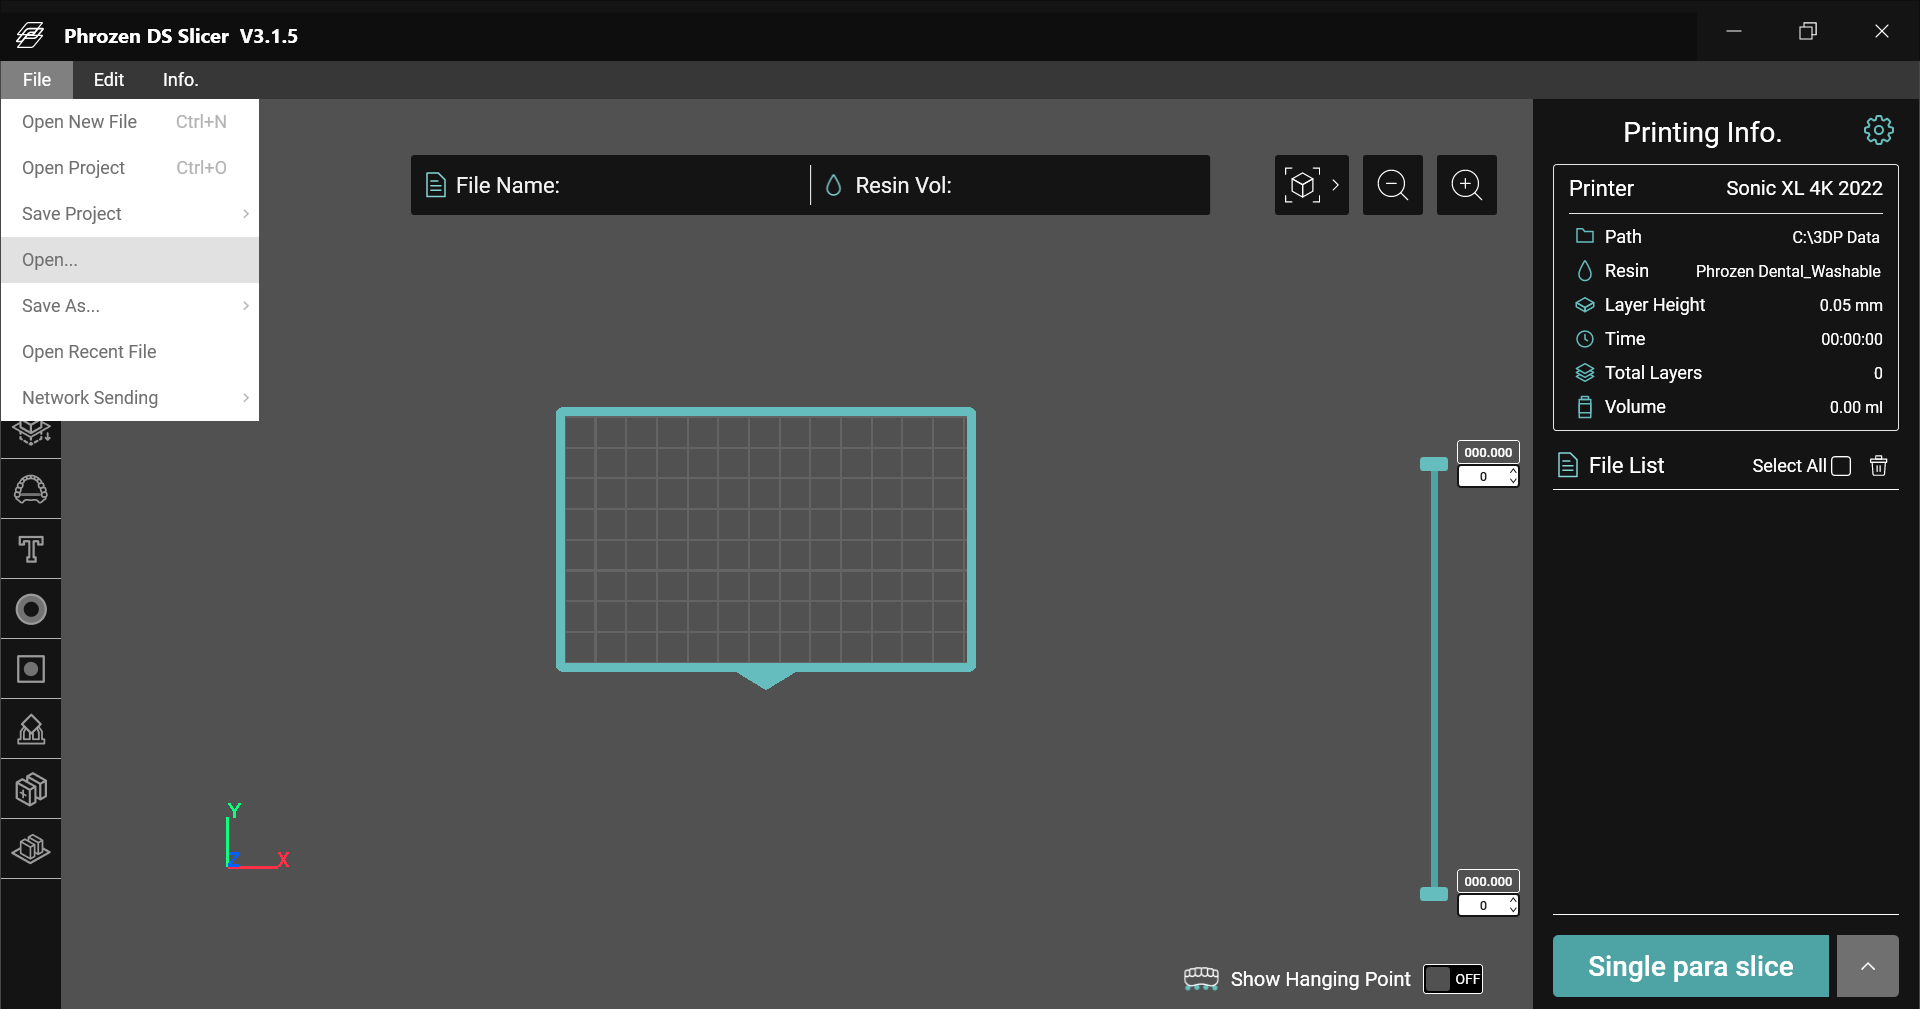
To begin, open the Phrozen DS Slicer software and import your gingiva mask (in .STL file format).
Print Orientation & Support
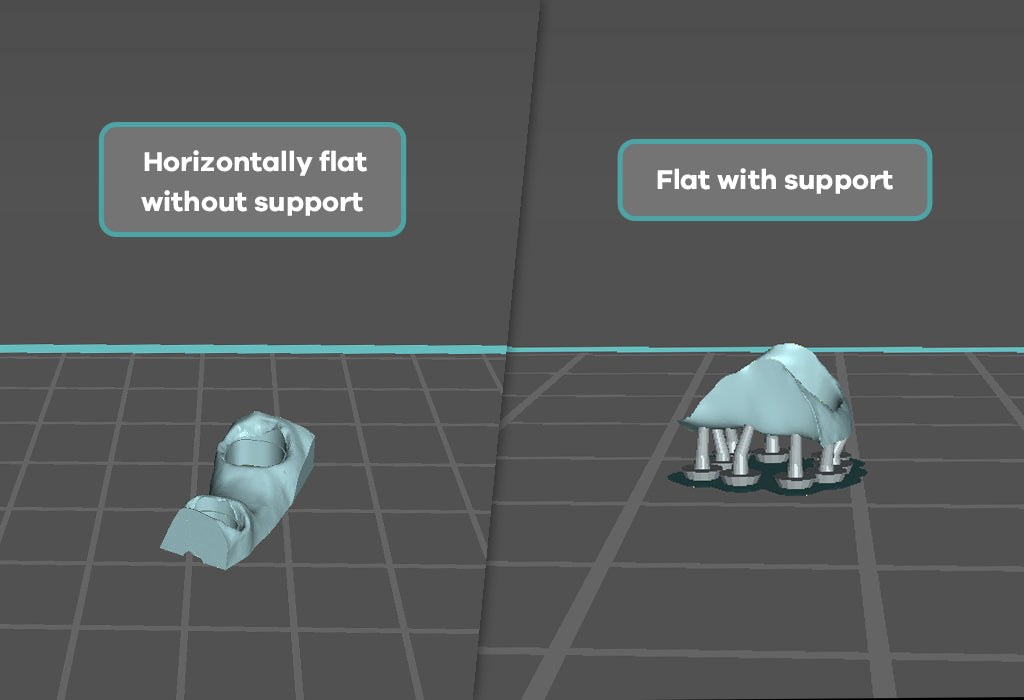
The optimal print orientation for a gingiva mask primarily relies on the shape of its base:
- If the base of the gingiva mask is flat, we highly recommend printing it horizontally flat on the building plate without the need for a support structure.
- If the base of the gingiva mask is round or not flat, we highly recommend printing it horizontally and placing it flat facing the building plate, but with support structures.
Resin profile
We recommend using our Phrozen Gingiva Mask Resin for printing your gingiva or gum tissue implant models.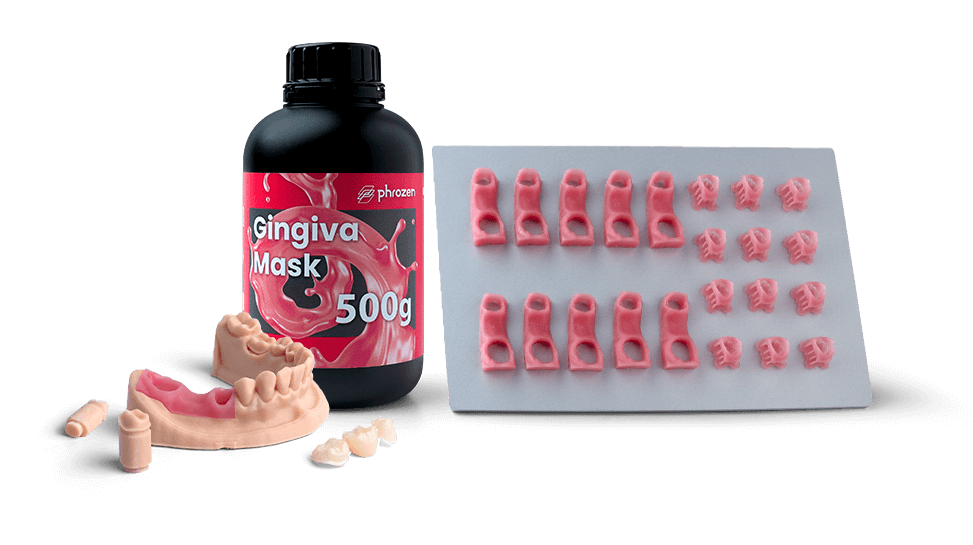 The resin is specifically designed to produce soft material with excellent elasticity and dimensional stability. Features that make the printed application easy to trim while still maintaining its accuracy throughout the process.
In addition to its impressive functionality, this material also offers beautiful aesthetics with its light pink color that closely mimics the appearance of gum tissue.
To set your resin and its parameter:
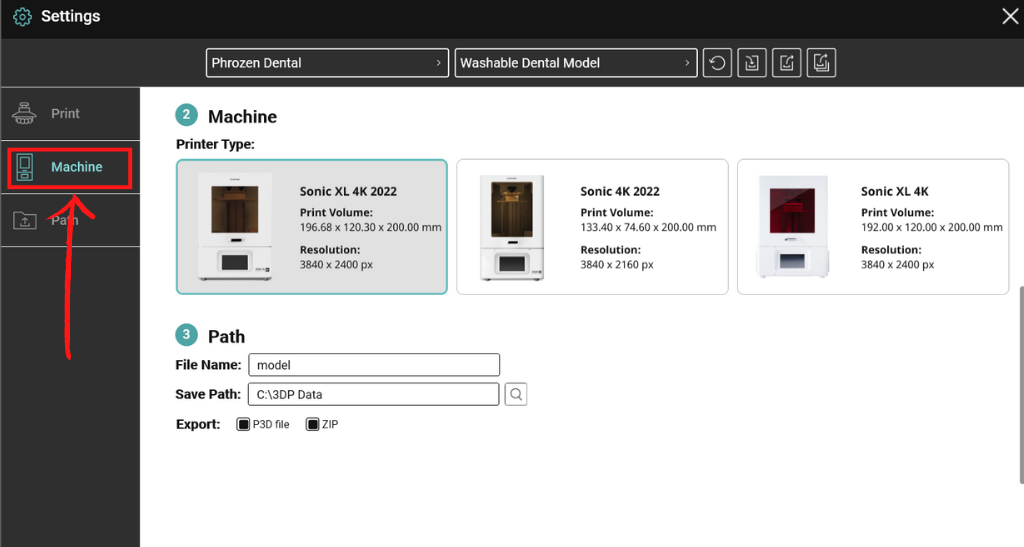
- First, go to the settings menu by clicking on the gear icon (⚙) located in the top right corner. Go to "Machine" from the sidebar menu and choose which printer you will use for printing.
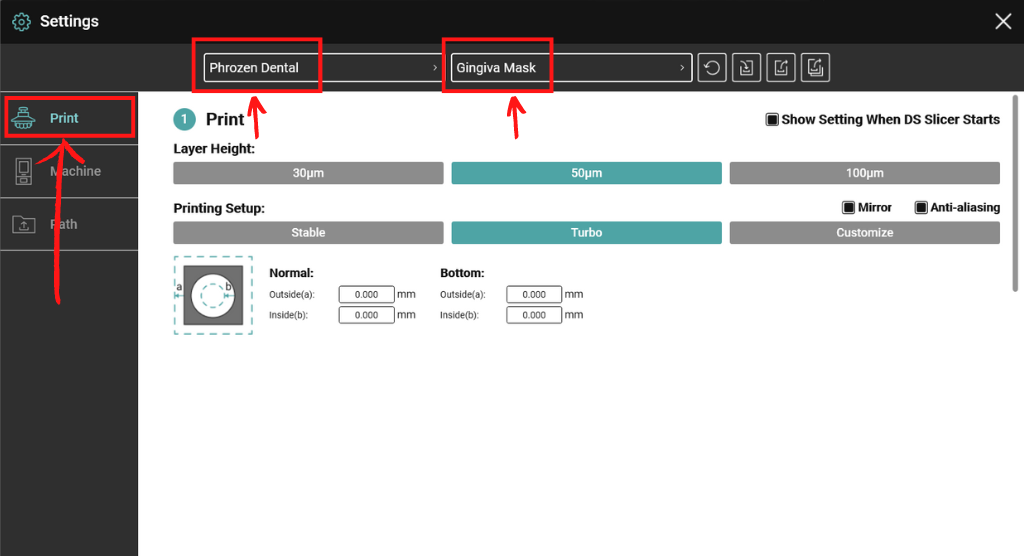
- After choosing your printer, go to "Print" on the sidebar menu and then select "Phrozen Dental" and "Gingiva Mask" resin.
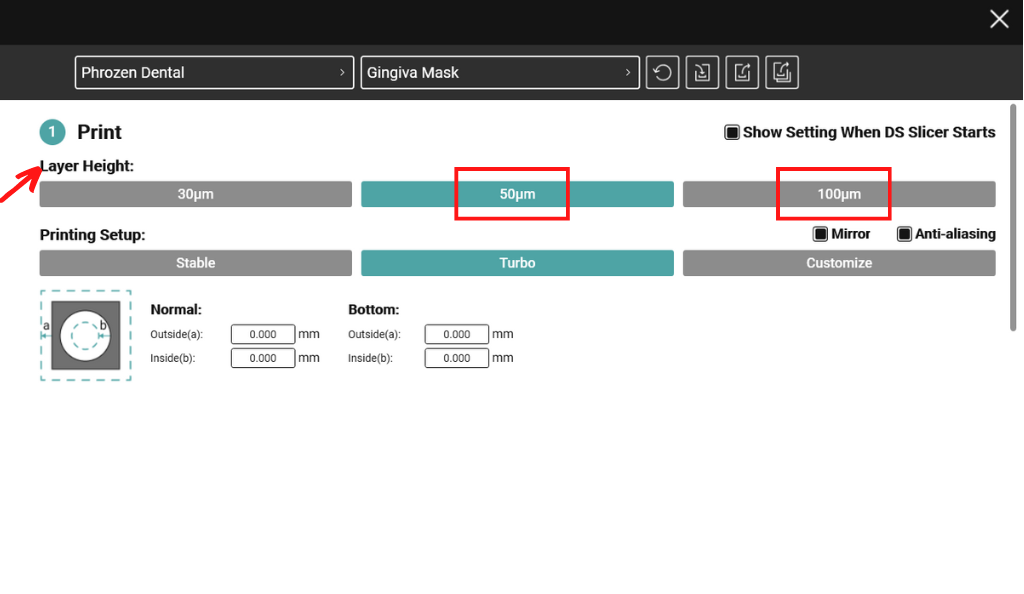
- Select the layer height that you want your model to be printed on. The lower the layer height, the higher the detail your printed object will have. However, lower layer heights require more layers to be printed, resulting in a longer printing time. We recommend printing your gingiva masks either on 50 µm or 100 µm layer heights.
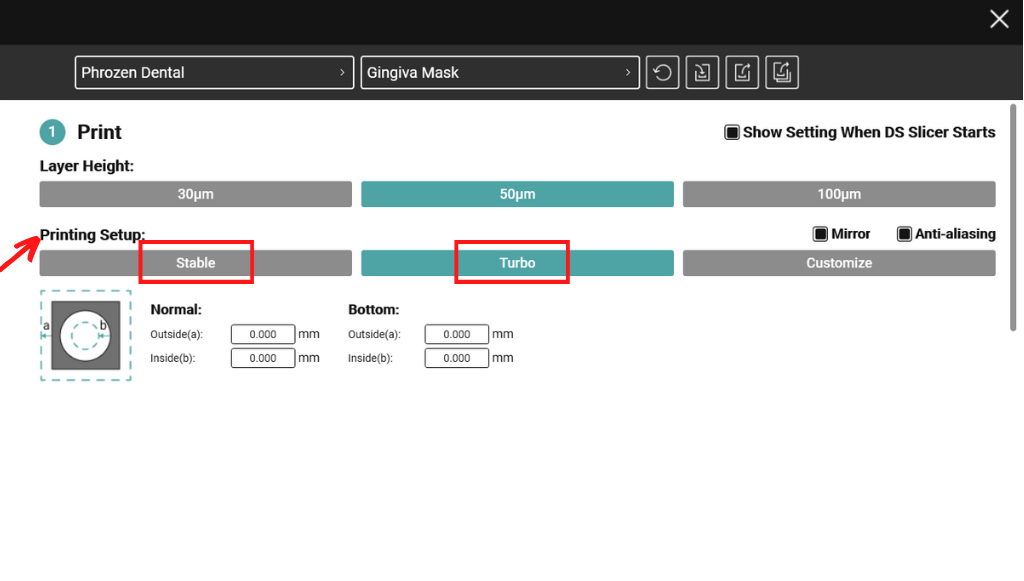
- Select the parameter that best suits your printing requirements. Inside the DS Slicer software, the resin parameter has been meticulously tested by our dental technicians, eliminating the need for you to undergo trials & errors in dialing the resin parameter. You can select the "Stable" setting for moderate printing speed or the "Turbo" setting for faster printing speeds.
After setting the orientation, support, and resin profile, double-check everything once more, then click the "Single Para Slice" to slice the model, and we're ready to go to the next step.
Step 4: File Transfer
Once it finishes slicing (don't forget to name the file), the sliced file will automatically be converted into a .ZIP file format. You can save this sliced file either to a USB drive or send it directly to your printer through network sending.
To save your files via USB:
- Click the "Open the Folder" button and select the file you want to save to the USB. Make sure that the file is saved in .ZIP format.
To save & send your files via Network Sending:
- Click the "Network sending" button, then enter the IP address of your printer. Make sure that the IP address you enter matches the IP address of your printer.
Step 5: Printing
Start by shaking the resin well and pouring it into the vat up to half or three-quarters of its maximum capacity. Don’t forget to double-check that all the screws (two thumbs screws on the building plate & two side screws on the vat) are tightened properly.
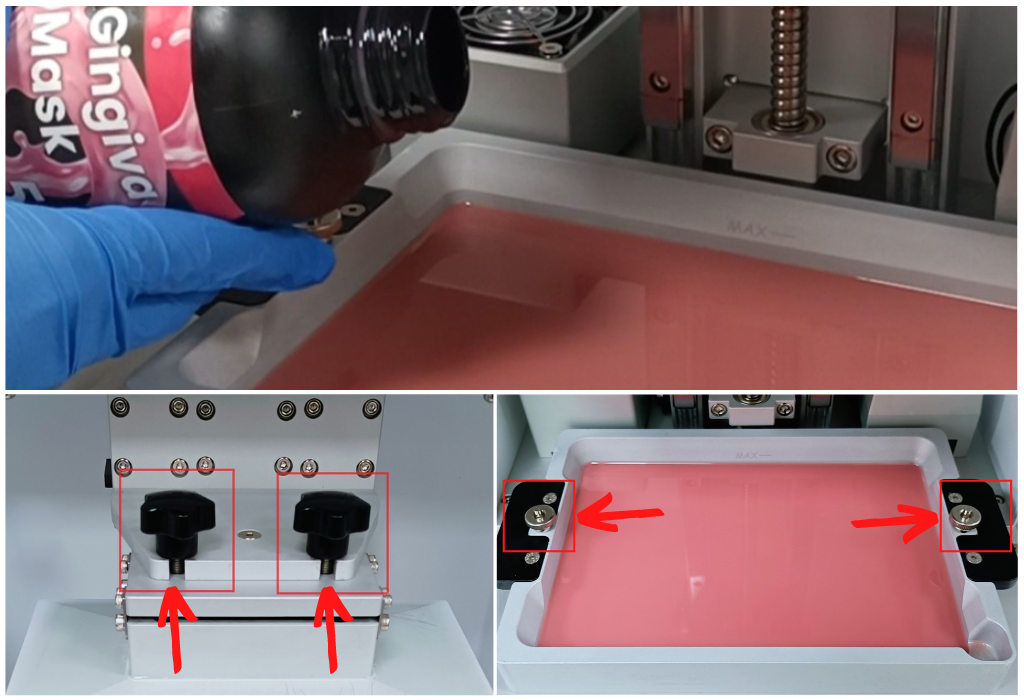
To start printing your gingiva mask via USB:
- Plug in your USB drive to the printer.
- On the printer’s touch panel, click the "Print" button.
- Then click on the USB icon at the bottom.
- Select the file print you intend to print.
- After that, a pop-up will appear. Click “Yes” to initiate the printing process.

To start printing your gingiva mask via Network Sending (WiFi):
- Enter the Phrozen OS interface by clicking "Open page" or by typing in the IP address of your printer.
- Go to the "PLATES" section
- Choose the file (based on the file name) you intend to print, and click the “Print” button on your screen. The printer would then automatically start the printing process.

(Click the following link here to see more details on how to start the printing process using the Phrozen Dental 2022 series)
Step 6: Post-processing
Removing your gingiva mask from the building plate
Use a metal scraper to complete this step. Insert the scrapper into the edge of your printed gingiva mask, then apply constant but light pressure to remove them from the building plate.
(Note: Avoid using excessive force as it can damage the printed objects and hurt our hands in the process)
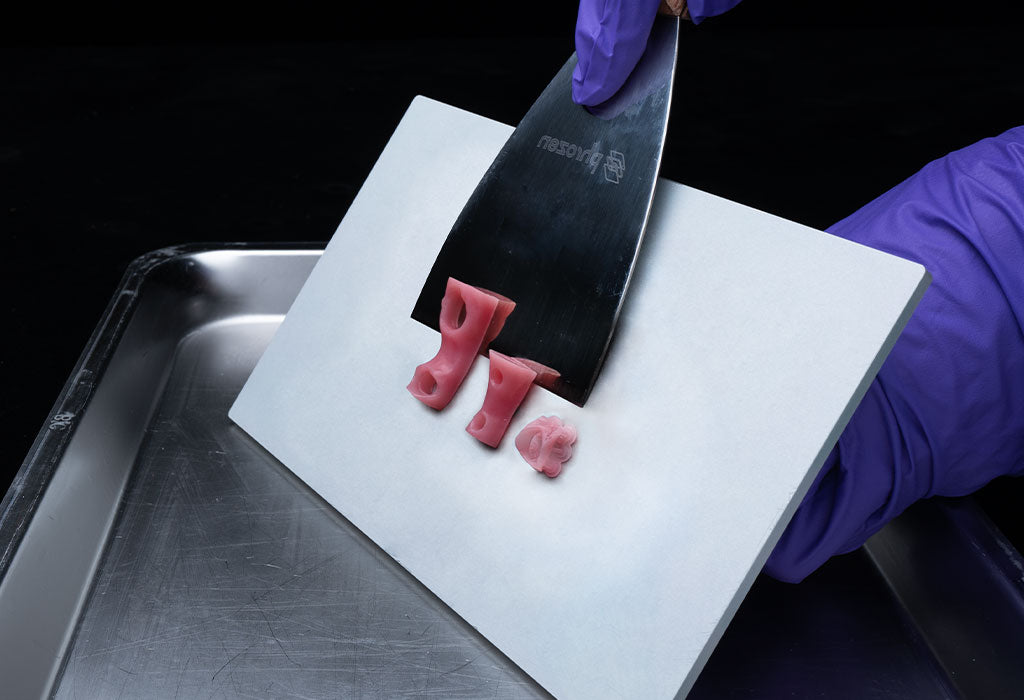
Cleaning the 3D printed gingiva mask
After removing the printed gingiva mask from the building plate, use an ultrasonic cleaner and IPA (isopropyl alcohol) for 10 minutes to remove uncured resin on its surface. Leave it in a dark place for up to 30 minutes, or alternatively use a compressed air gun to immediately dry the printed gingiva mask.
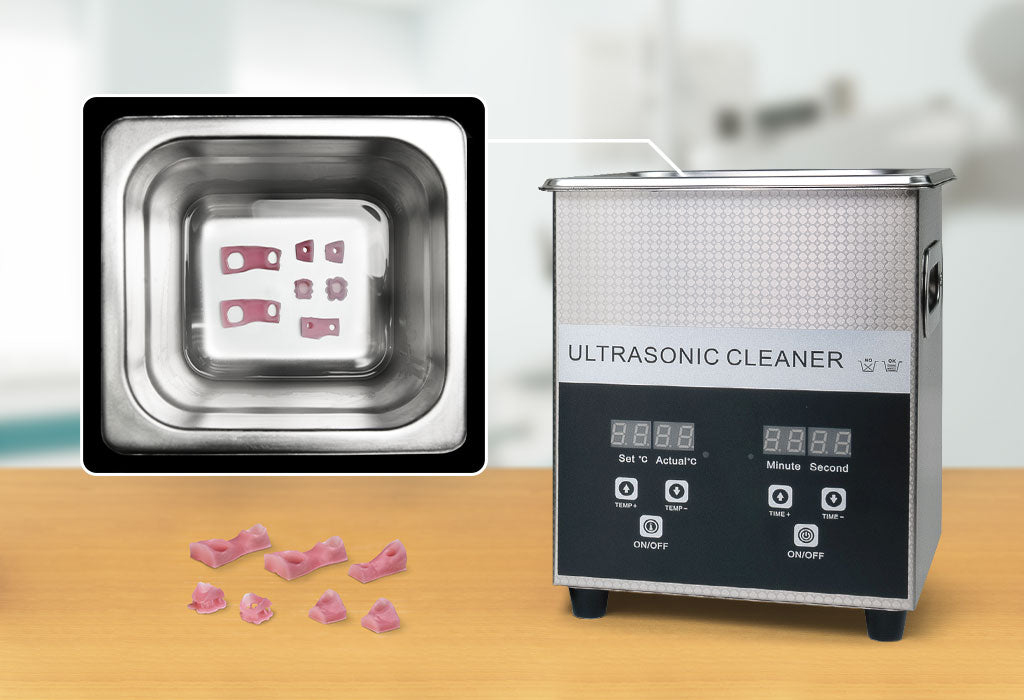
Post-curing the 3D printed gingiva mask
Fully submerge the 3D printed gingiva mask inside a glass container filled with glycerol.
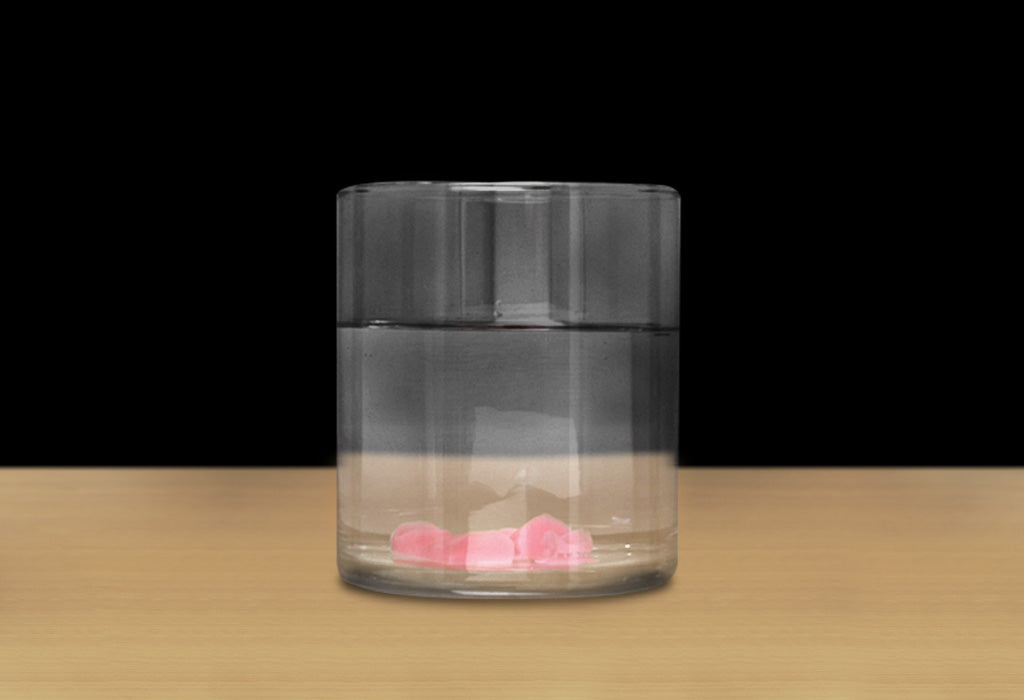
Next, place the glass container inside Phrozen post-curing stations such as Phrozen Cure, Cure Luna, or Cure Mega, and cure them for 30 minutes. Optionally, you can also use other post-curing devices as long as they emit the same wavelength (405nm).
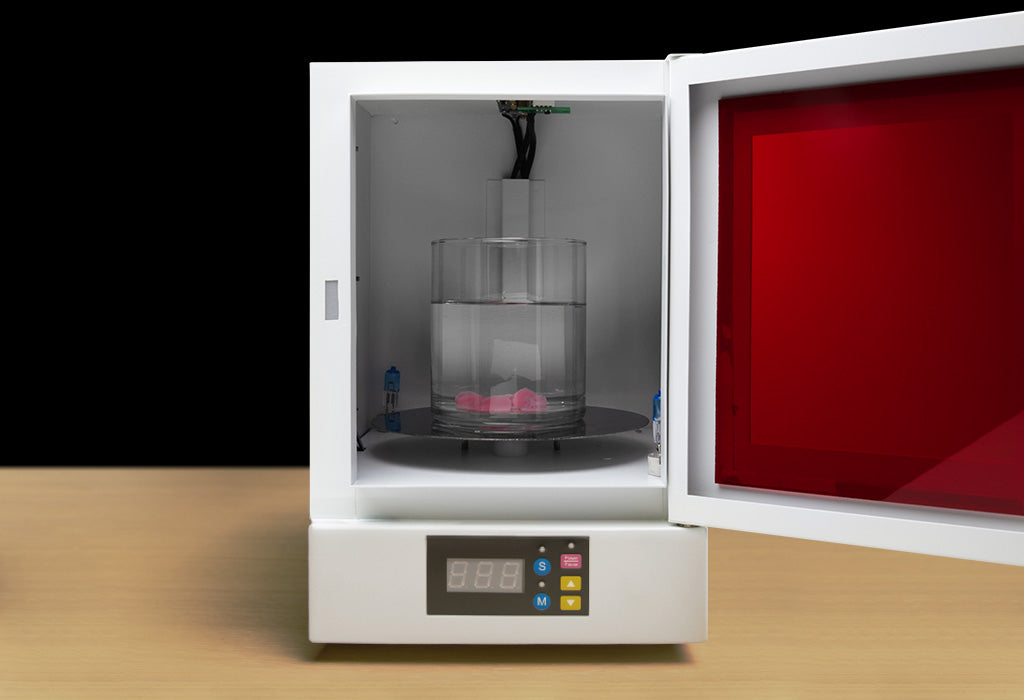
Once the curing process is complete, remove the printed gingiva mask from the glass container and rinse it thoroughly with water to eliminate any slimy residue from the glycerol. Then gently wipe the gingiva mask with paper towels to complete the post-curing process.
(Note: Different resins have different post-processing method & post-curing times, make sure to always refer to the user guide of each resin)
How much you save with Phrozen Dental?
Phrozen Dental 3D Print Solution for Gingiva Mask:


