Integrating and Using 3SHAPE Produce with Phrozen DS Slicer
With 3Shape Produce, you can now directly transmit 3D files from your 3Shape TRIOS Design Studio to Phrozen DS Slicer, forming a more cohesive and time-saving 3D printing workflow.
Please follow the step-by-step instructions below to set up this integration.


Step 1
Ensure You Have the Latest Version of 3Shape Unite
Verify if your current edition of 3Shape Unite is up to date with the latest version. If it's not, we highly recommend upgrading to the most recent version available to ensure optimal performance and to access any new features, improvements, or bug fixes that may have been introduced in subsequent releases.
In the event that you encounter any challenges or require assistance during the update process, please reach out to 3Shape’s customer service support.
Step 2
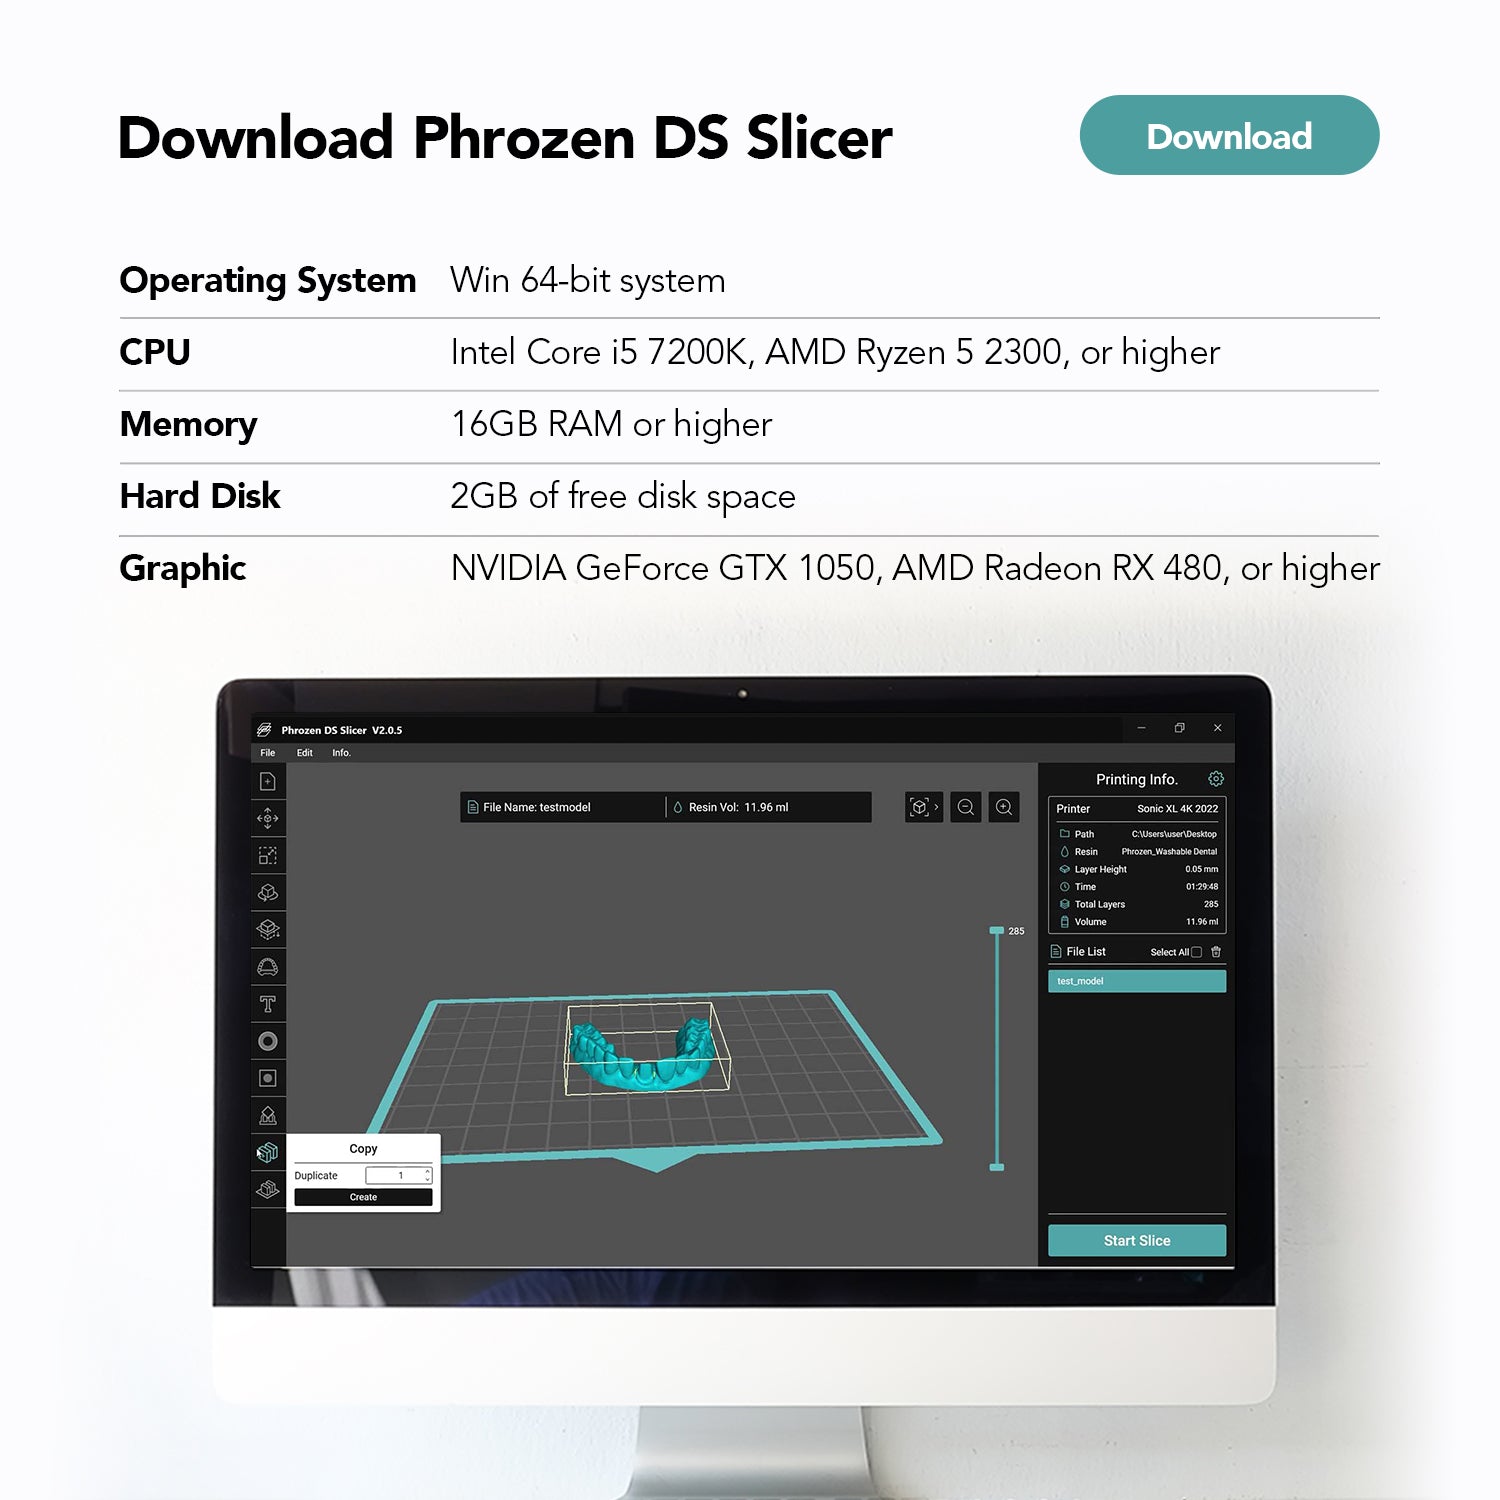
Install the Latest Version of Phrozen DS Slicer
In order to connect the Phrozen DS Slicer and Phrozen Dental 3D Printer with your 3Shape ecosystem, please install the latest version of the DS Slicer and restart your computer to ensure successful installation of the 3Shape server.

Step 3
Integrate Your Phrozen Dental 3D Printer
1. After you have finished designing your 3D files, head over to the “Produce" menu bar located in the top left corner of your TRIOS Design Studio interface and select "Machine setup."
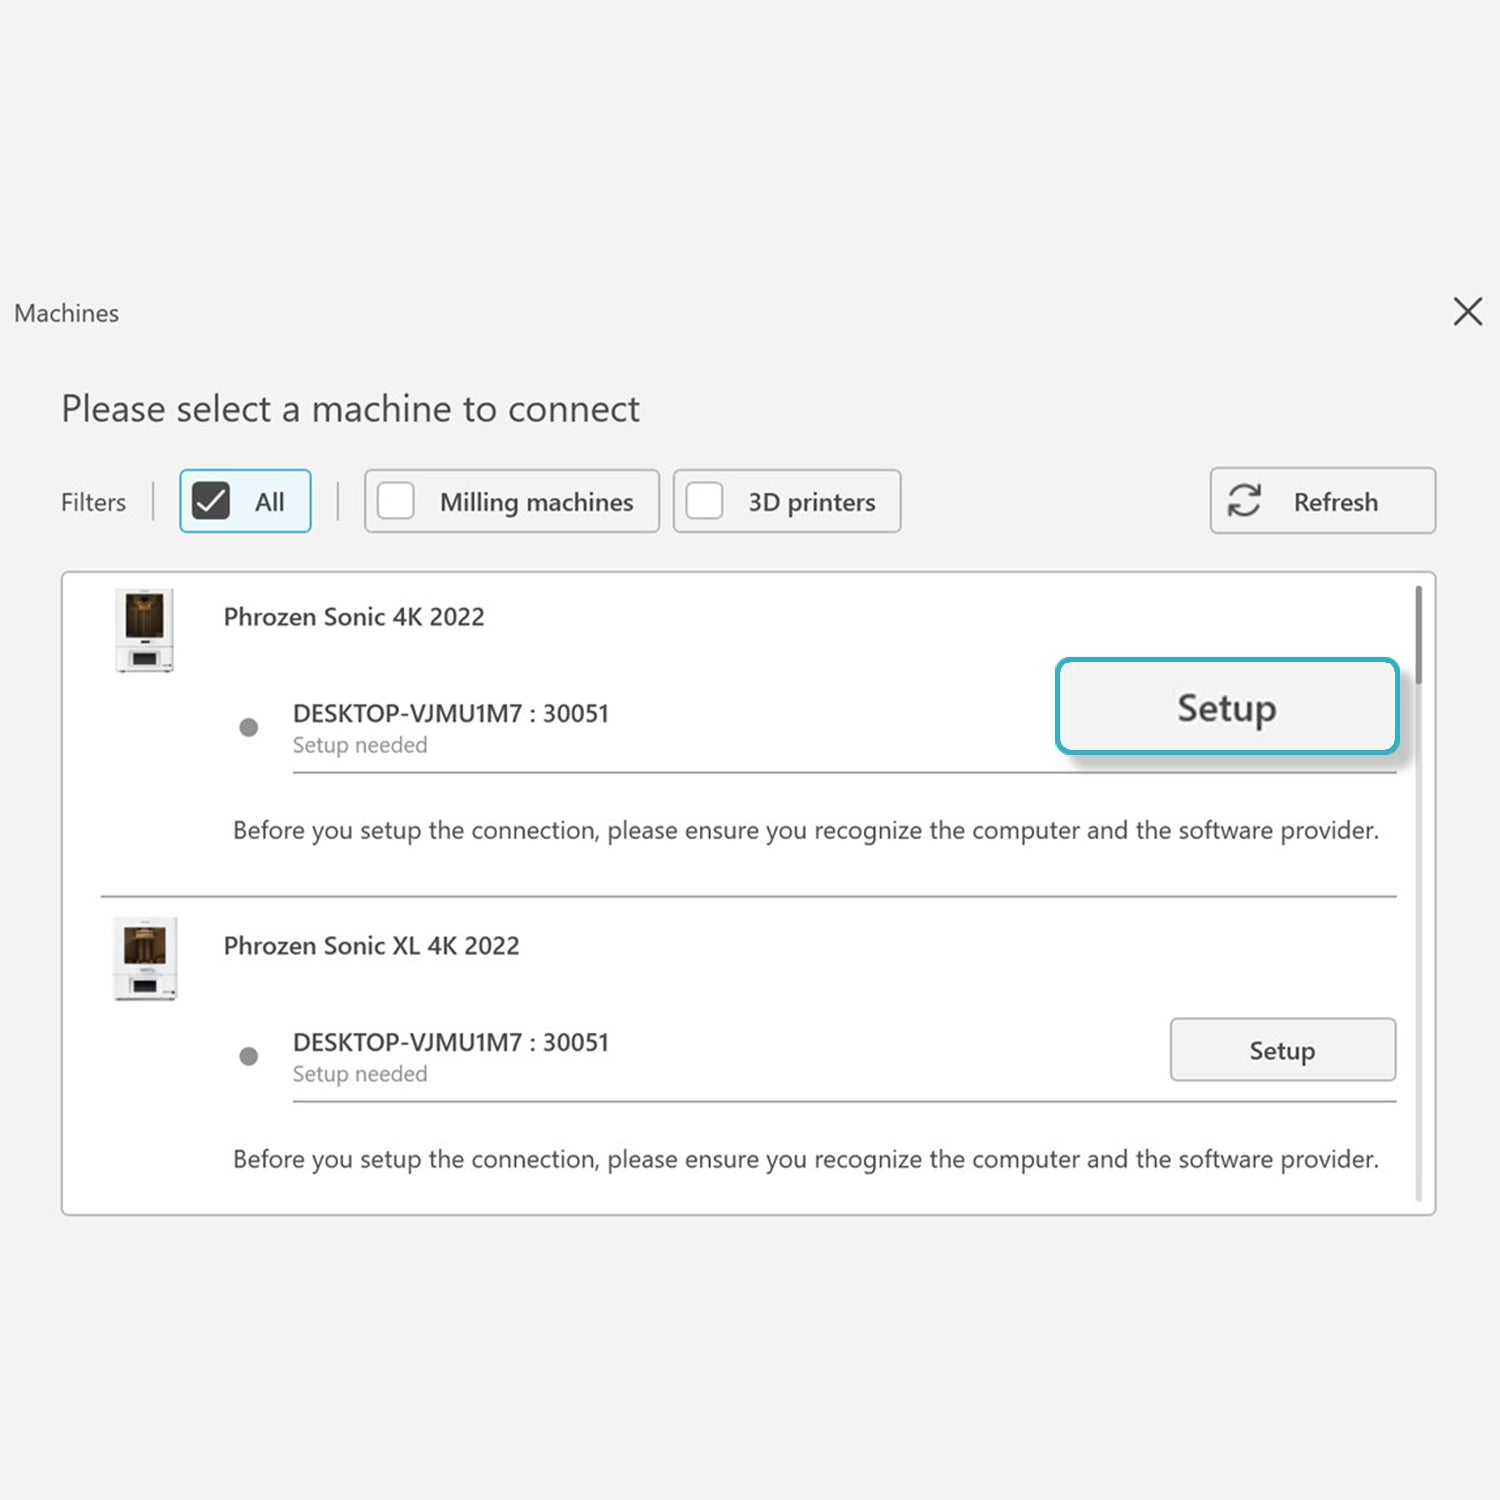
2. From there, select the Phrozen Dental 3D Printer you want to use and click the "Setup" button to add your printer.
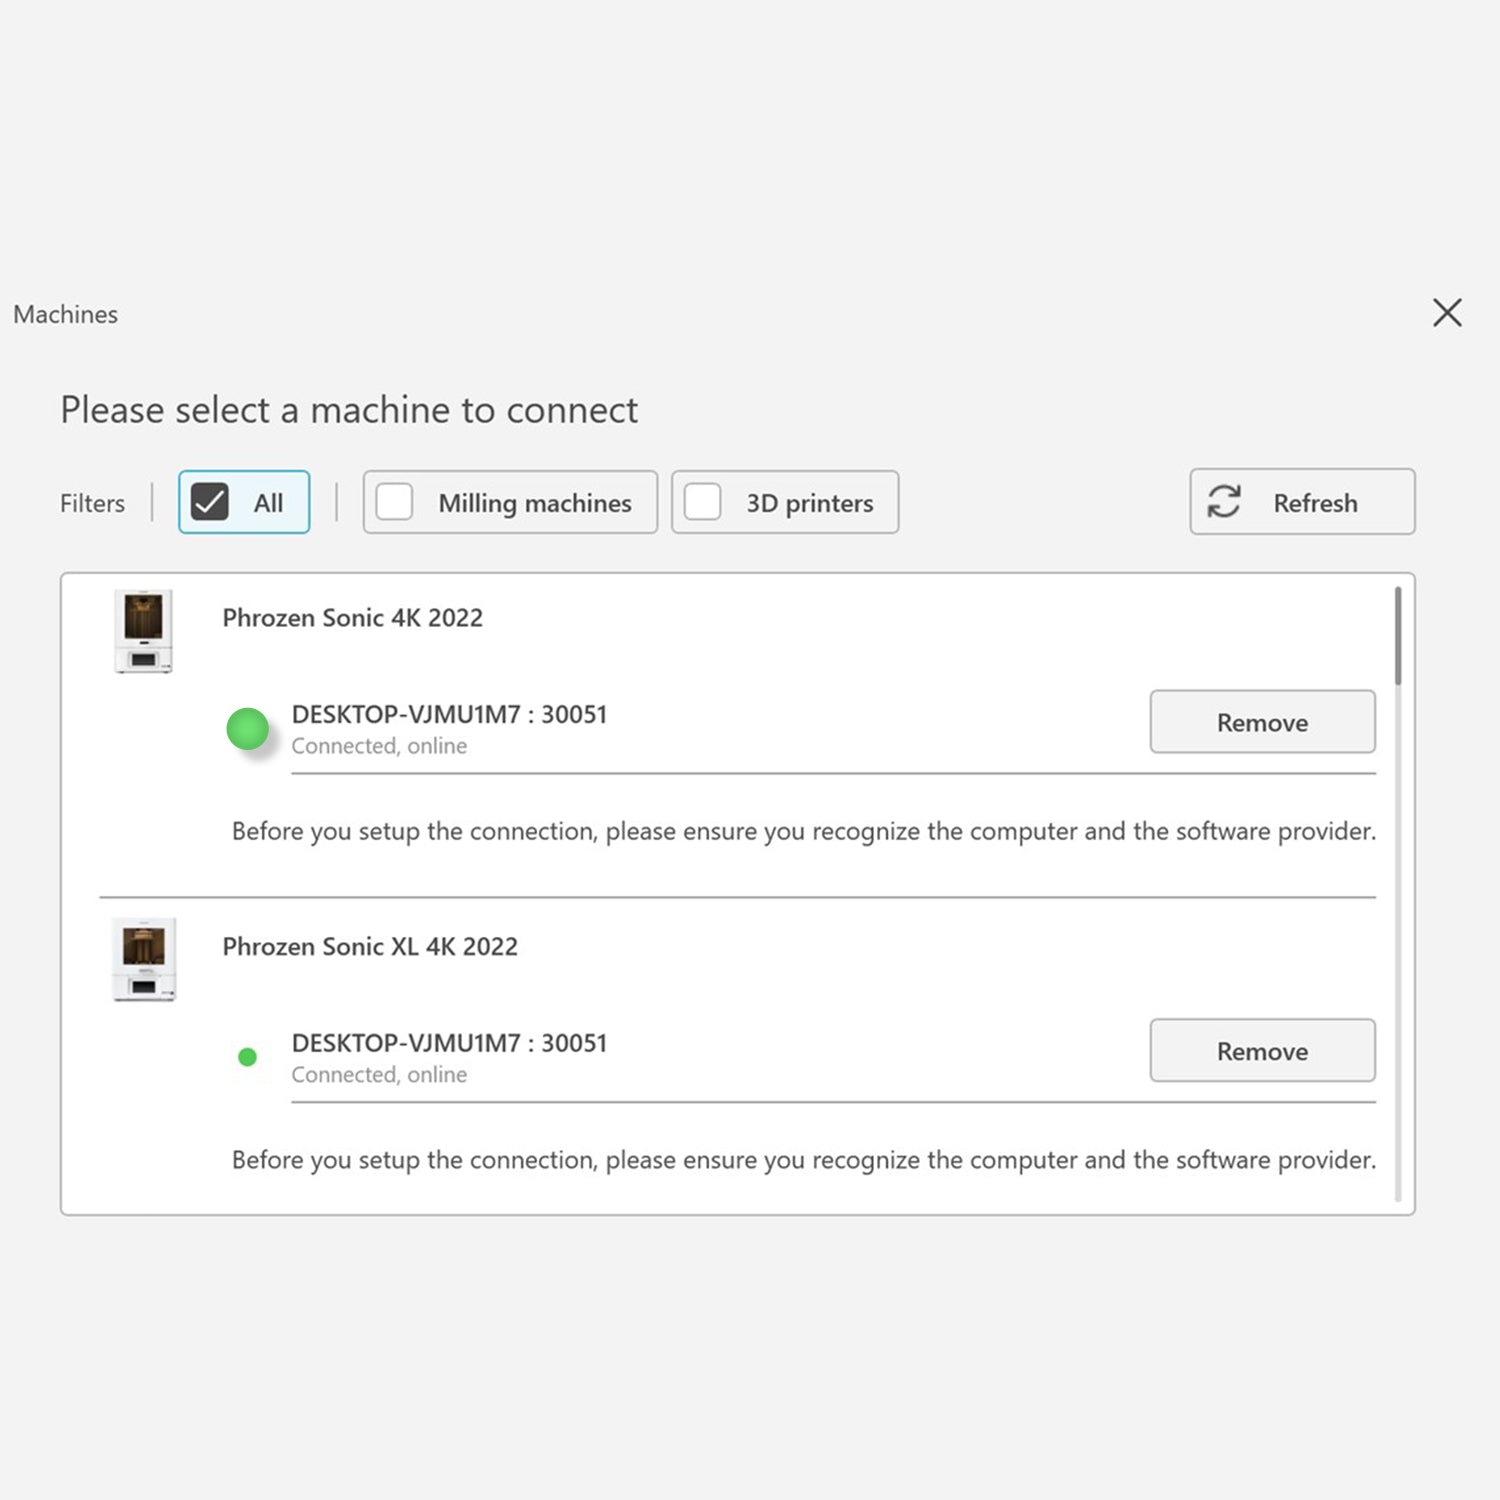
3. Wait for the green light to turn on, as this will indicate the integration has been established successfully.
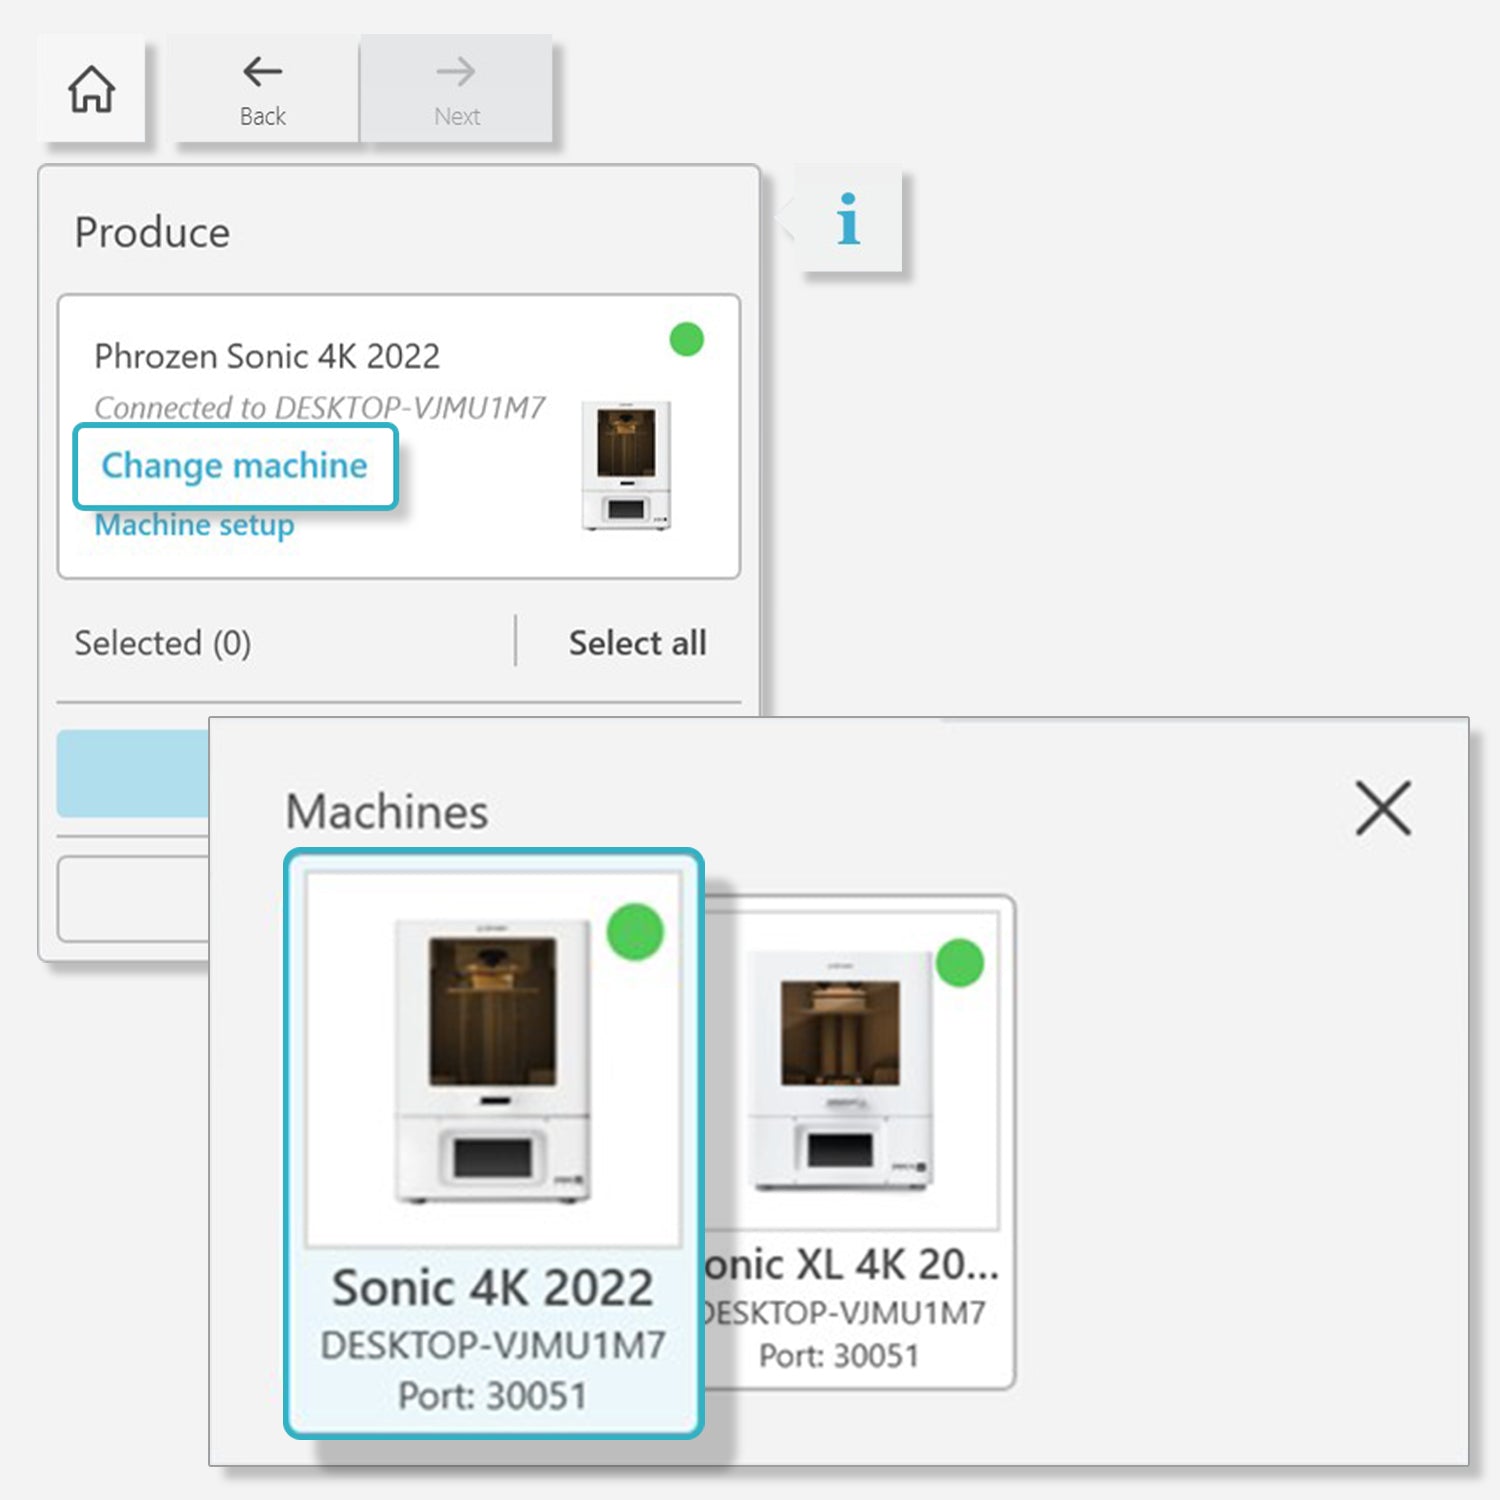
4. Head over to the “Produce" menu bar again, select "Change Machine," and choose the 3D printer you use. Lastly, click "Send" to transfer your files. The software will automatically send the 3D file you designed straight into the DS Slicer software.