With the help of 3D printing technology, having your own in-house production of thermoformed clear aligners has never been easier.To help you out with the process, we've put together a step-by-step guide below, covering all aspects of the production process from prepping your 3D printing file, to printing & post-processing, and finally to thermoforming & final fitting. Let's start!
Step 1: Scan
In order to create accurate and precise CAD (Computer Aided Design) models, a digital impression in .STL file format is needed. This impression serves as the basis for designing & manufacturing our dental aligners model, which would later be used to produce thermoformed clear aligners.
There are two primary methods to obtain this necessary data:
1. Scan the patient's teeth directly using the intraoral dental scanner. This handheld scanner can be placed directly in the patient's mouth and captures images in real time, allowing for a comprehensive digital impression of the teeth and gums.
2. Scan a physical model from a conventional impression using a desktop scanner. This method is often used in dental practices that do not have access to an intraoral scanner or for patients who are not suitable for intraoral scanning.
Both methods are equally viable as long as the resulting digital impression can be saved in the .STL file format.
Step 2: Slicing
After obtaining a digital impression, the next step in producing thermoformed clear aligners is to prepare a 3D printing file, which is a process commonly known as slicing.
In short, it's a process where your digital impression is sliced into hundreds or even thousands of thin, horizontal layers. Each layer then represents a horizontal cross-section of the 3D model, which the 3D printer uses as a blueprint for printing the actual model.
This step usually consists of setting up your printing orientation, support, and resin profile to achieve the desired result.
To begin, open the Phrozen DS Slicer software and import your digital impression (in .STL file format).

Creating a Base for Your Aligner Model
If you haven't included a base in your aligner model design, the DS Slicer software can help you create one.
The process is quite simple. Start by selecting the "Build Base" function from the sidebar menu. Click on Next twice, the software will automatically rotate the model, set up the feature line, and generate the base. You can also adjust the base's height afterward according to your preferences or requirements.
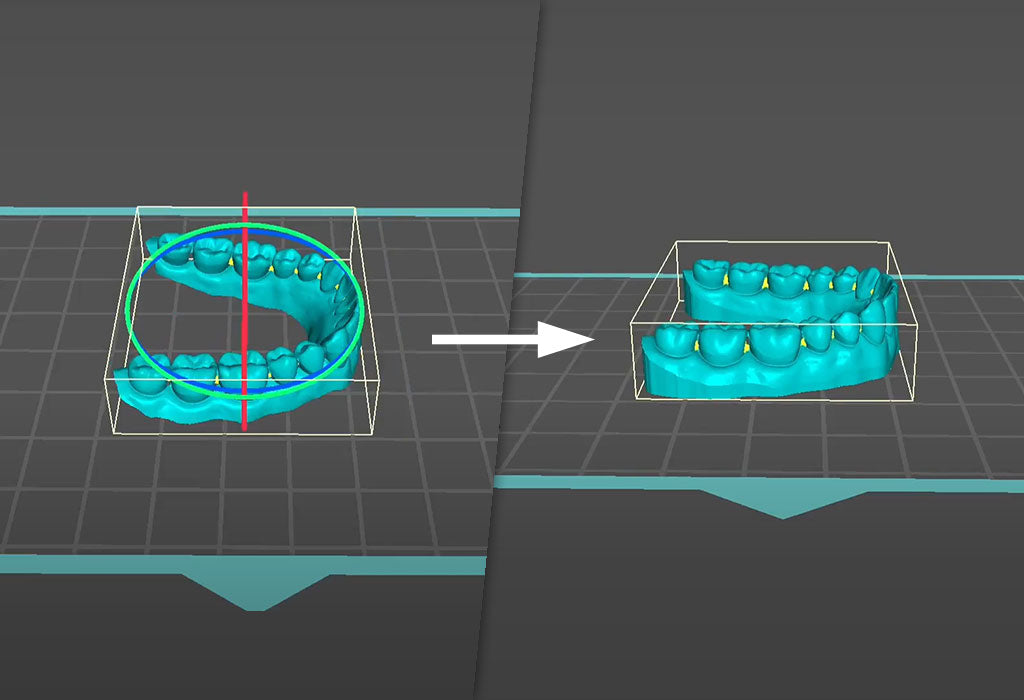
Print Orientation & Support
To ensure the best possible results when printing aligner models, we highly recommend printing your aligner models:
- Horizontally flat on the building plate - This orientation provides excellent stability and reduces the risk of distortion or warping during the printing process.
- Solid - Printing the model solid will provide added strength and durability to the aligner model.
- Without support - As the model will be printed solid and flat on the building plate, it is not necessary to add any support to the model.

Resin Setting
We recommend using our Phrozen Dental Ortho Model Resin for printing your aligner models. 
Not only will it deliver precise results, but the material is also designed to resist high temperatures of up to 190°C. As a result, it will help ensure that all your models can withstand the thermoforming process without losing their shape or accuracy.
To set your resin and its parameter:
- First, go to the settings menu by clicking the gear icon (⚙) located in the top right corner. Select "Machine" from the menu and choose which printer you will use for printing.

- After choosing your printer, select "Print" from the menu and then choose "Phrozen Dental" and "Dental Ortho Model" resin.

- Select the layer height that you want your model to be printed on. The lower the layer height, the higher the detail your printed object will have. However, lower layer heights require more layers to be printed, resulting in a longer printing time. We recommend printing your aligner models either on 50 µm or 100 µm layer heights.

- Select the resin parameter that best suits your printing requirements. Inside the DS Slicer software, the resin parameter has been meticulously tested by our dental technicians, so you no longer need to undergo trials and errors in dialing the resin parameter. You can select the "Stable" setting for moderate printing speed or the "Turbo" setting for faster printing speeds.

- After completing all of the stuff inside this section, double-check everything once more, then click the "Single Para Slice" button to slice the model.
Step 3: File Transfer
Once the AI software finishes slicing your model (don't forget to give the file a name), you can save the file either to a USB drive or send it directly to your printer through network sending.

To save your files via USB:
- Click "Open the Folder" and then select the file that you want to save to the USB. Make sure that the file is saved in ZIP format.
To save & send your files via Network Sending:
- Click "Network sending" then enter the IP address of your printer. Make sure that the IP address you enter matches the IP address of your printer.

Step 4: Printing
Start by shaking the resin well and pouring it into the vat. We recommend filling the vat up to half or three-quarters of its maximum capacity.

Don’t forget to double-check that all the screws below are tightened properly.

To start printing your aligner models with Phrozen Sonic 2022 Series:
If you save your file via USB:
- Plug in your USB drive to the printer.
- On the printer’s touch panel, click "Print" button.
- Then click on the USB icon at the bottom.
- Select the file print you intend to print.
- After that, a pop-up will appear. Click on “Yes” to initiate the printing process.
If you transfer your file via Network Sending (WiFi):
- Enter the Phrozen OS interface by clicking "Open page" or by typing in the IP address of your printer.

- Go to the "PLATES" section.

-
Choose the file (based on the file name) you intend to print, and click the “Print” button on your screen. The printer would then automatically start the printing process.

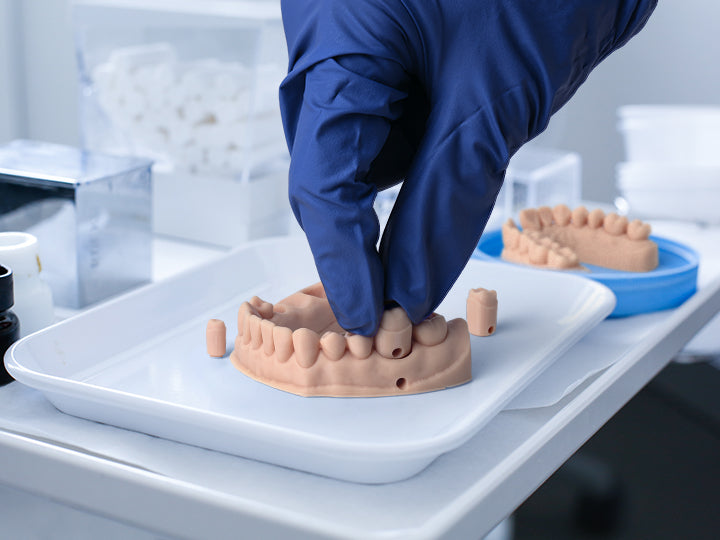
Step 5: Post-processing
Removing your aligner model from the building plate:
Use a metal scraper to complete this step. Insert the scrapper into the edge of your aligner model, then apply constant but light pressure to remove them from the building plate.
(Note: Avoid using excessive force as it can damage the printed objects and hurt our hands in the process)

Cleaning your aligner model:
Once you've removed your aligner model from the building plate, it's time to give it a good clean and remove any uncured resin on the surface. We recommend cleaning the model with an ultrasonic cleaner and 95% alcohol for 120 seconds. Make sure that the model has been thoroughly cleaned before you dry it.
(Note: Remember not to rub your printed model as this may cause over-cleaning and affect its precision tolerances)

For the drying process, let the model sit in a dark place for up to 30 minutes. Or alternatively, you can use a compressed air gun to immediately dry your models. 
Post-curing your aligner model:
For this step, we recommend using Phrozen post-curing stations like Phrozen Cure, Cure Luna, or Cure Mega. Alternatively, you can use other post-curing devices as long as they emit the same 405nm wavelength.

Now If you are printing your aligner models using Phrozen Dental Ortho Model Resin, as shown in this article, then you need to cure your model inside the post-curing station for 30 minutes to achieve good mechanical properties and precision.
(Note: Different resins have different post-curing times, so make sure to always refer to the user guide of each resin to find the appropriate post-curing time)
Step 6: Thermoforming
Thermoforming is a manufacturing process that involves heating a thermoplastic sheet and forming it over a model or mold to create a specific shape or product. In our case, we'll heat up the thermoplastic and shape it over our 3D-printed aligner model to create our clear aligner.
To do the thermoforming process with pressure formers, here are the steps you need to follow:
- Firstly, ensure that your aligner model is completely dry and post-cured before putting it in the thermoforming device.
- Next, insert the thermoplastic sheet into the tension ring and put the 3D-printed aligner model on the device.
- Then, set the temperature & pressure as instructed by the manufacturer and start the thermoforming process.
- Once it's done, take out the untrimmed aligner along with your model from the device.
Keep in mind that the steps may differ if you're using a different type of dental thermoforming device. While you can use the steps above as a reference, it's always best to first and foremost follow the manufacturer's instructions to operate your dental thermoforming device.
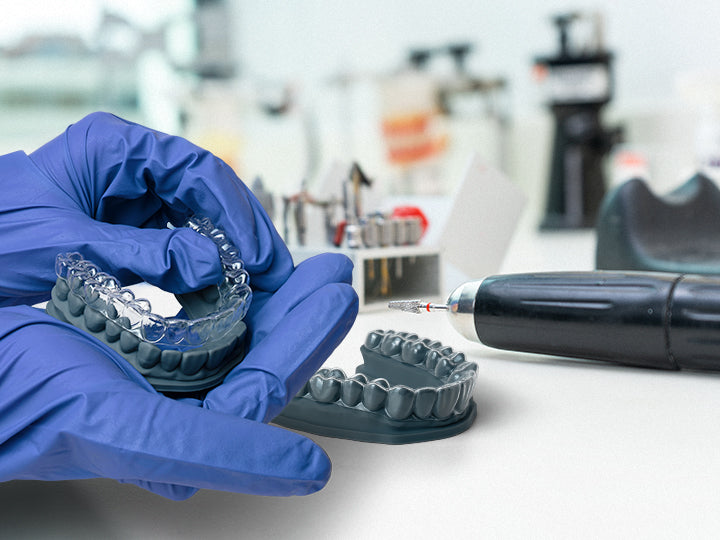
Step 7: Finishing
After creating the thermoformed aligner, the final step is to finish it up.
To begin, grab scissors to remove any unimportant areas of the aligner. This initial step will make it easier to see which areas need to be further trimmed or adjusted.
Once it has been removed, use a combination of scissors and low-speed grinding tools to perform more detailed trimming. This part might require extra care to ensure the edges of the aligner are smooth and even. It is vital to avoid creating any sharp or jagged edges that could irritate the patient's mouth or damage the surrounding tissues.
How much you save with Phrozen Dental?
Phrozen Dental 3D Print Solution for Clear Aligners: