3D Print Provisional Restorations for All-on-X: A Step-by-Step Guide
When it comes to full-arch implant cases, time and precision matter. Traditional methods of creating provisional restorations can take days, but with digital workflows and 3D printing, dental professionals can now deliver same-day provisionals without compromising on fit, esthetics, or durability.
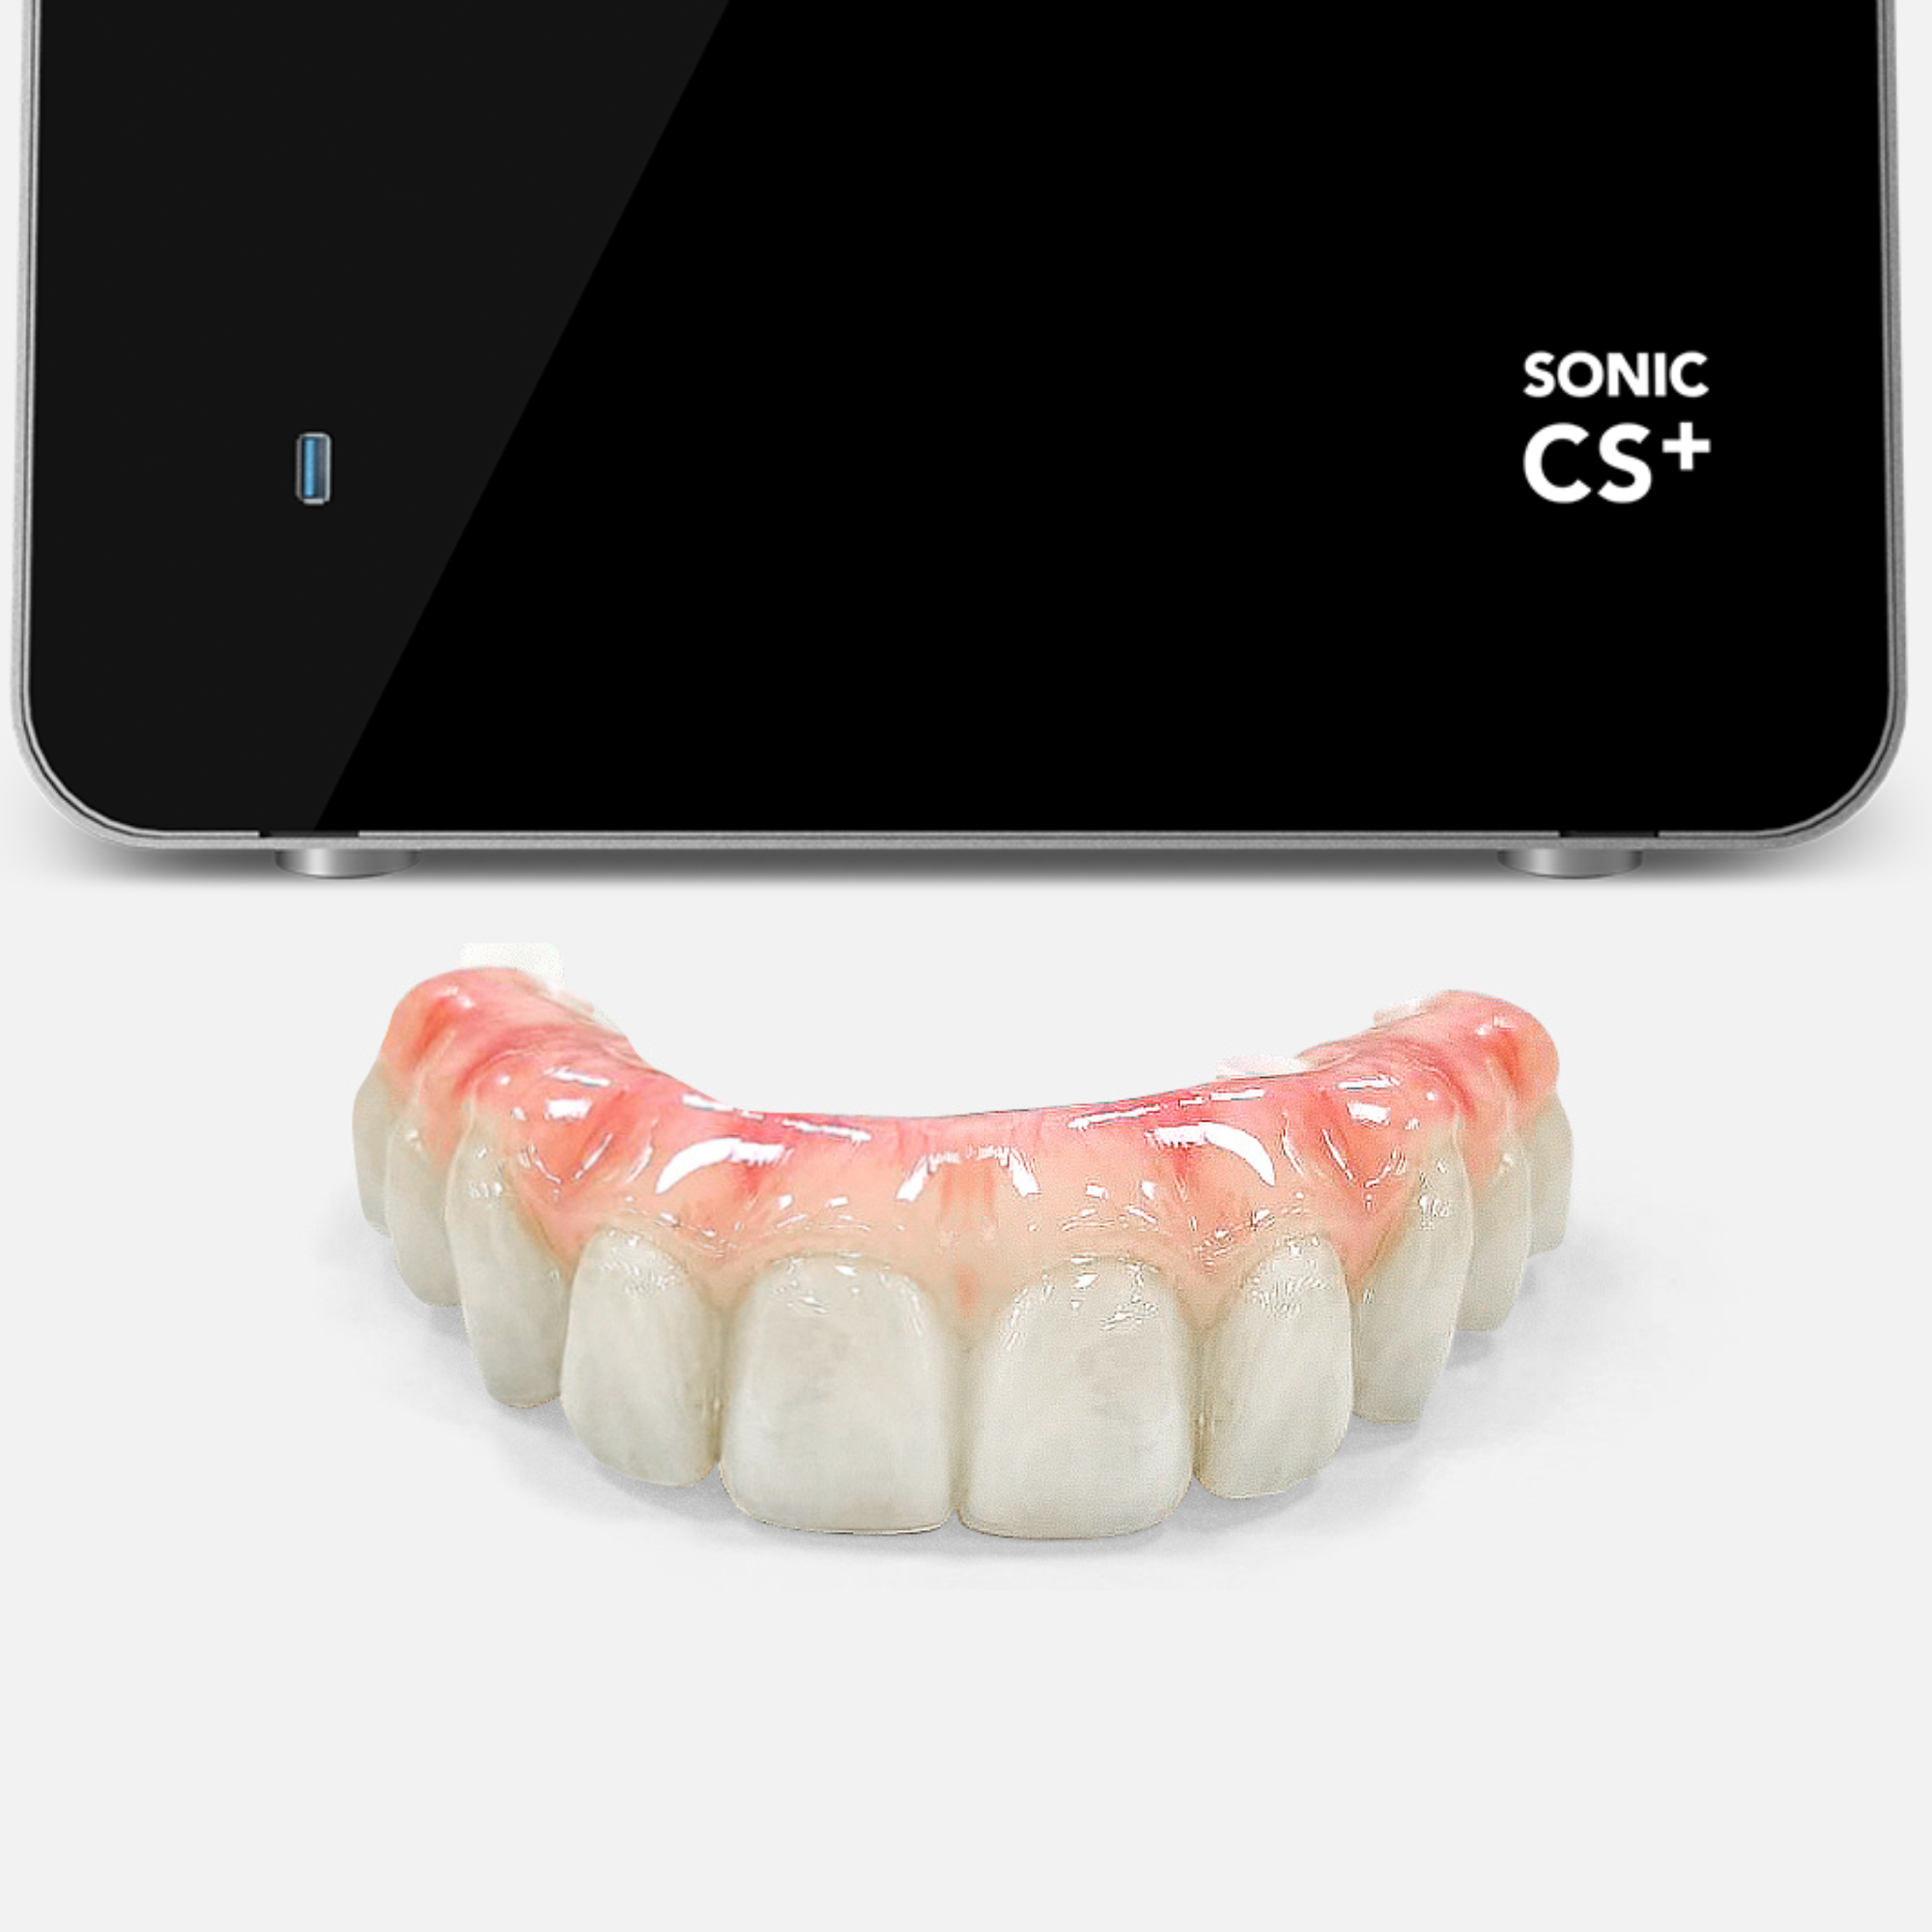
In this guide, we’ll walk you through the entire process of 3D printing All-on-X provisional restorations using a specialized chairside resin printer such as the Phrozen Sonic CS+. From scanning to staining, we’ll share practical tips for a smooth experience and success at each step.
3D Print Provisional Restorations for All-on-X: A Step-by-Step Guide
When it comes to full-arch implant cases, time and precision matter. Traditional methods of creating provisional restorations can take days, but with digital workflows and 3D printing, dental professionals can now deliver same-day provisionals without compromising on fit, esthetics, or durability.
In this guide, we’ll walk you through the entire process of 3D printing All-on-X provisional restorations using a specialized chairside resin printer such as the Phrozen Sonic CS+. From scanning to staining, we’ll share practical tips for a smooth experience and success at each step.
Table of Content
1. Pre Printing
2. Scan
3. Design
4. Slicing
5. Printing
6. Post-Processing
7. Finishing
Step 1. Pre-Printing Preparation
Heat and Mix the Resin
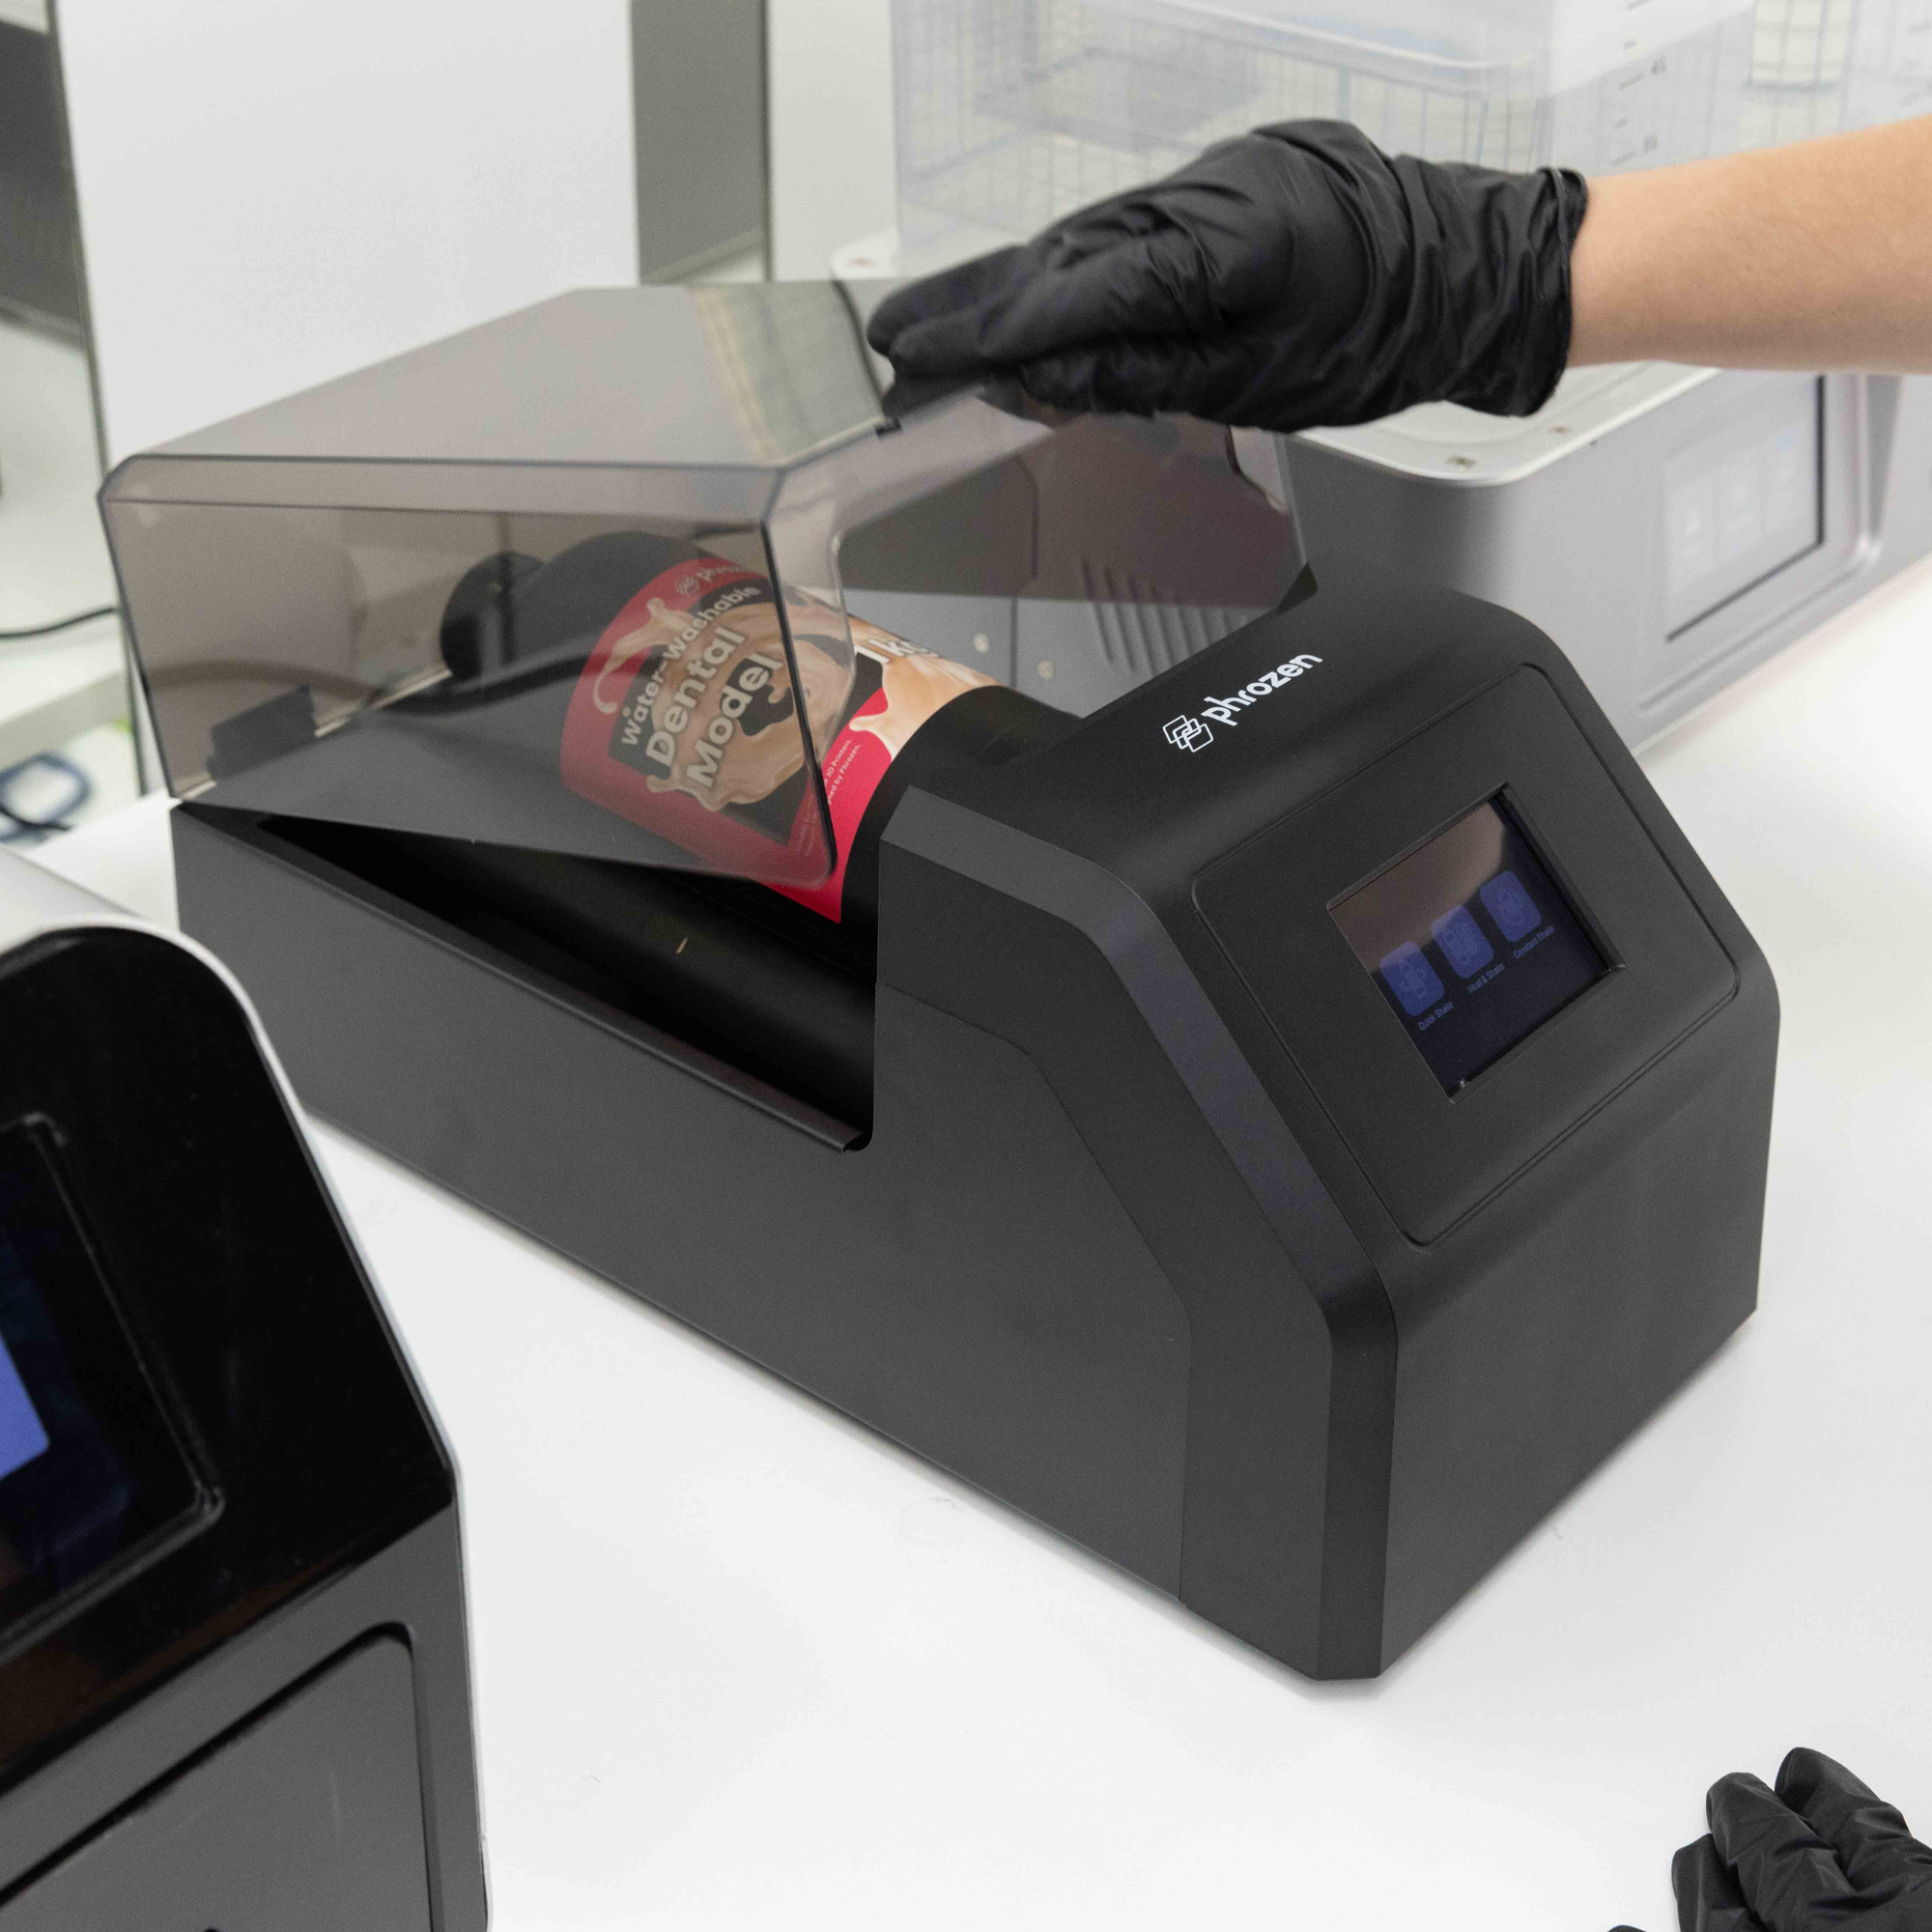
Proper resin condition is crucial, especially when working with ceramic-filled all-on-x resins, as the filler particles can settle over time, leading to failures and inaccuracies in your prints. To prevent this, use Phrozen Heat & Mix to heat and shake the resin for 30-45 minutes.
This process ensures a uniform mixture and even particle distribution, ultimately improving print success rate by maintaining optimal resin conditions before each print job.
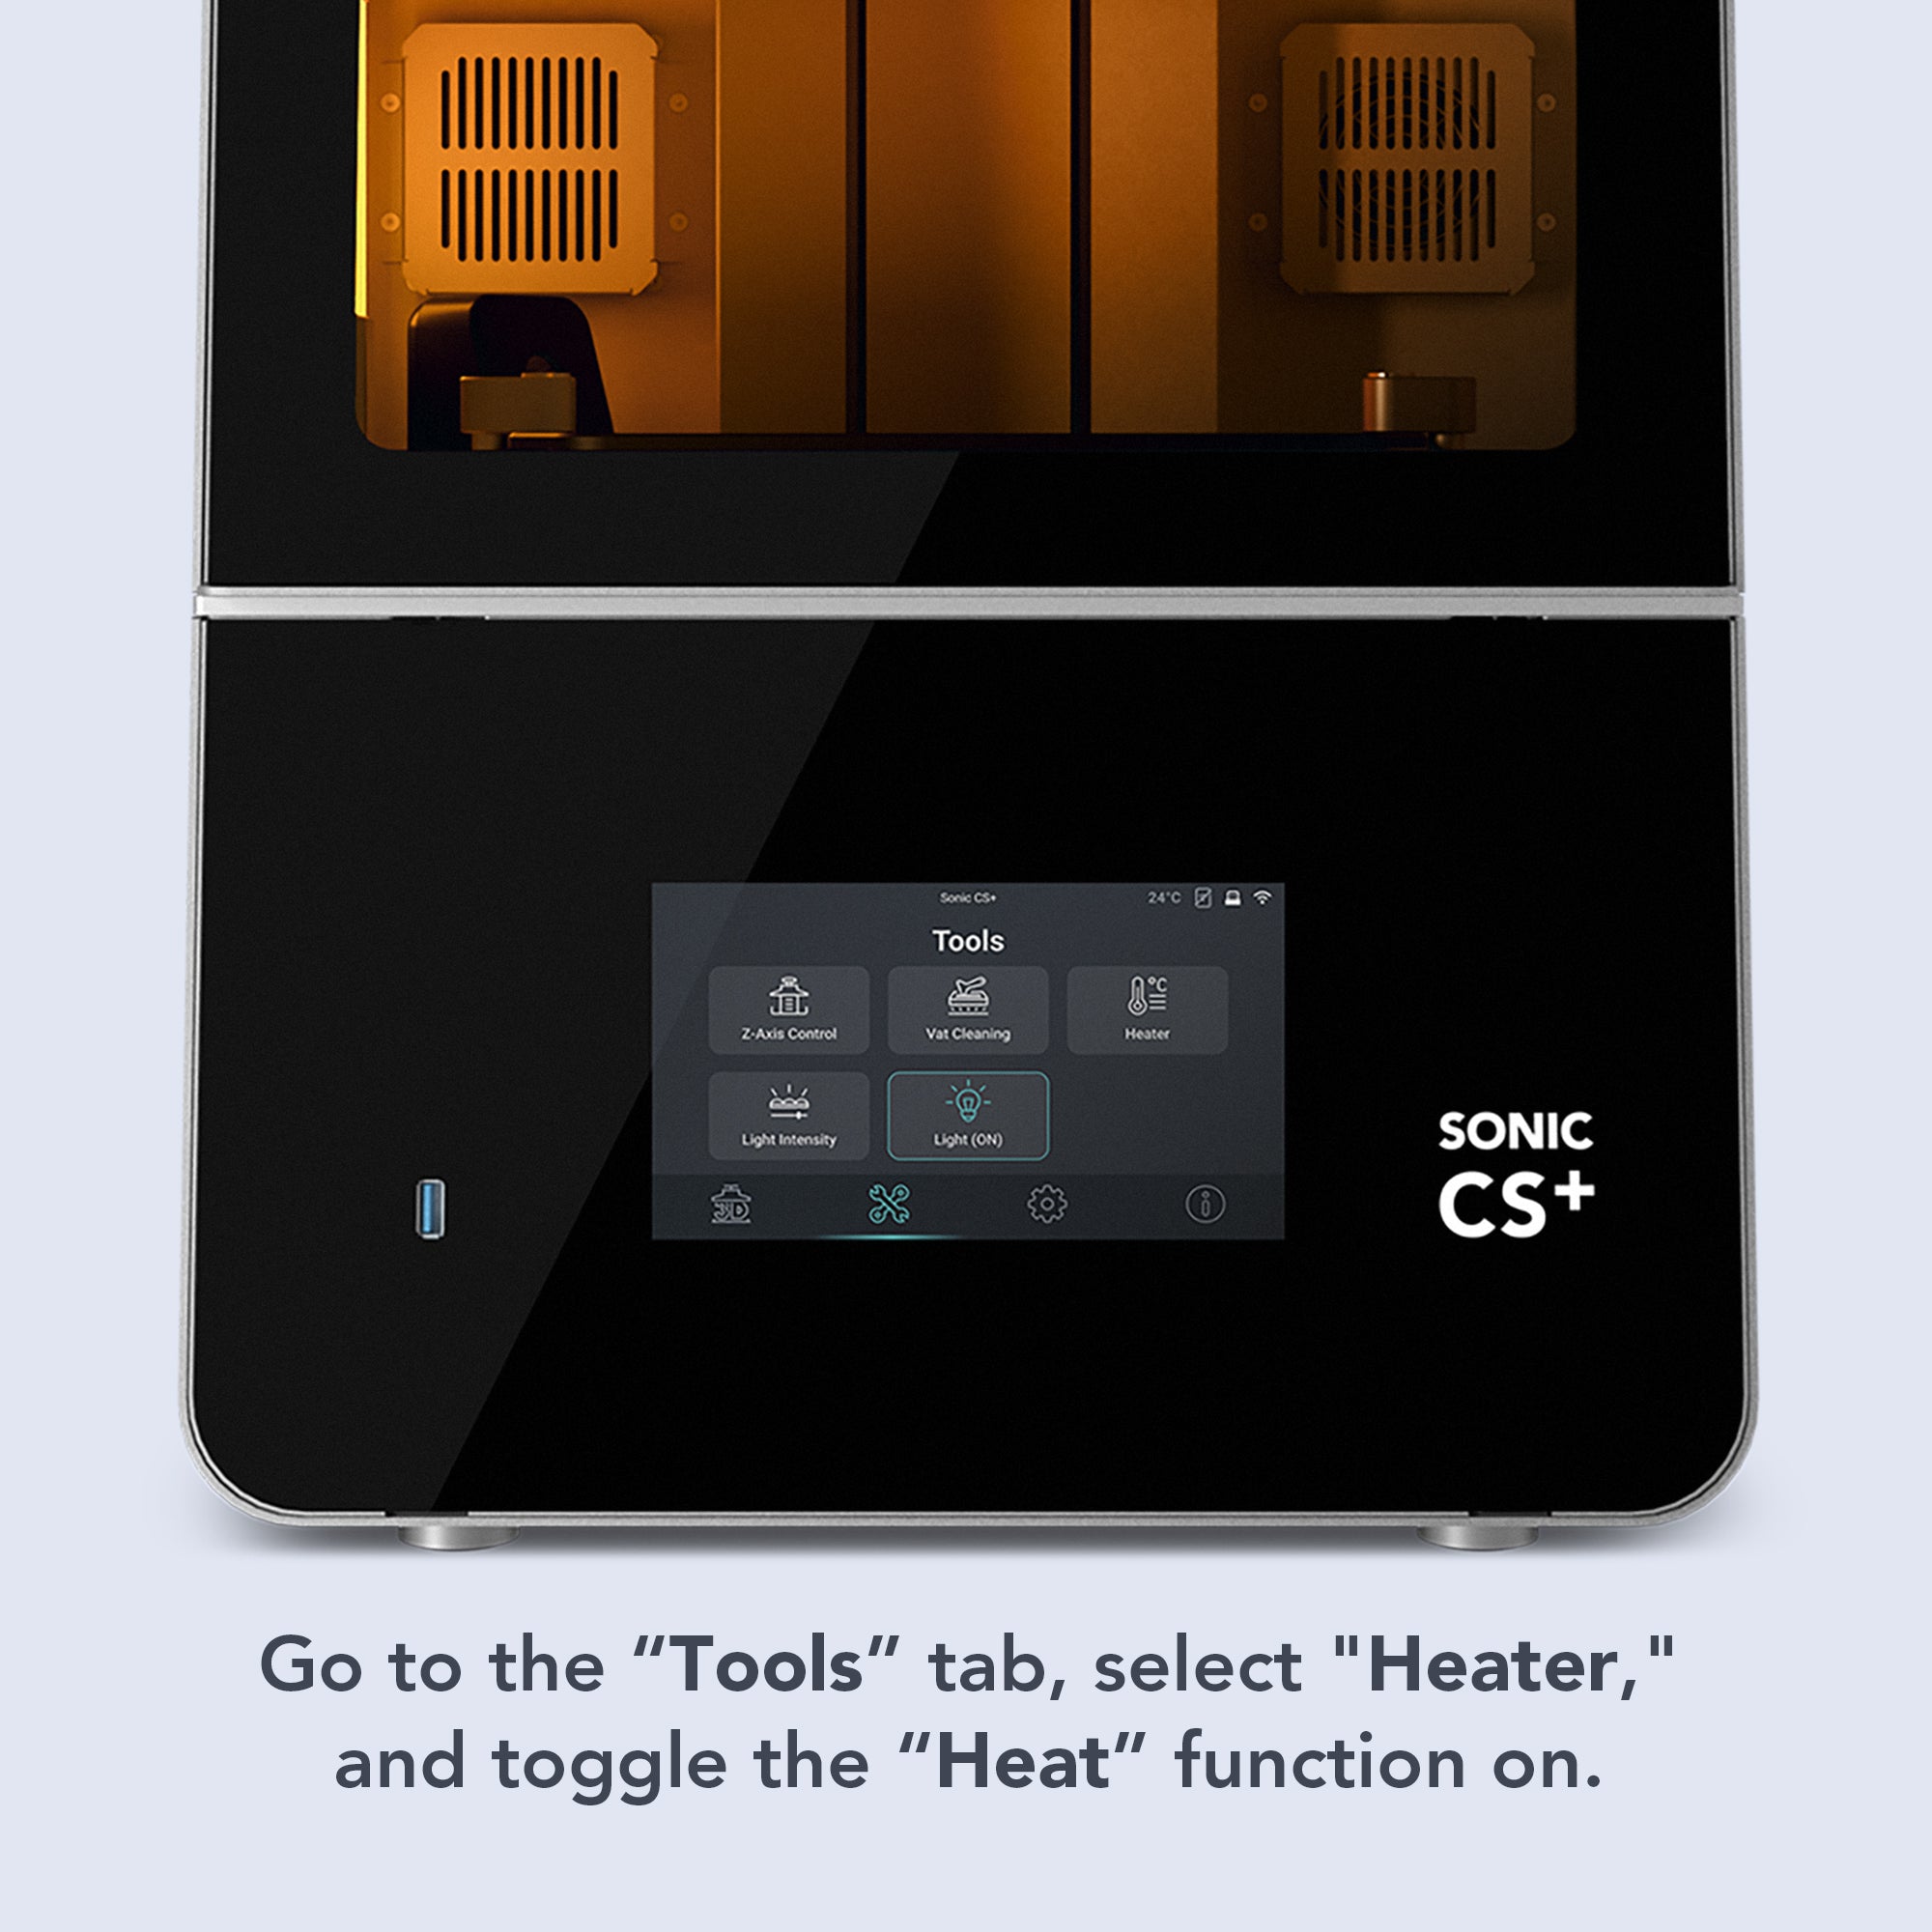
Preheat the Printer
Just like resin, printers work best at stable temperatures. If the printer has been idle for a while or it’s a chilly winter, we recommend turning on the Sonic CS+ heater for about 30 minutes before printing.
You can do this simultaneously with the resin preheating process or while handling other tasks like scanning or designing.
Heat and Mix the Resin
Proper resin condition is crucial, especially when working with ceramic-filled all-on-x resins, as the filler particles can settle over time, leading to failures and inaccuracies in your prints. To prevent this, use Phrozen Heat & Mix to heat and shake the resin for 30-45 minutes.
This process ensures a uniform mixture and even particle distribution, ultimately improving print success rate by maintaining optimal resin conditions before each print job.
Preheat the Printer
Just like resin, printers work best at stable temperatures. If the printer has been idle for a while or it’s a chilly winter, we recommend turning on the Sonic CS+ heater for about 30 minutes before printing.
You can do this simultaneously with the resin preheating process or while handling other tasks like scanning or designing.
Step 2. Capture the Patient’s Intraoral Condition
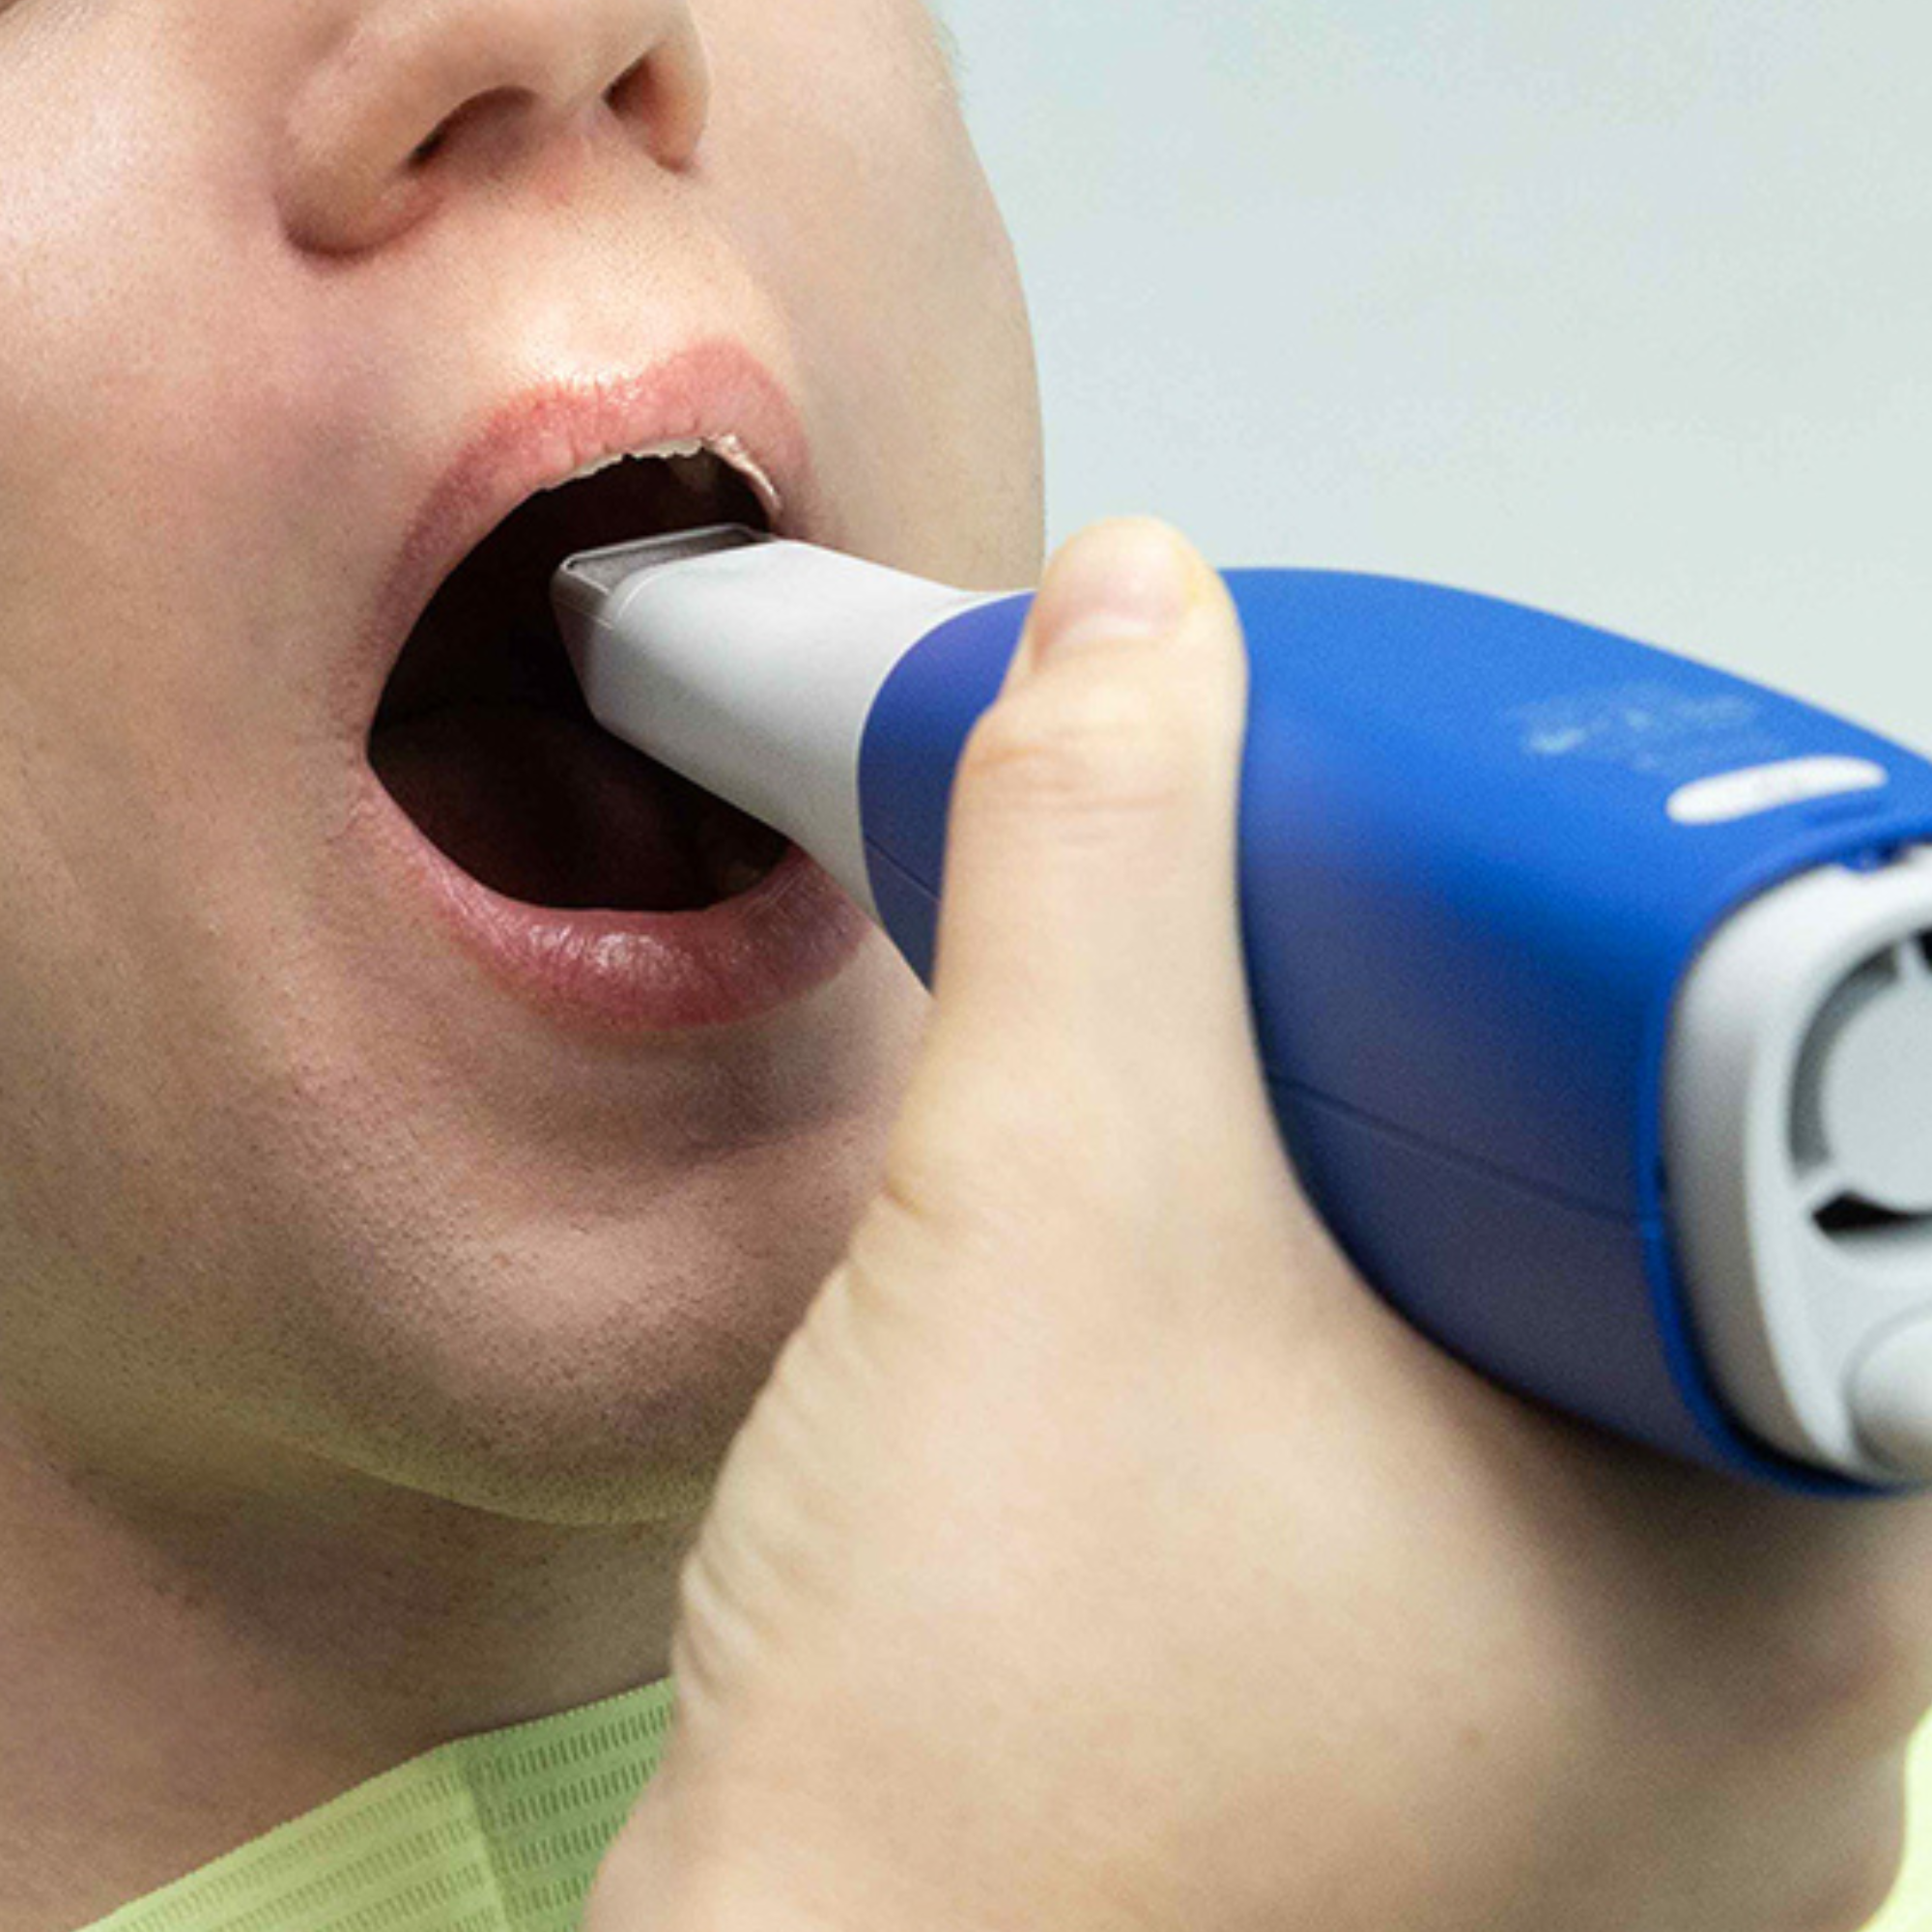
Direct Scanning with Intraoral Scanner
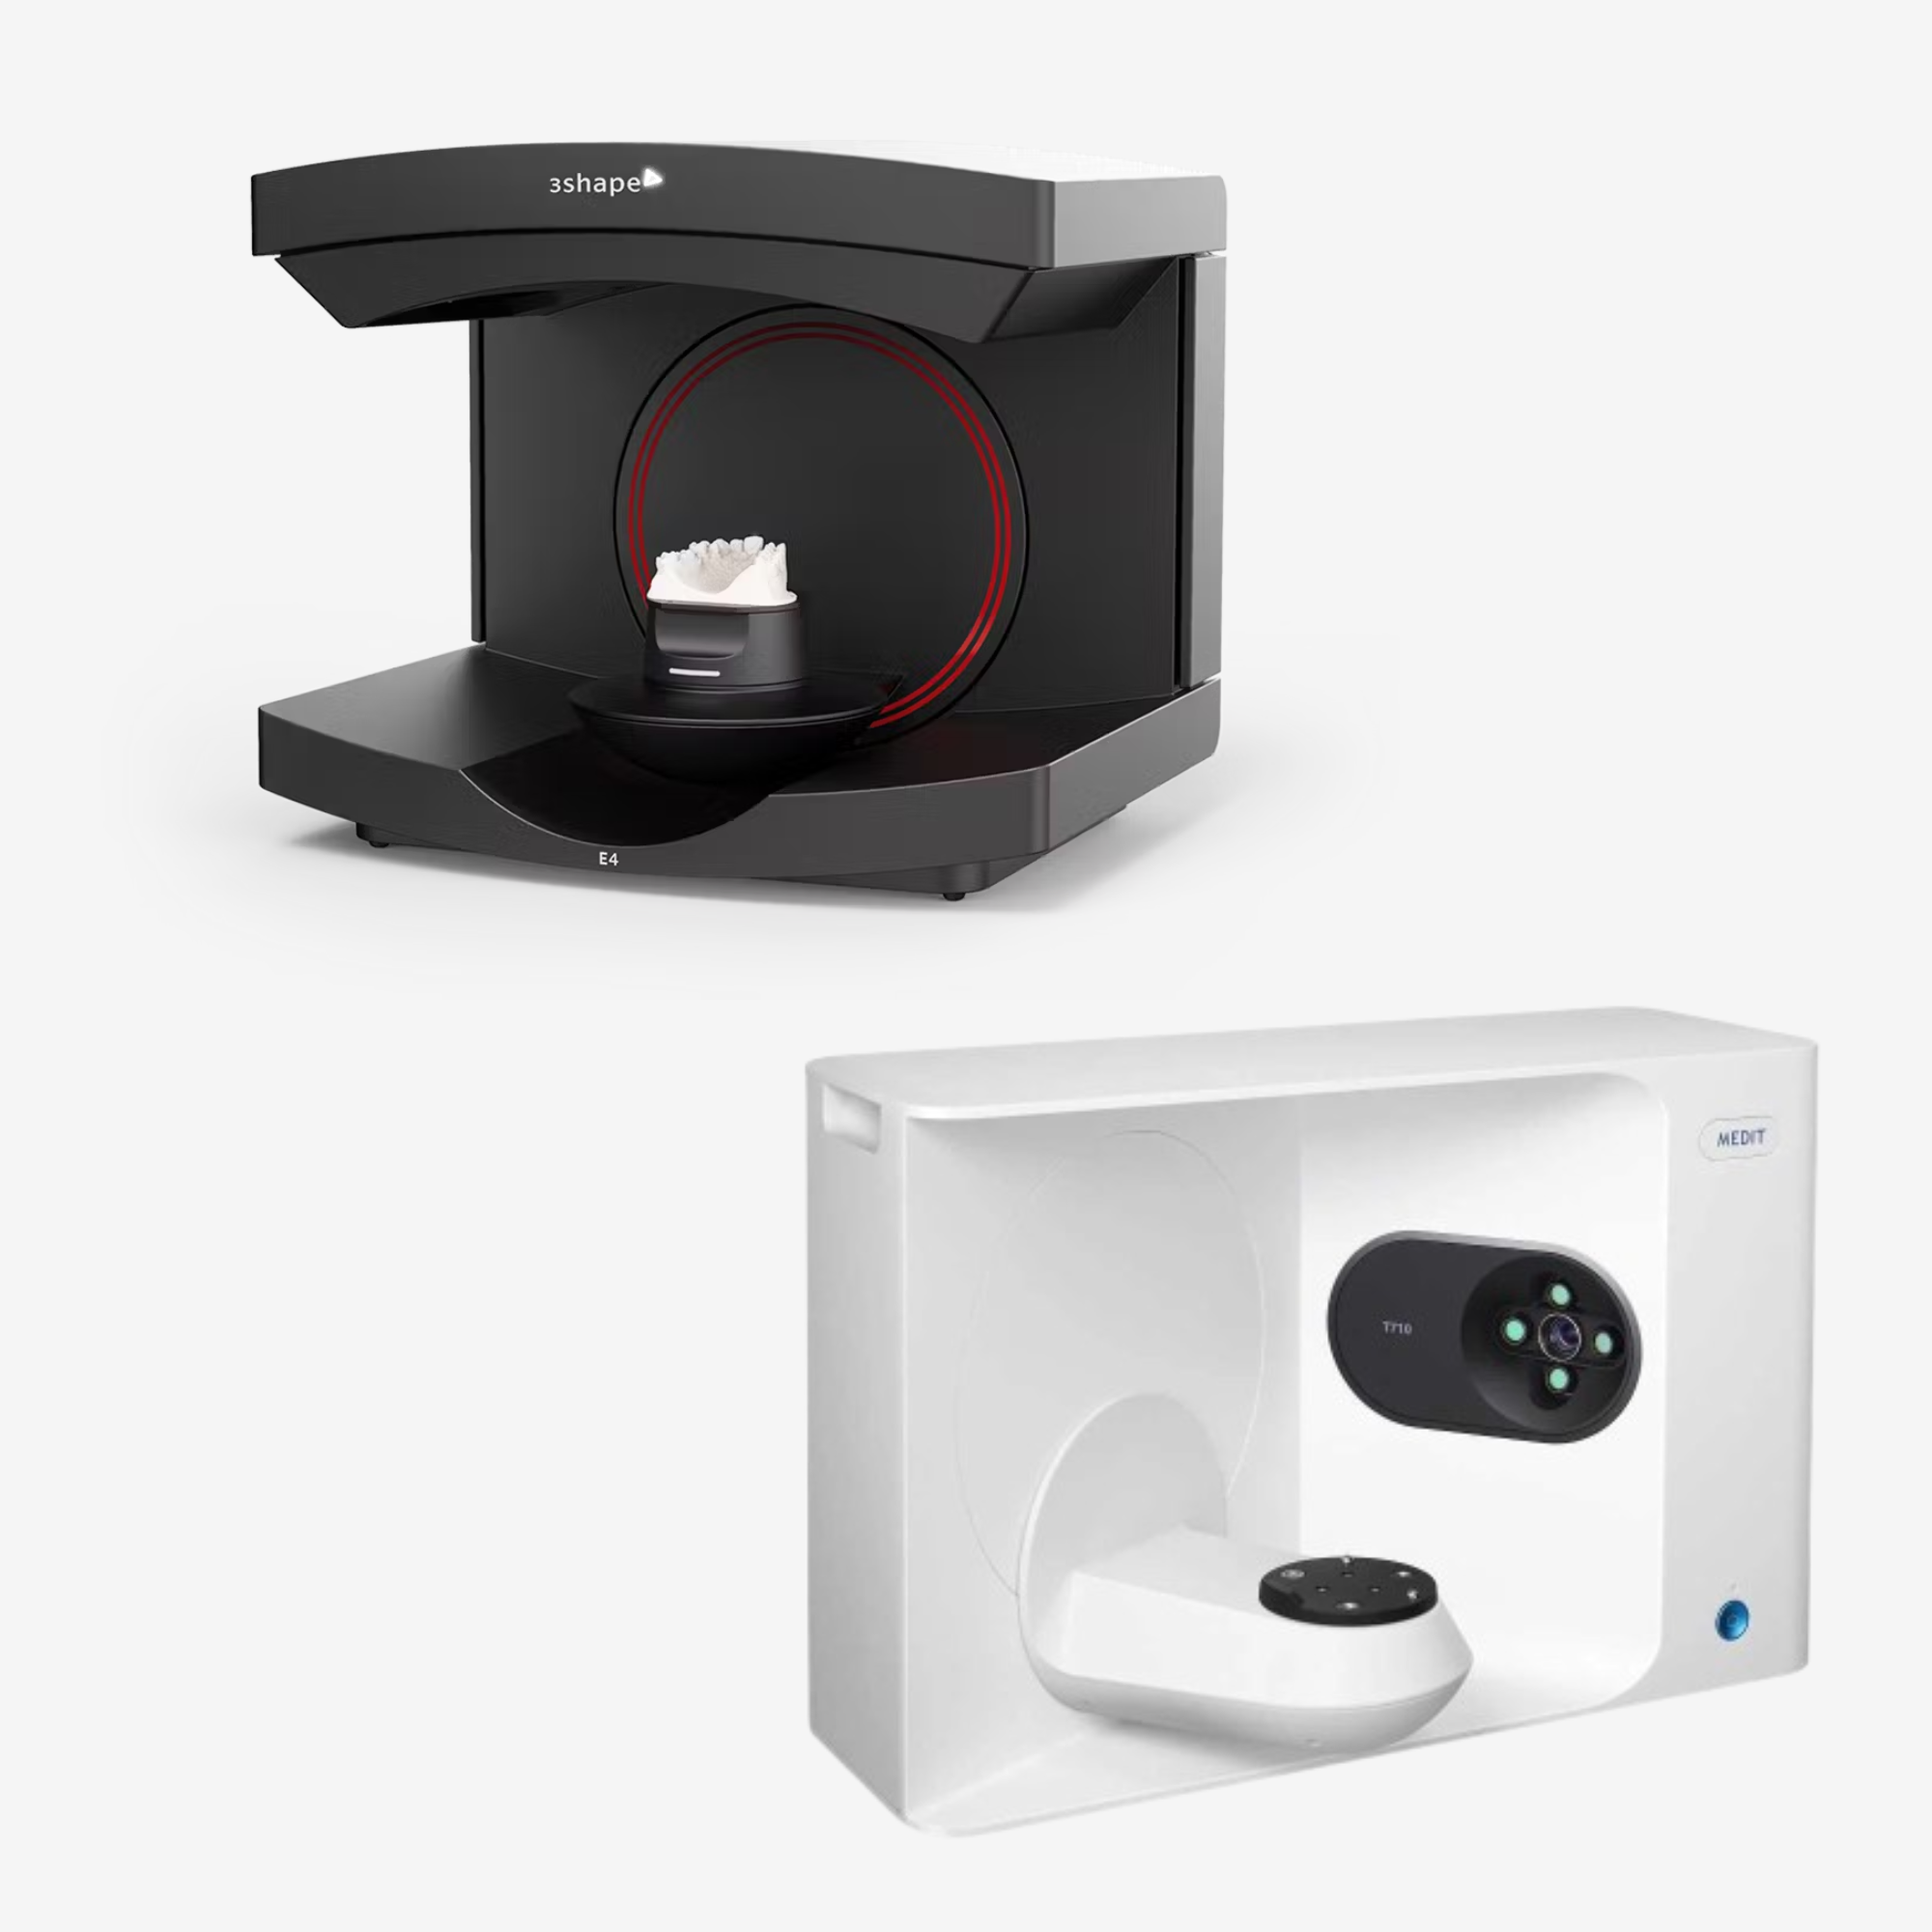
Use an intraoral scanner to capture the entire arch. We recommend leading scanner providers such as Medit and 3Shape, as both Medit Link and 3Shape Unite integrate seamlessly with Phrozen DS Slicer.
However, any scanner capable of exporting in .STL format is perfectly acceptable, leaving you with no restrictions on your choice.
Indirect Digital Impressions
If you prefer using traditional impressions, you can scan plaster models made from alginate or PVS impressions using a desktop 3D scanner. Both approaches work, as long as the scan data output is clean and accurate.
Direct Scanning with Intraoral Scanner
Use an intraoral scanner to capture the entire arch. We recommend leading scanner providers such as Medit and 3Shape, as both Medit Link and 3Shape Unite integrate seamlessly with Phrozen DS Slicer.
However, any scanner capable of exporting in .STL format is perfectly acceptable, leaving you with no restrictions on your choice.
Indirect Digital Impressions
If you prefer using traditional impressions, you can scan plaster models made from alginate or PVS impressions using a desktop 3D scanner. Both approaches work, as long as the scan data output is clean and accurate.
Step 3. Designing the Provisional
Using Pre-Op Data for Planning
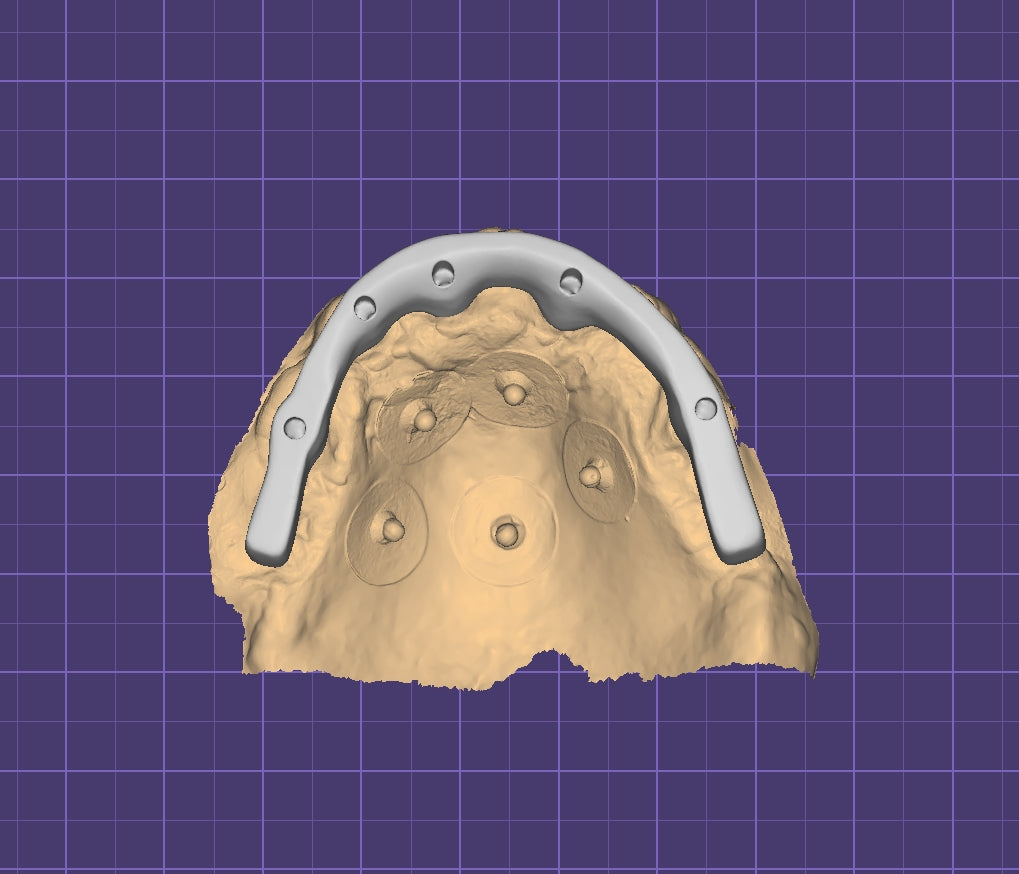
The process begins with gathering pre-op data, including CBCT scans, intraoral scans, existing dentures, and bite records. These references facilitate implant planning and the creation of surgical guides, ensuring optimal placement and angulation of the implants.
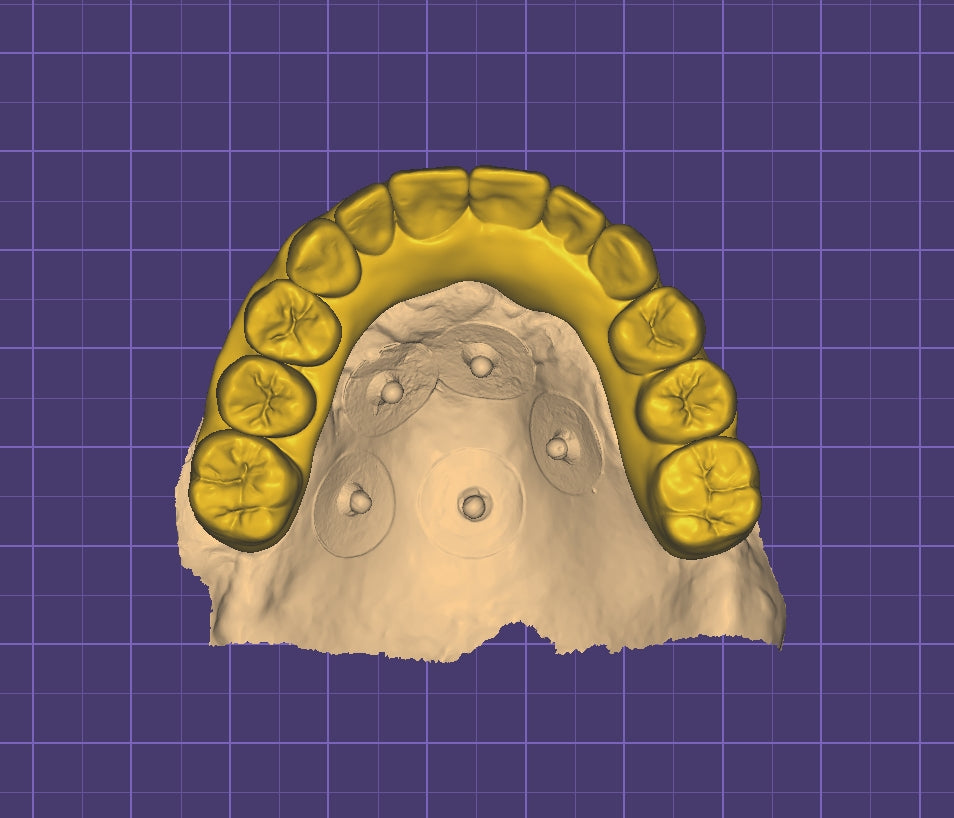
Prosthesis Design
After the surgery, rescan the arch and use dental CAD software, such as exocad or 3Shape, to digitally design the provisional prosthesis. You can control tooth arrangement, occlusal height, and screw channel positioning to create a perfect-fit provisional tailored to your patient.
Step 4. Preparing the File for Printing
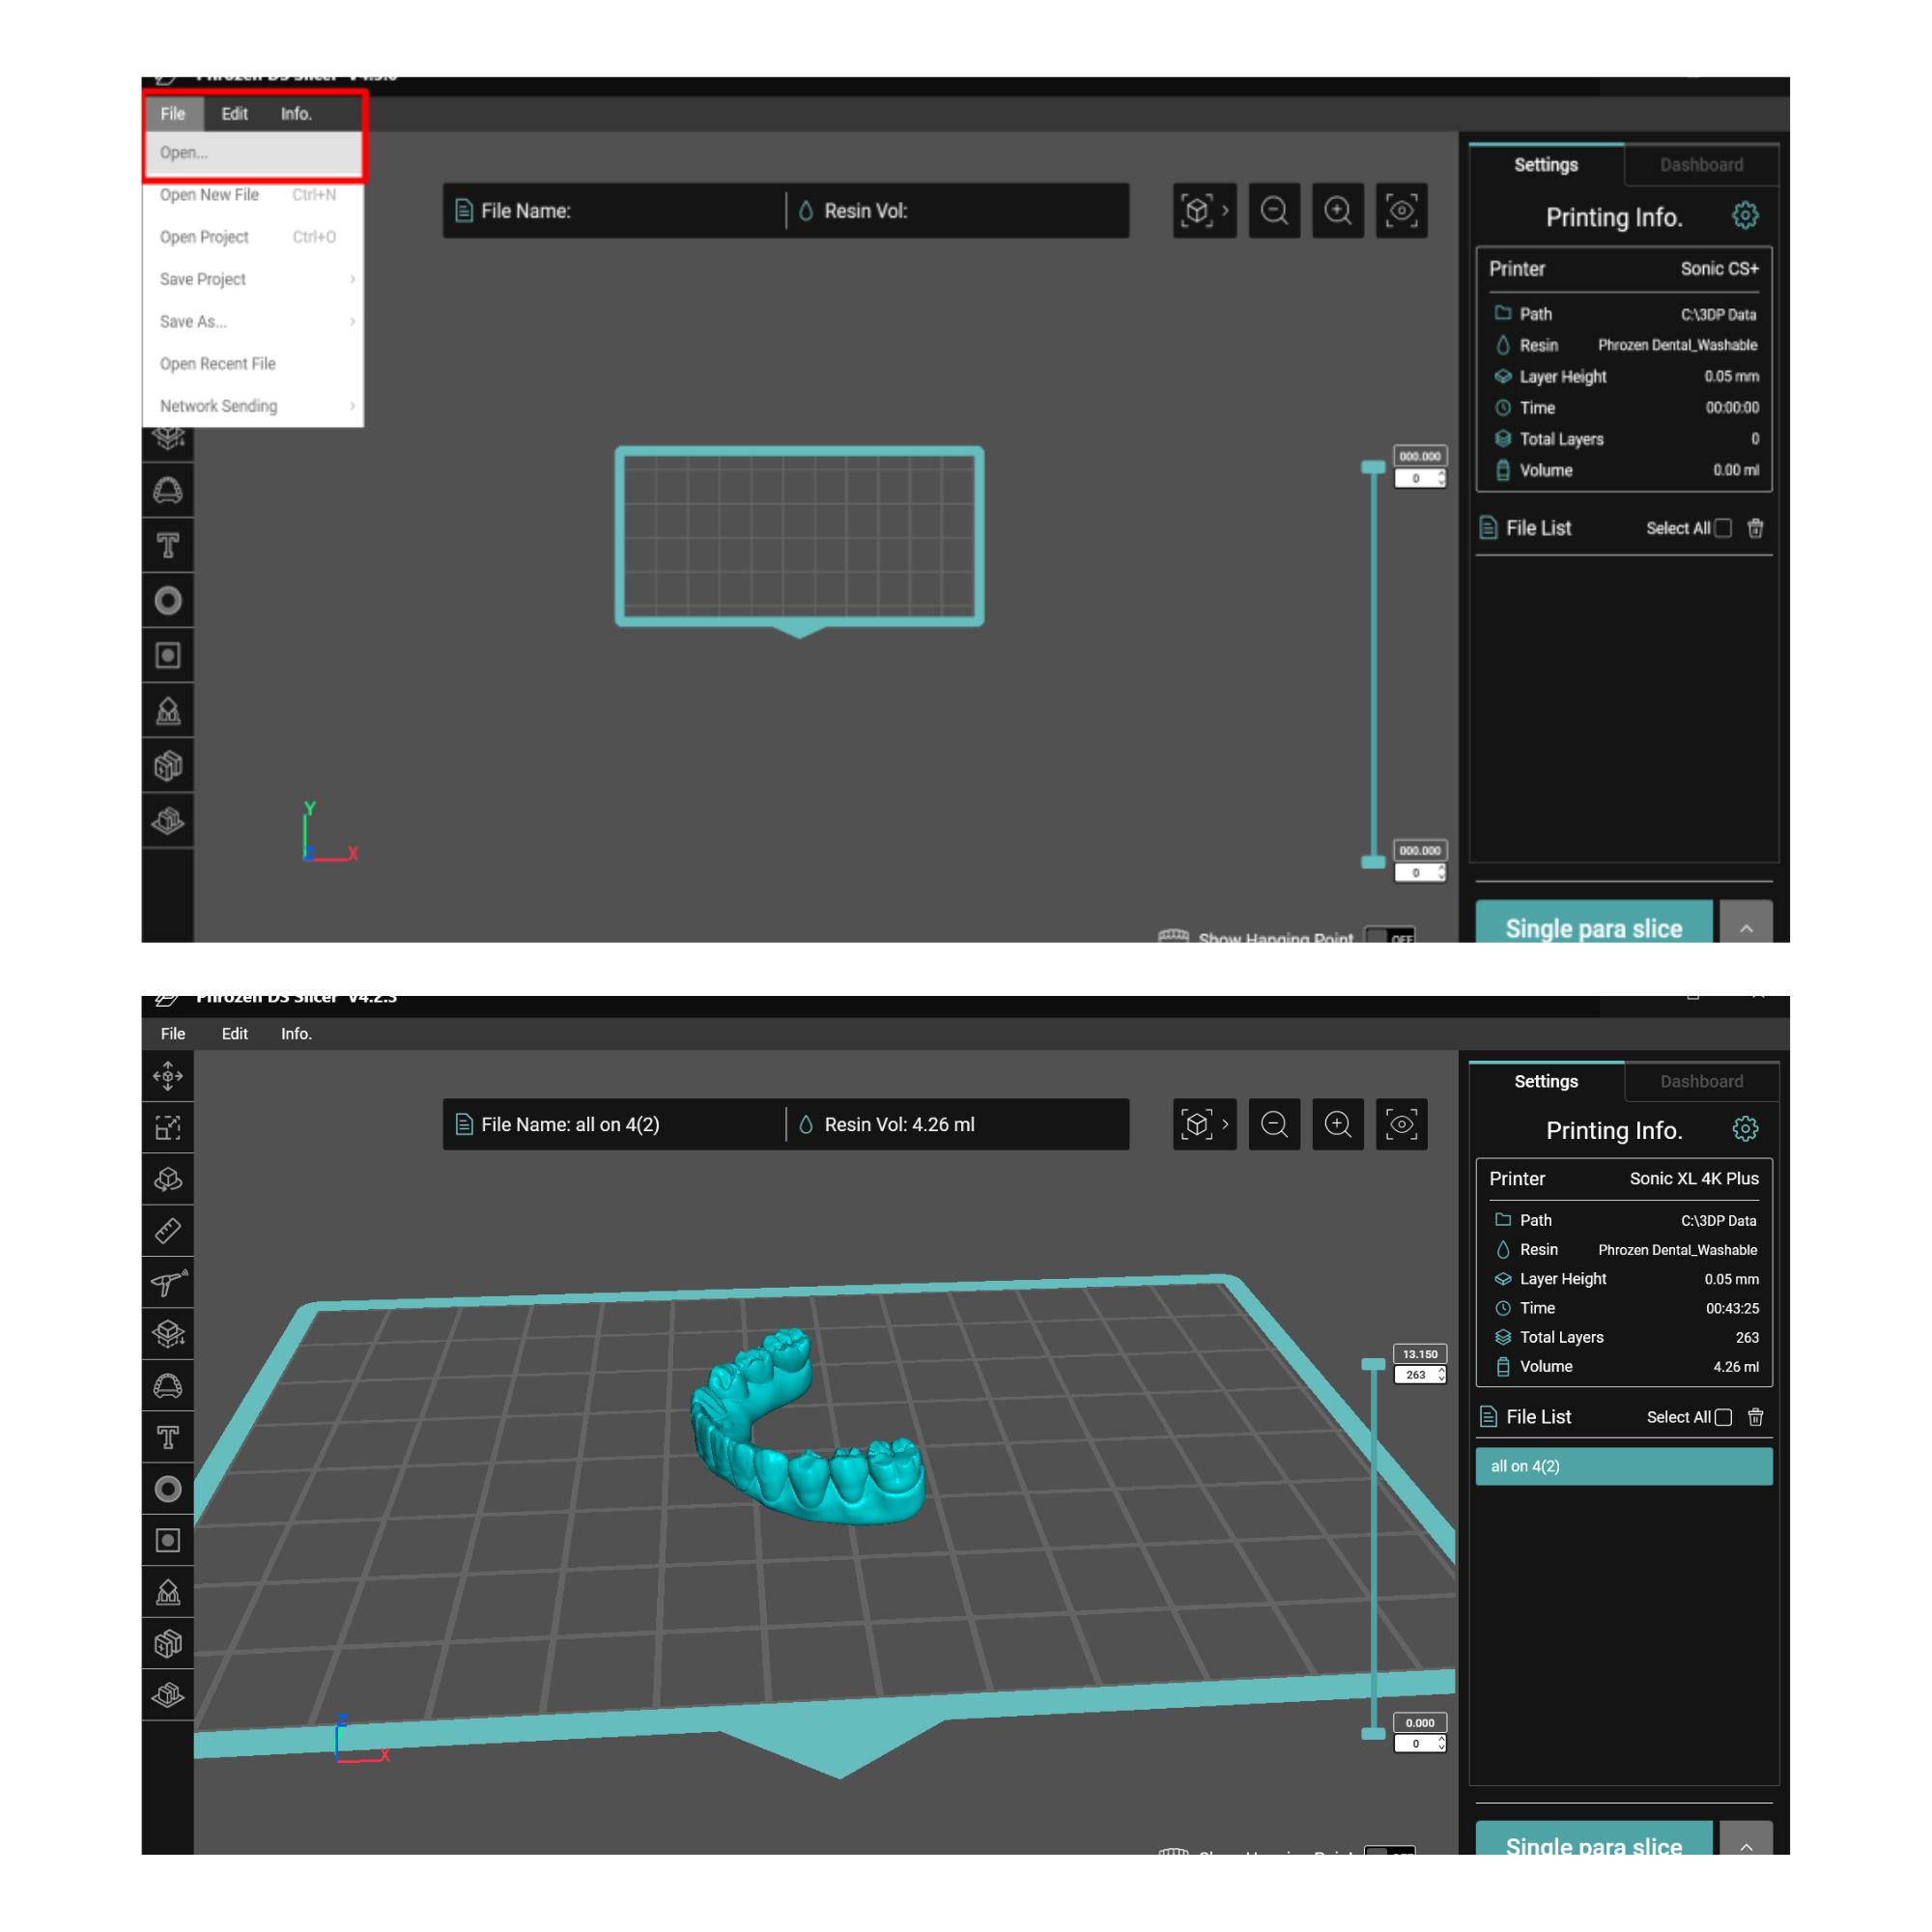
4.1 Import the .STL File into Phrozen DS Slicer
Connect the DS Slicer dongle that came with your printer and open the DS Slicer software. This platform serves as your workspace for preparing files and adjusting resin parameters prior to slicing.
For importing the .STL file: Click File → Open → Select your All-on-X files.
Note: Always use the latest version of Phrozen DS Slicer to achieve consistent results.
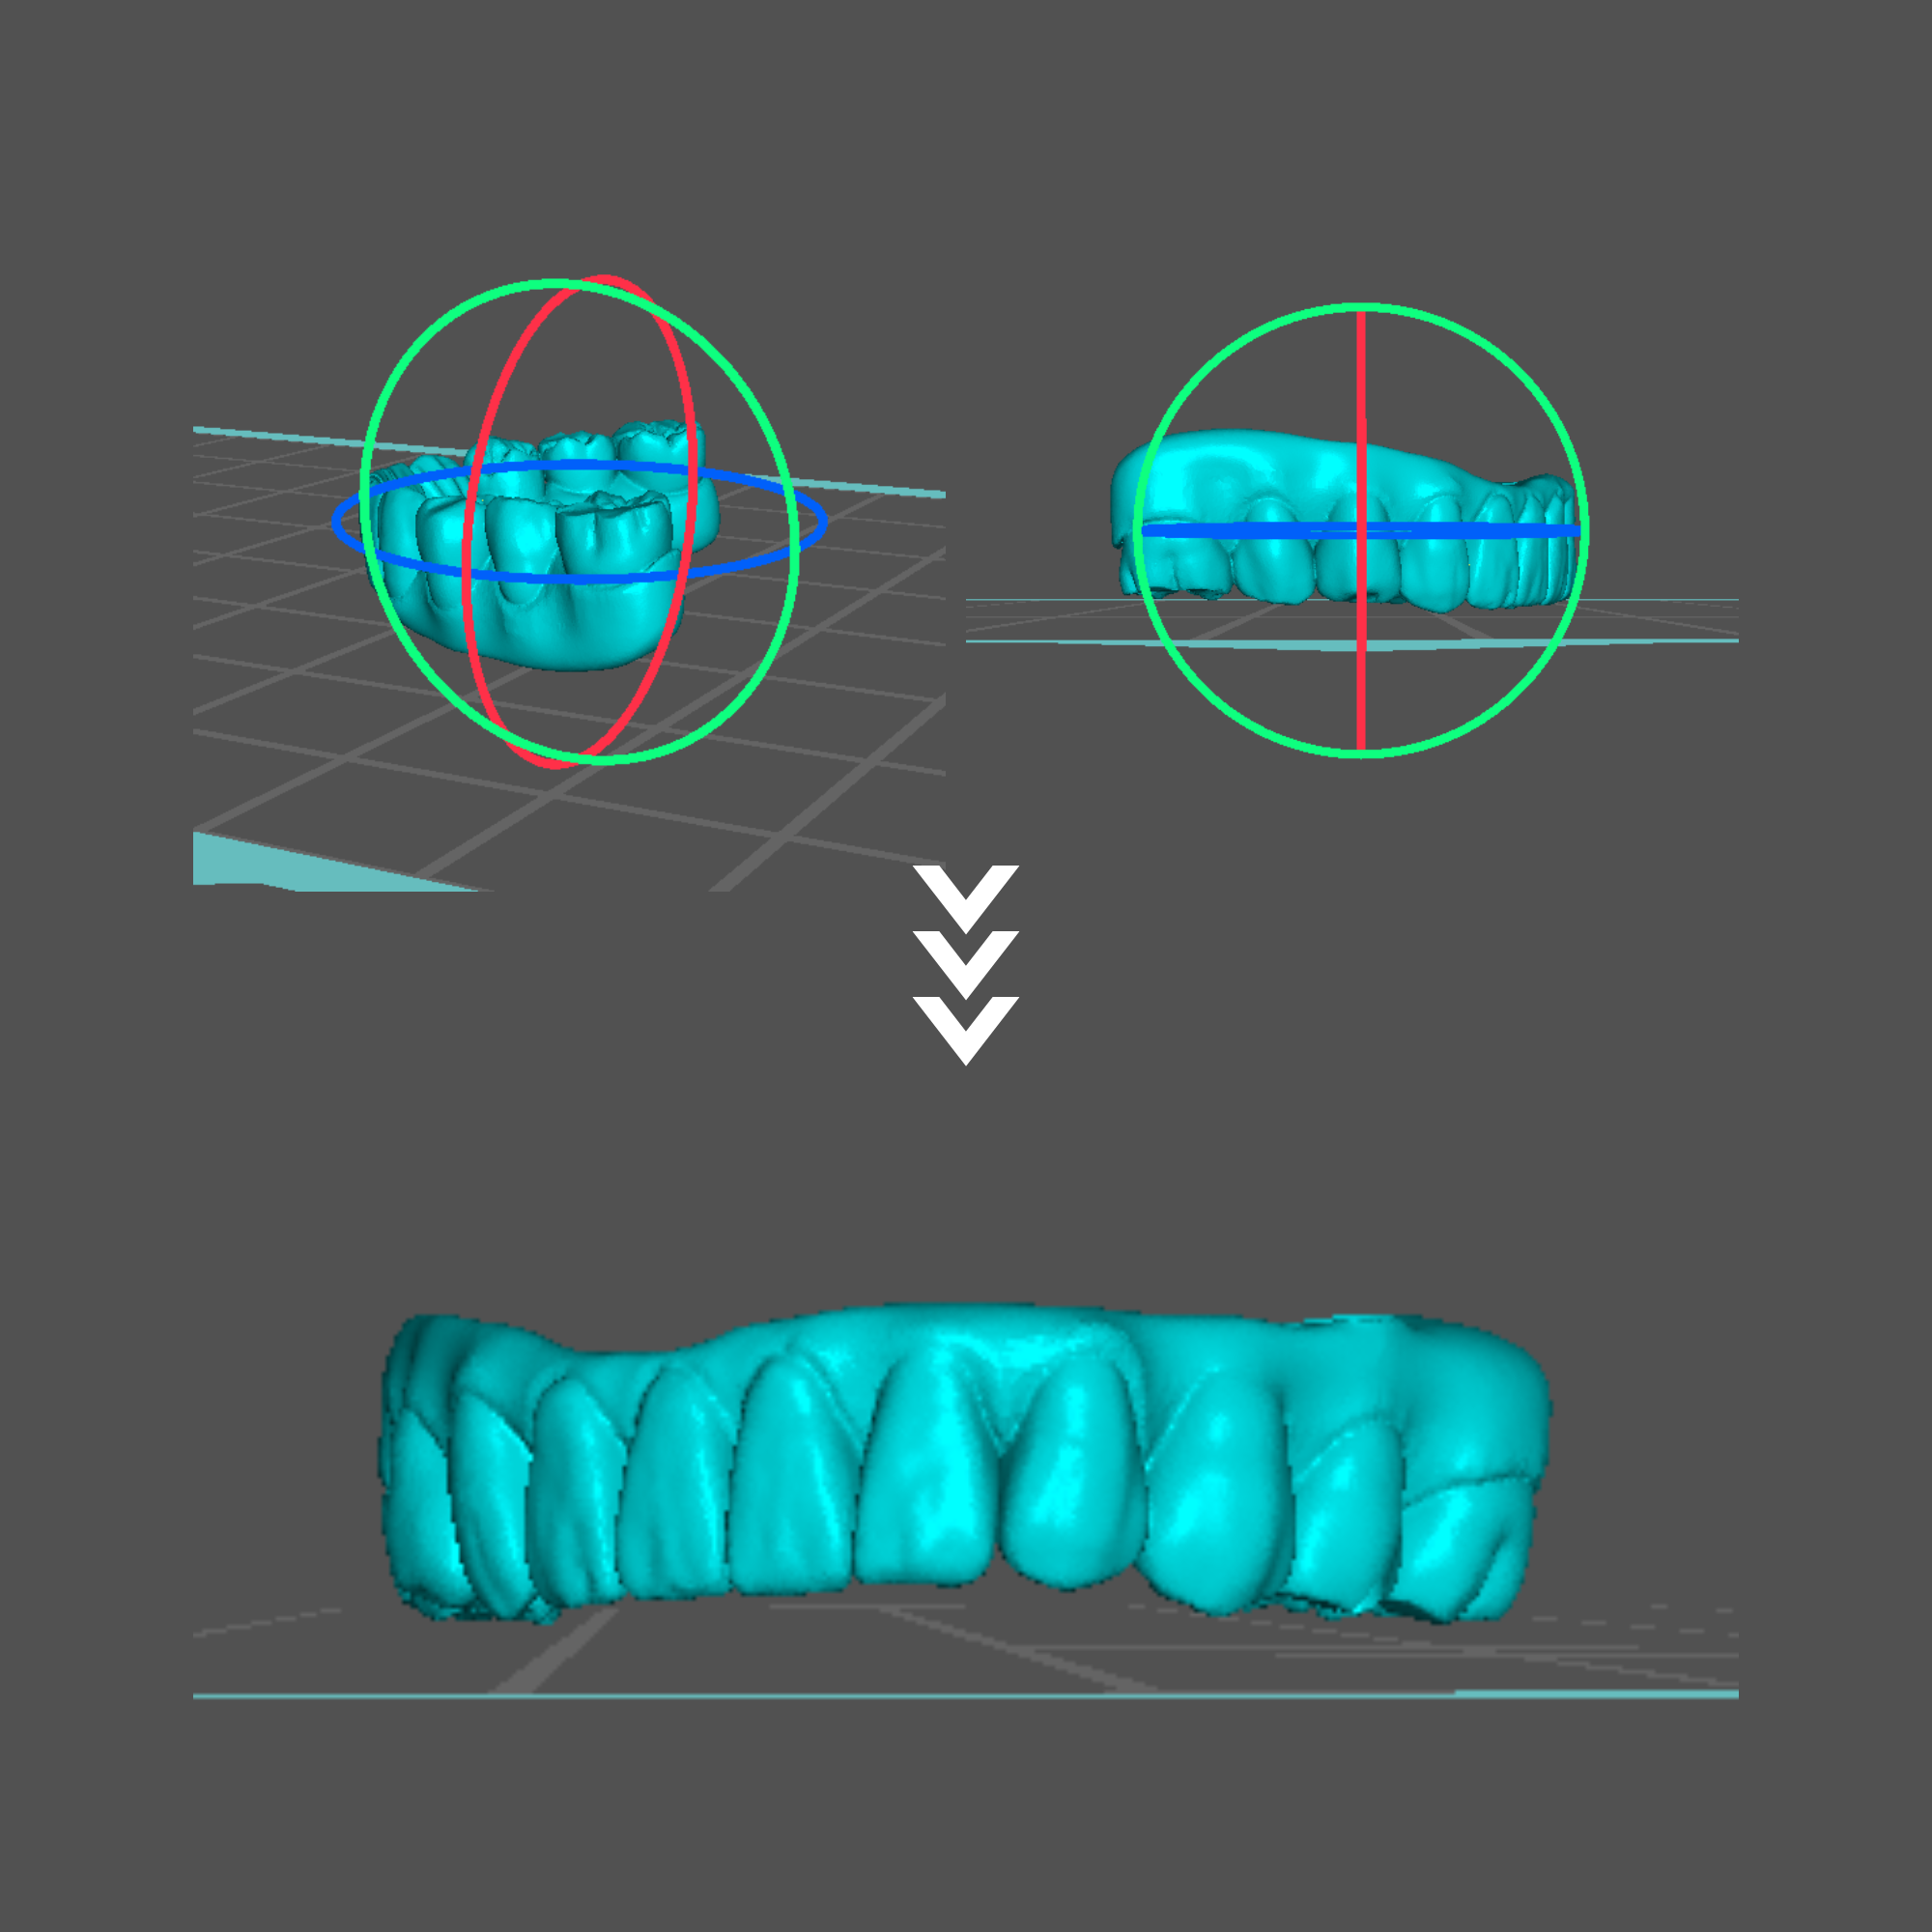
4.2 Choosing the Right Print Orientation
Proper orientation has a direct impact on strength, accuracy, and ease of finishing.
For All-on-X cases, orient the occlusal surface flat against the build plate. This orientation helps prevent extreme print angles that often lead to misprints or fitting issues around cylindrical holes.
In some cases, a few screw channels may still end up at extreme straight angles even after alignment. In those cases, try to align all the cylinder holes as evenly as possible and avoid one hole from tilting too far in one direction.
4.1 Import the .STL File into Phrozen DS Slicer
Connect the DS Slicer dongle that came with your printer and open the DS Slicer software. This platform serves as your workspace for preparing files and adjusting resin parameters prior to slicing.
For importing the .STL file: Click File → Open → Select your All-on-X files.
Note: Always use the latest version of Phrozen DS Slicer to achieve consistent results.
4.2 Choosing the Right Print Orientation
Proper orientation has a direct impact on strength, accuracy, and ease of finishing.
For All-on-X cases, orient the occlusal surface flat against the build plate. This orientation helps prevent extreme print angles that often lead to misprints or fitting issues around cylindrical holes.
In some cases, a few screw channels may still end up at extreme straight angles even after alignment. In those cases, try to align all the cylinder holes as evenly as possible and avoid one hole from tilting too far in one direction.
4.3 Adding Print Support
The screw channels on All-on-X prostheses can vary with each case, making it hard to rely solely on the auto-support function. However, once you grasp the basic concepts, adding custom support to any of your All-on-X cases becomes quite simple. Below is a step-by-step walkthrough on how we usually addsupport for our All-on-X model.
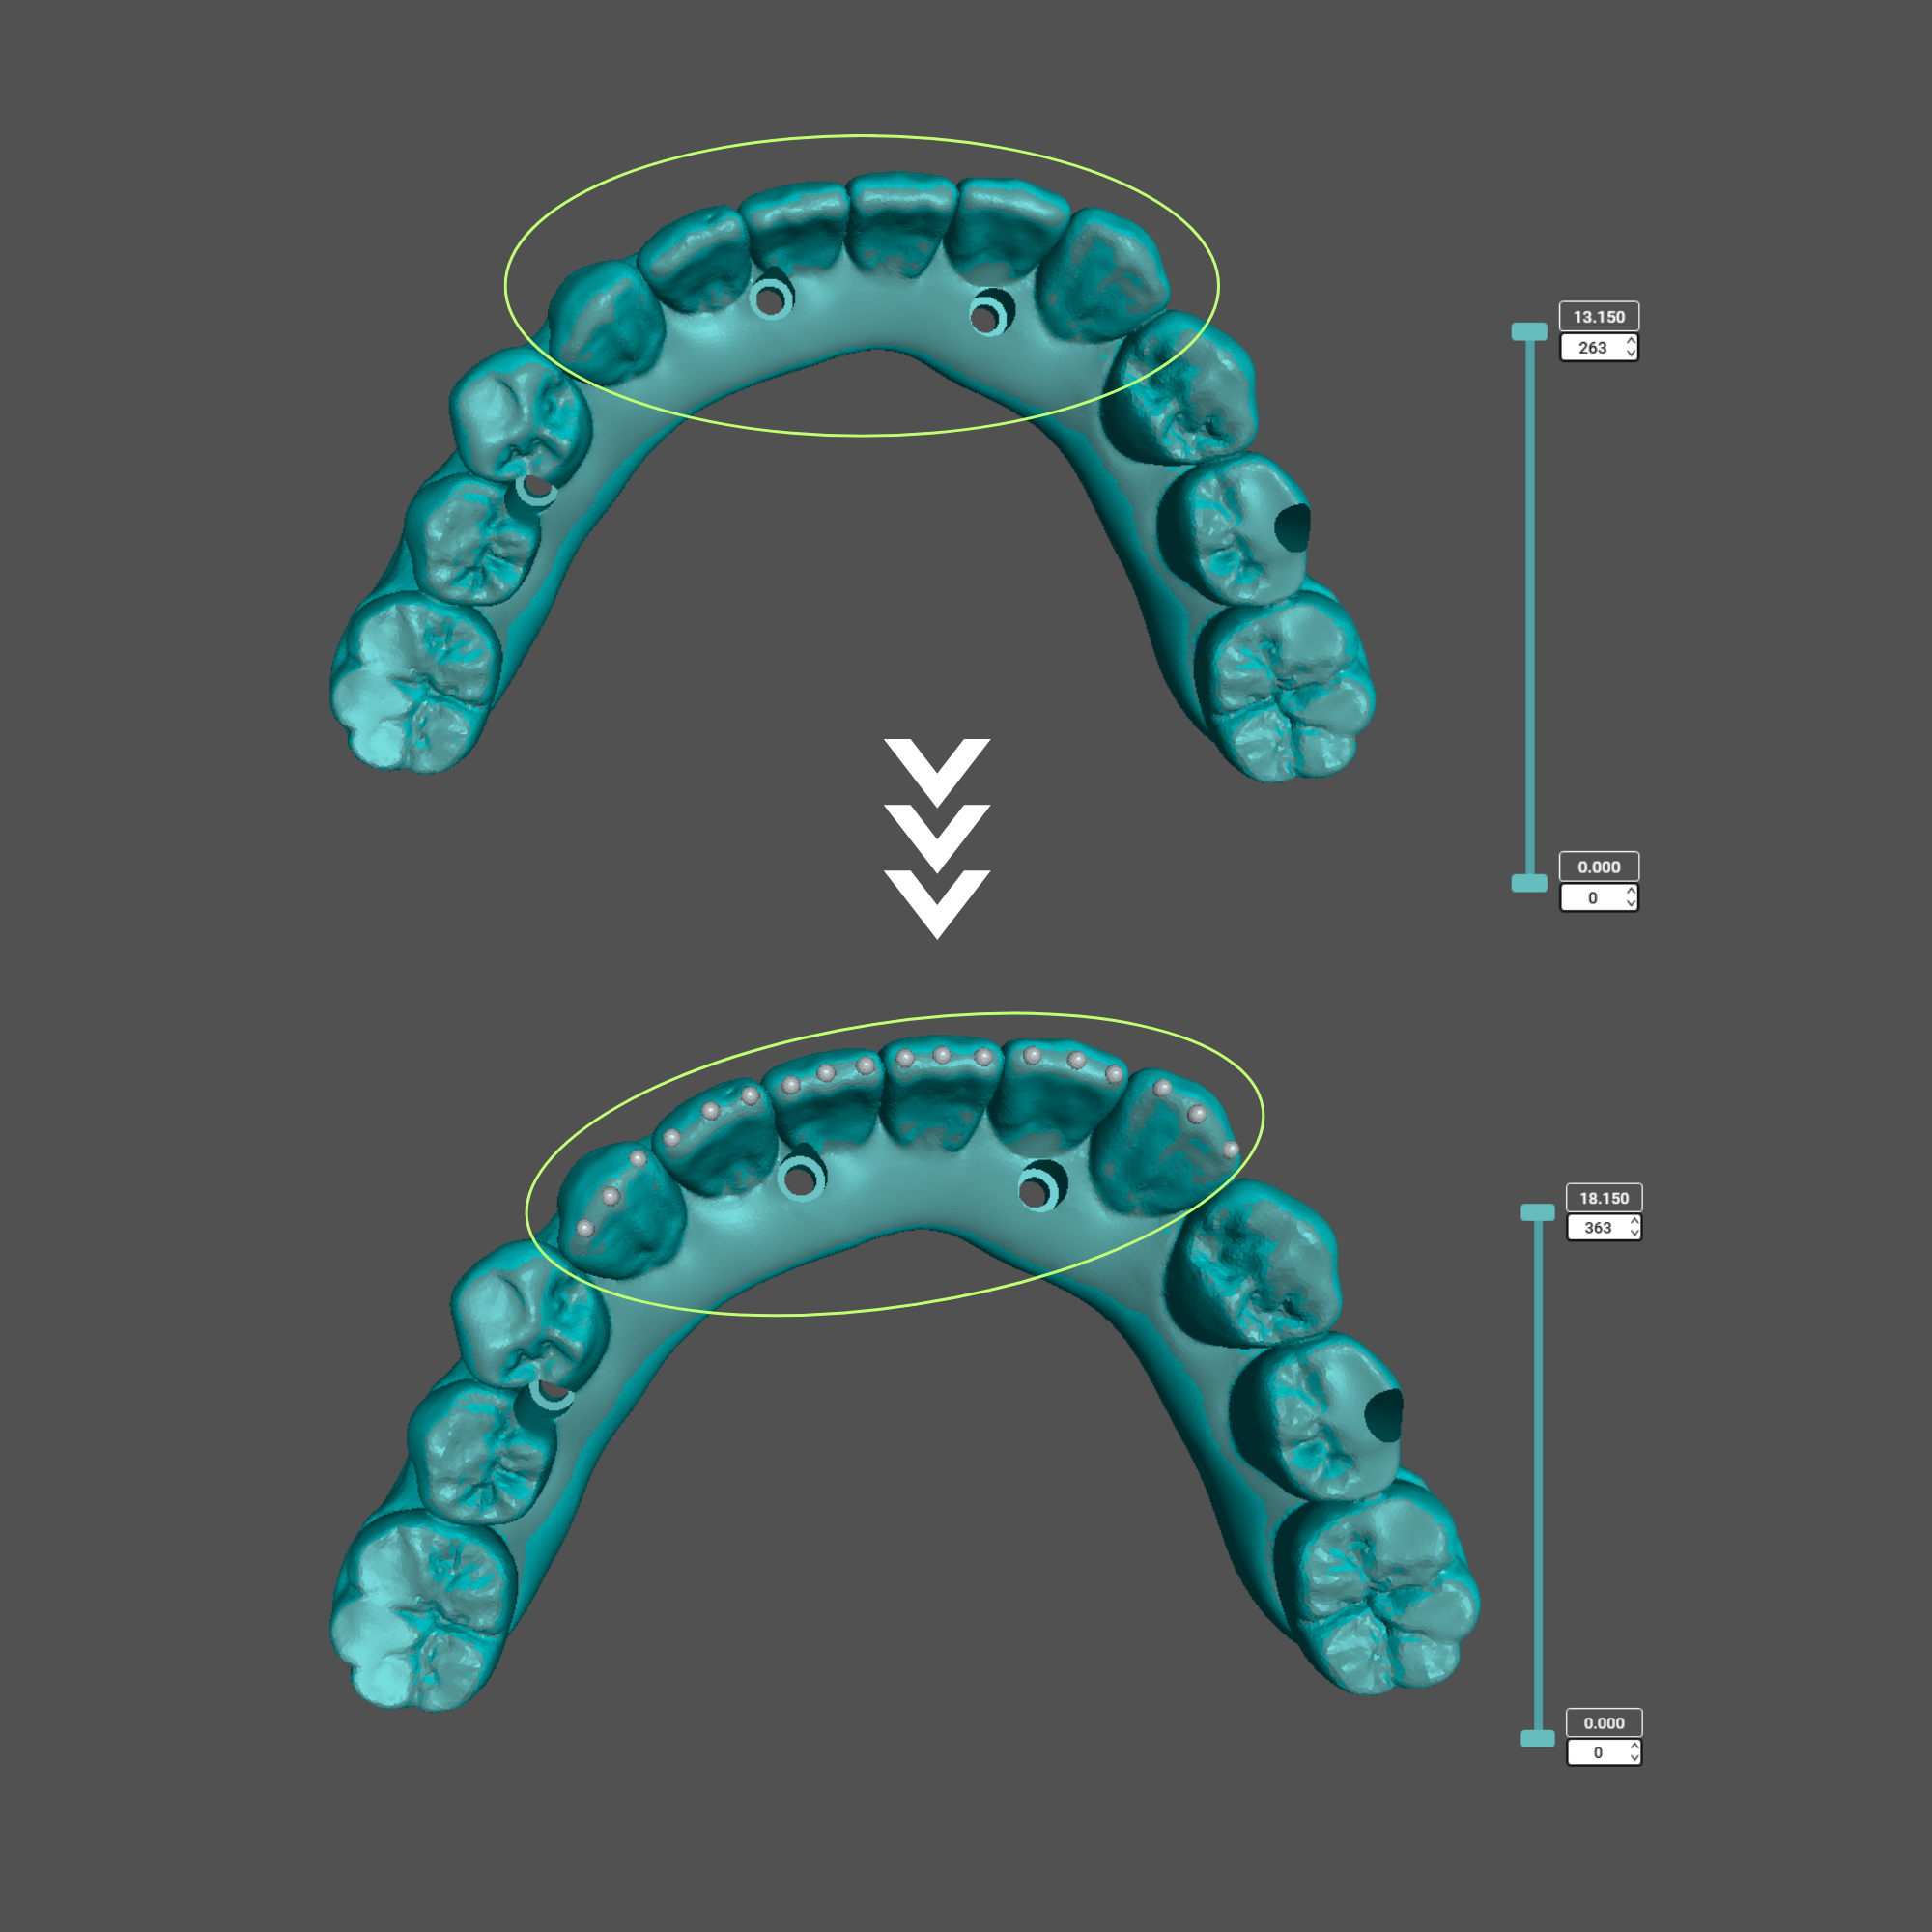
Anterior Teeth
Add about three supports per tooth: One on the mesioincisal angle, one in the center, and one on the distoincisal angle.
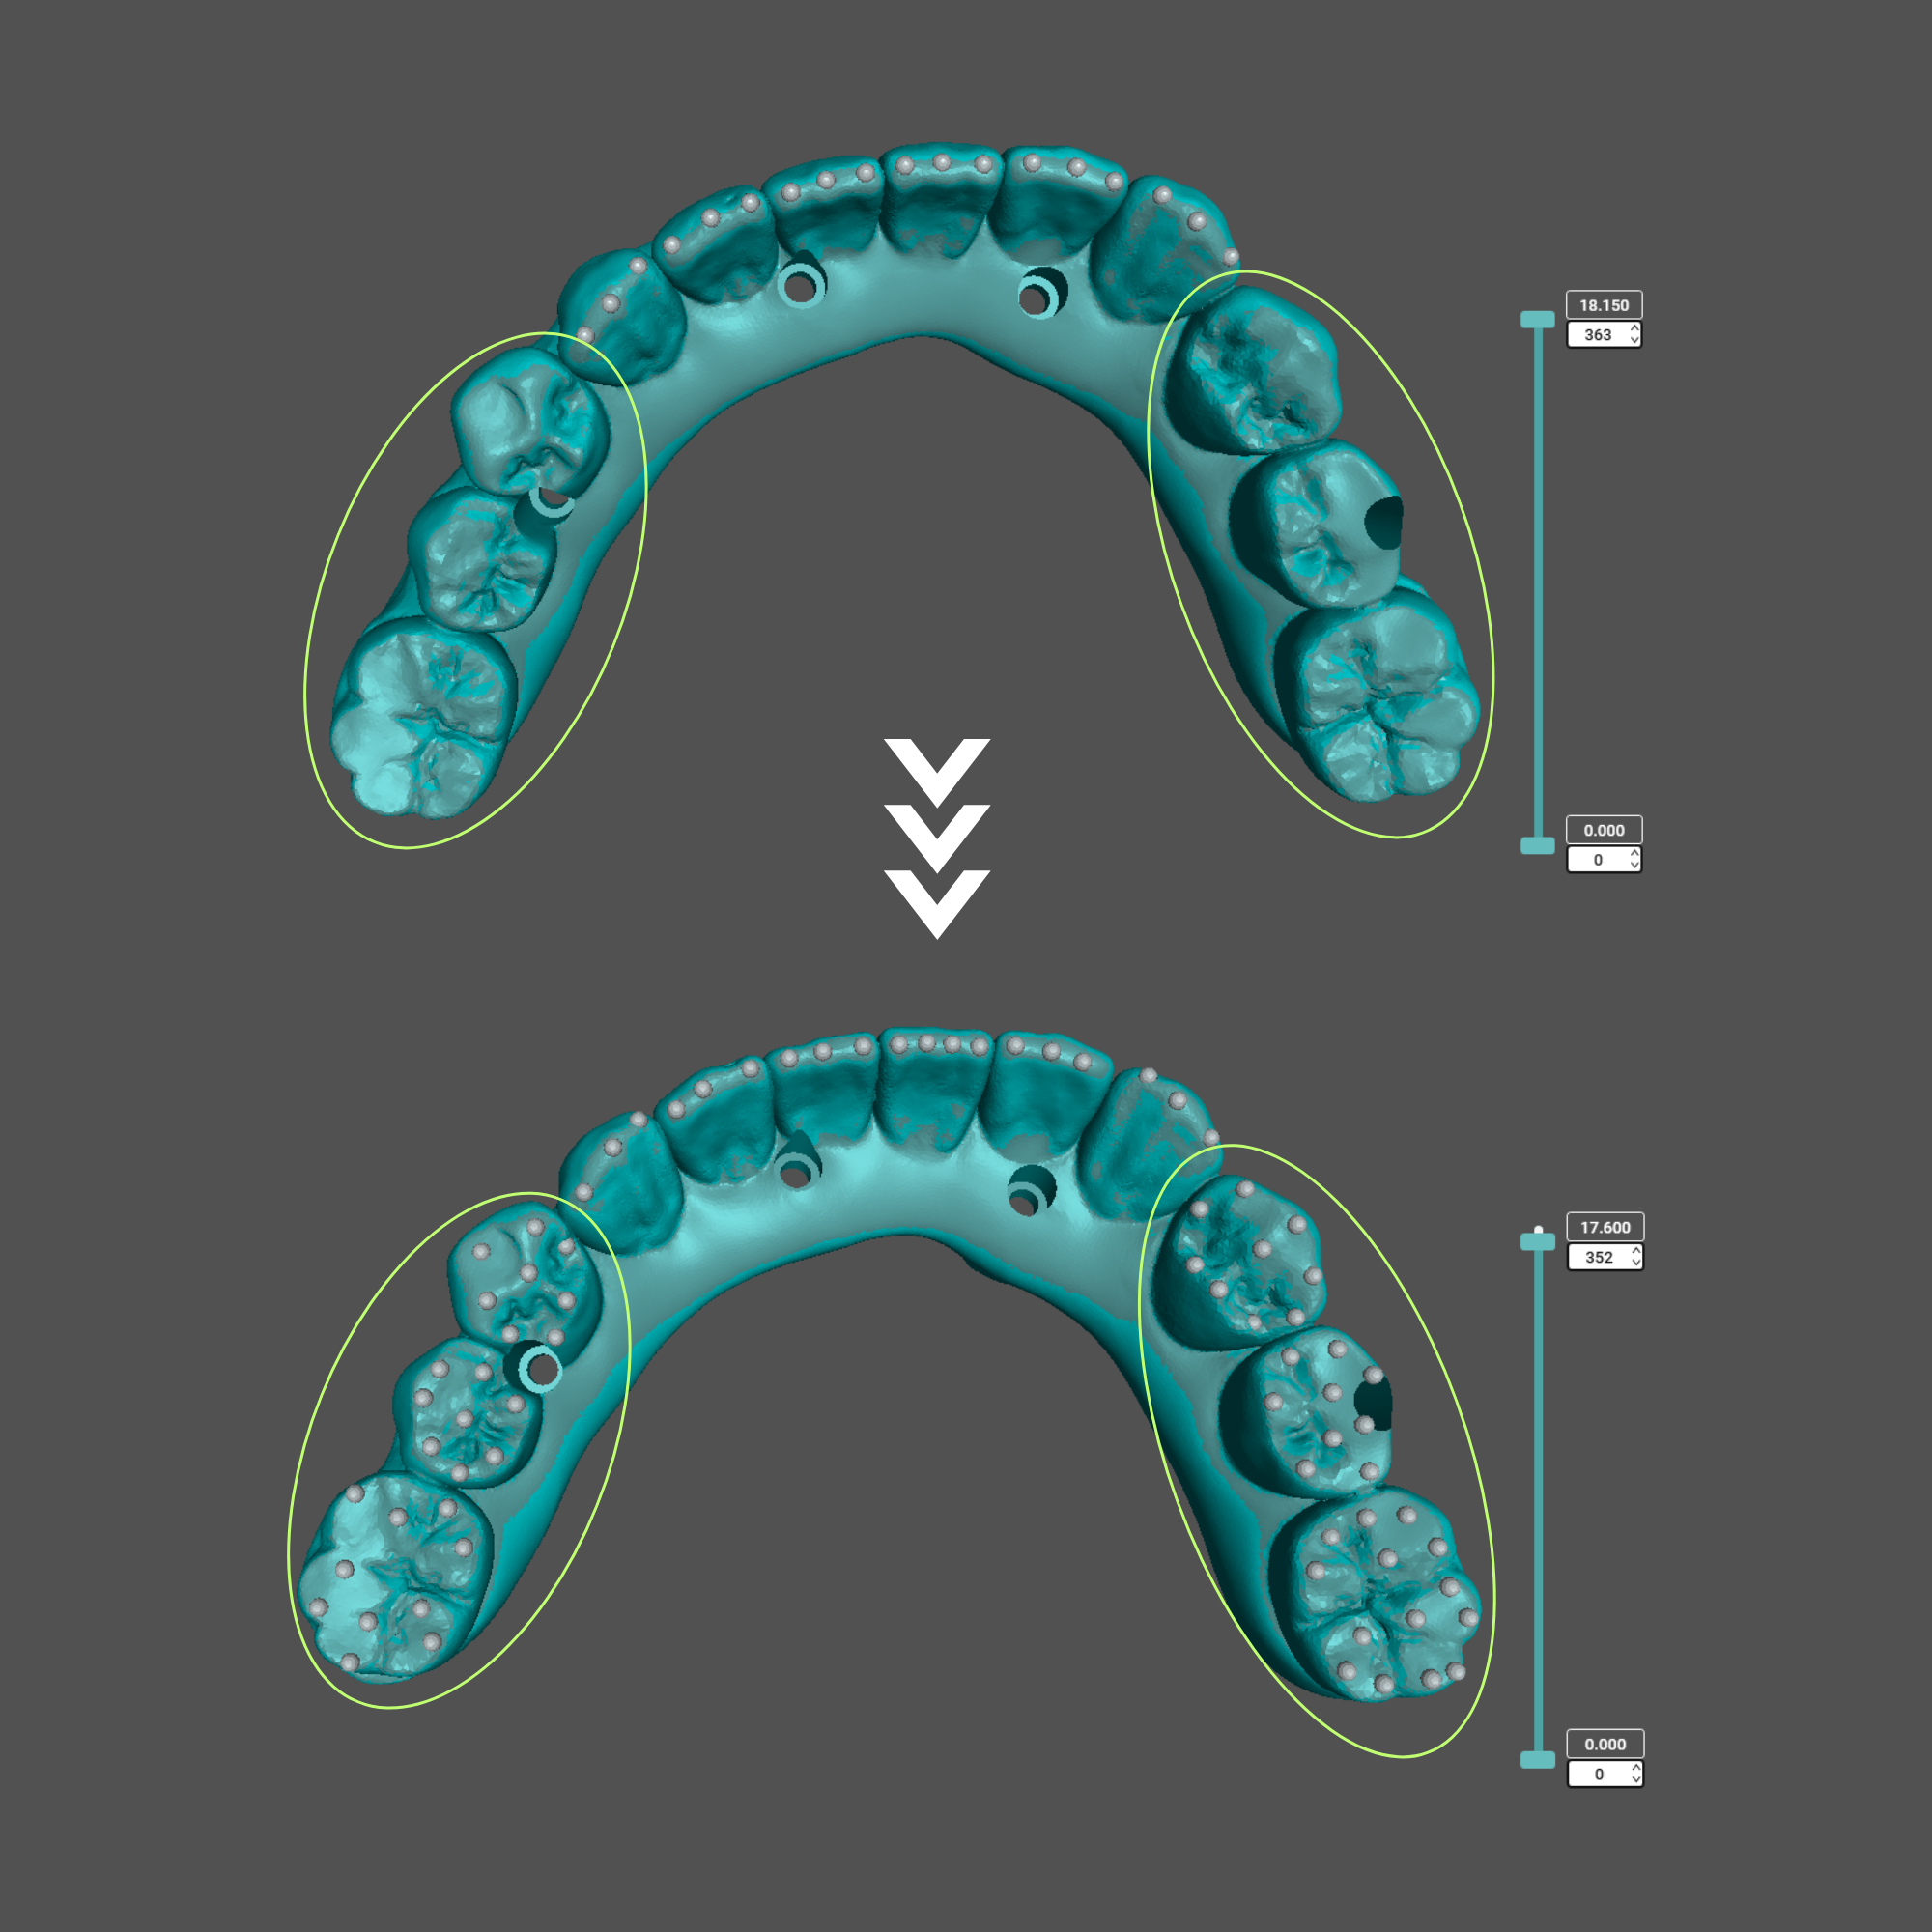
Molars and Premolars
Generally, we want to place support on each cusp tip of the molars and premolar teeth.
Then, add additional supports spaced around 3 to 5 mm apart to prevents layer shifting, especially when printing with higher speed.
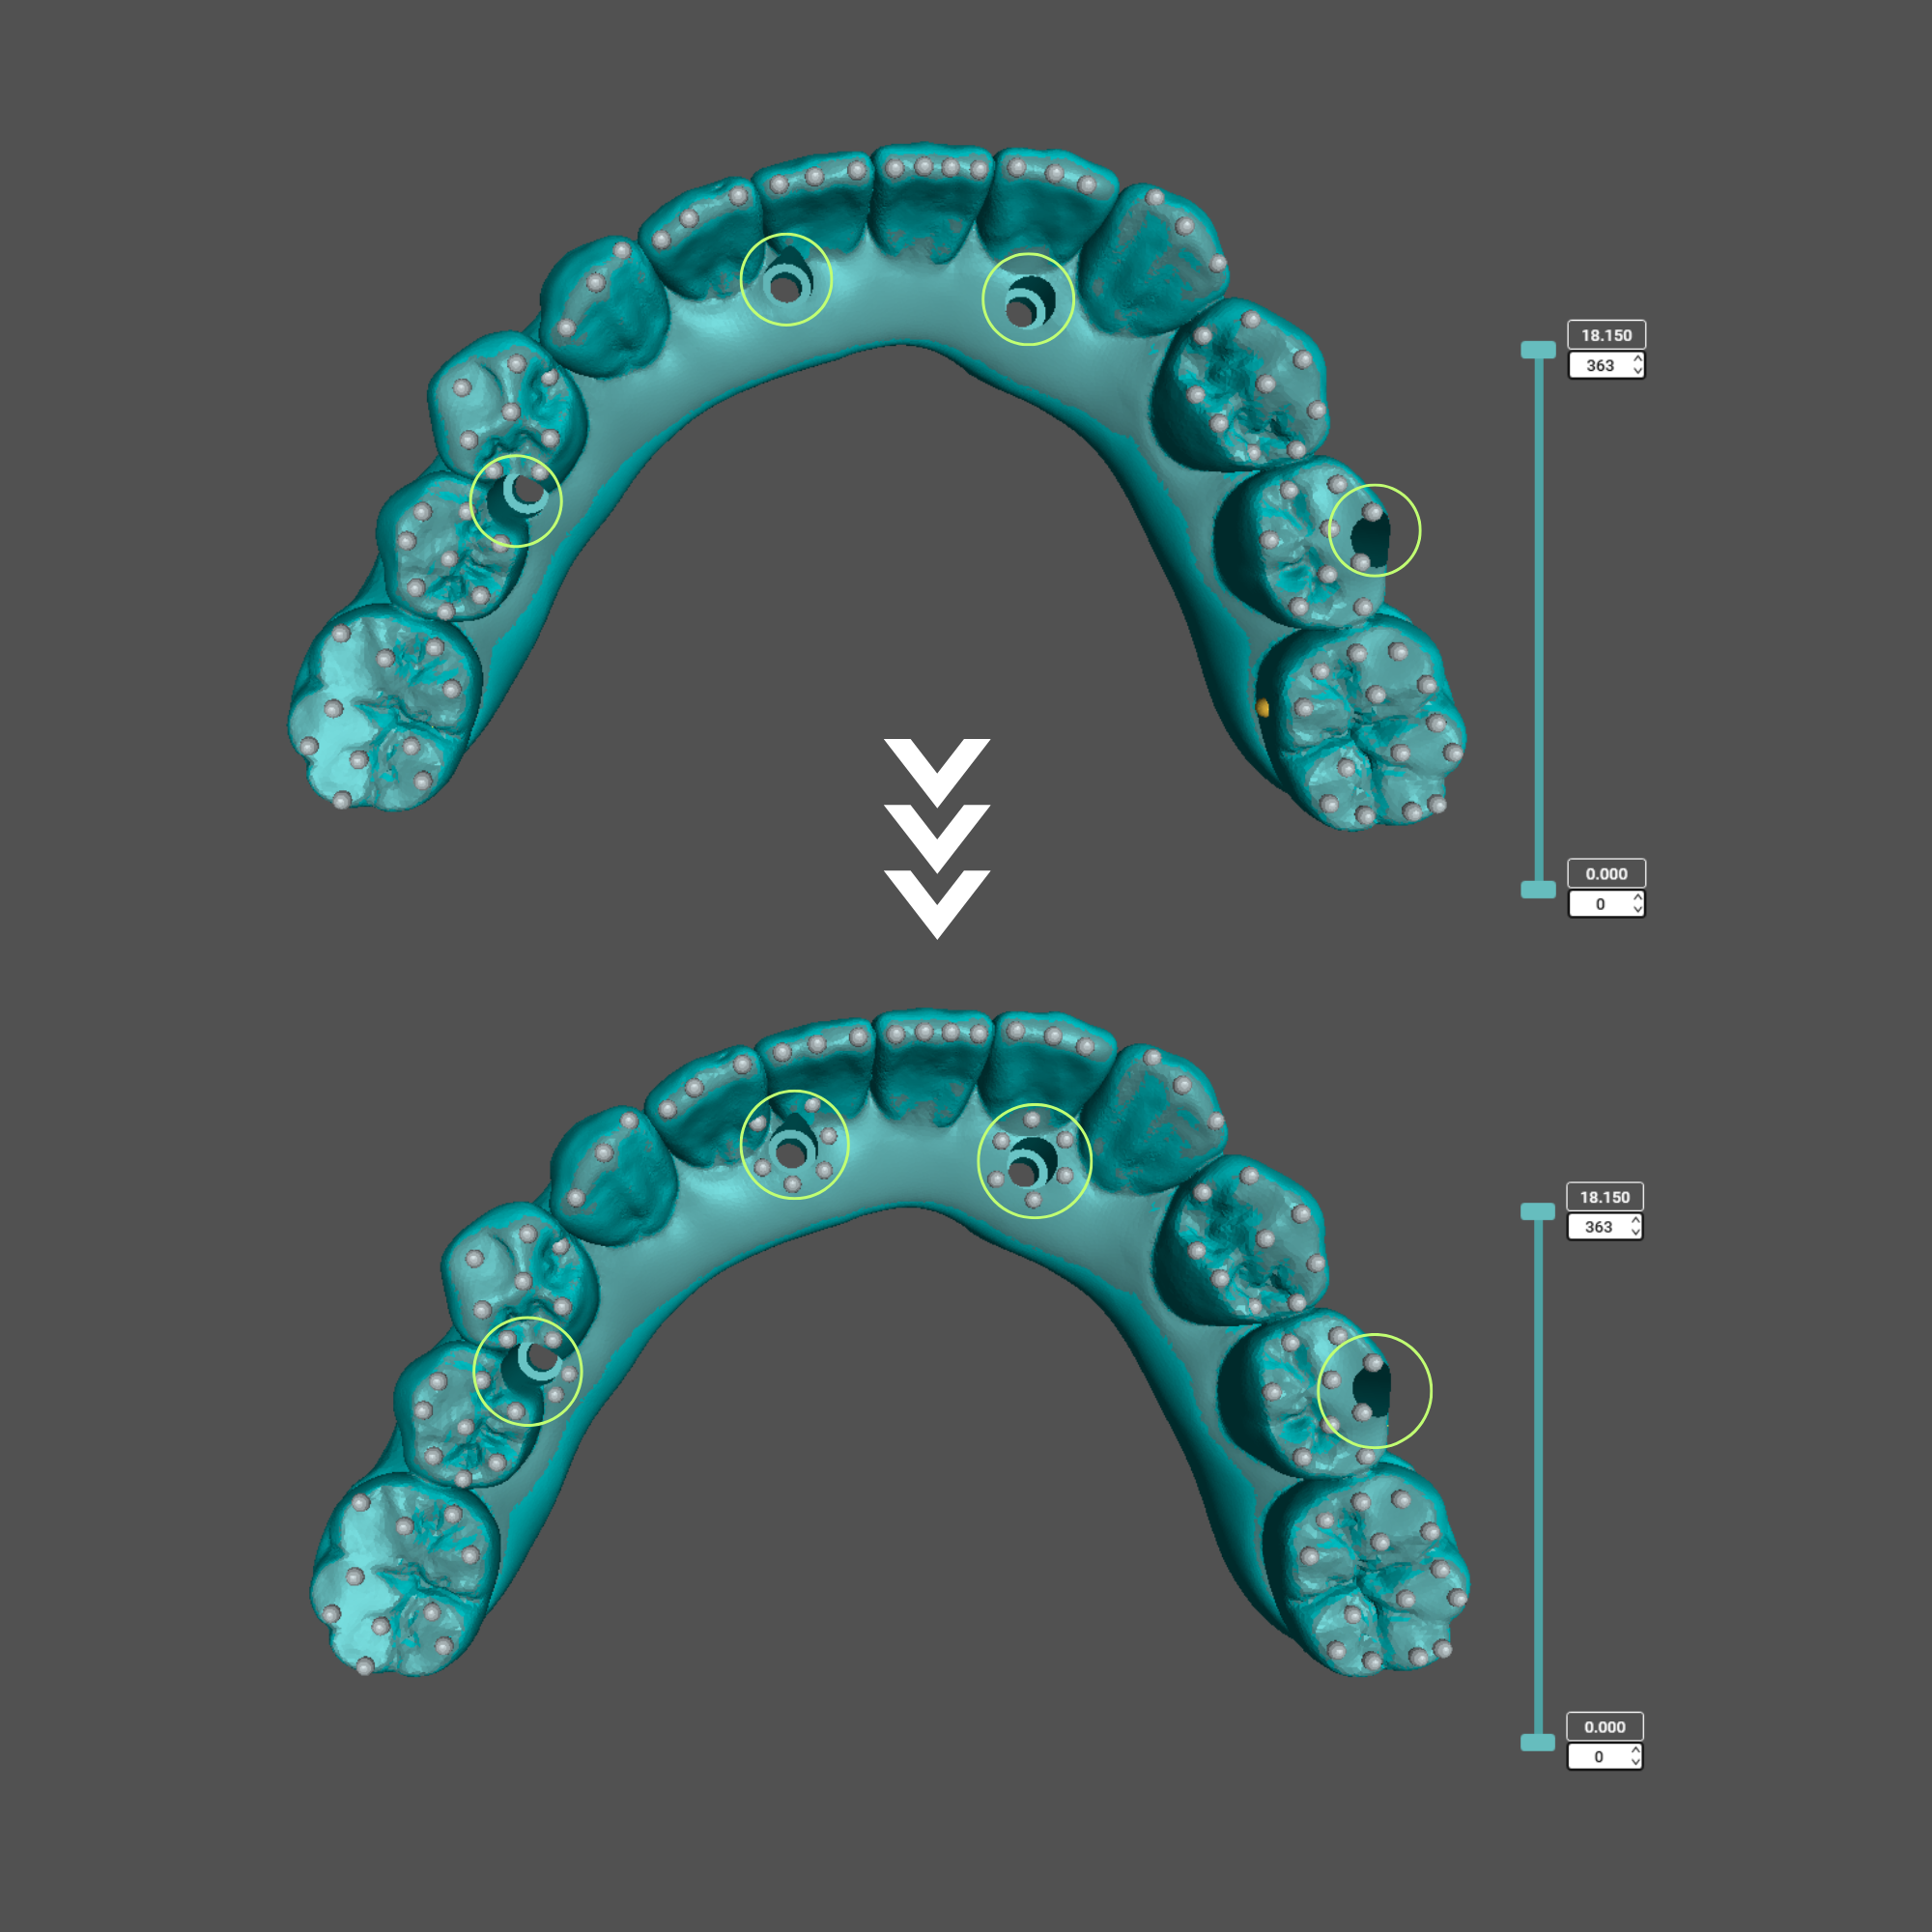
Screw Channels
Add supports circling the outer edge of each cylinder hole.
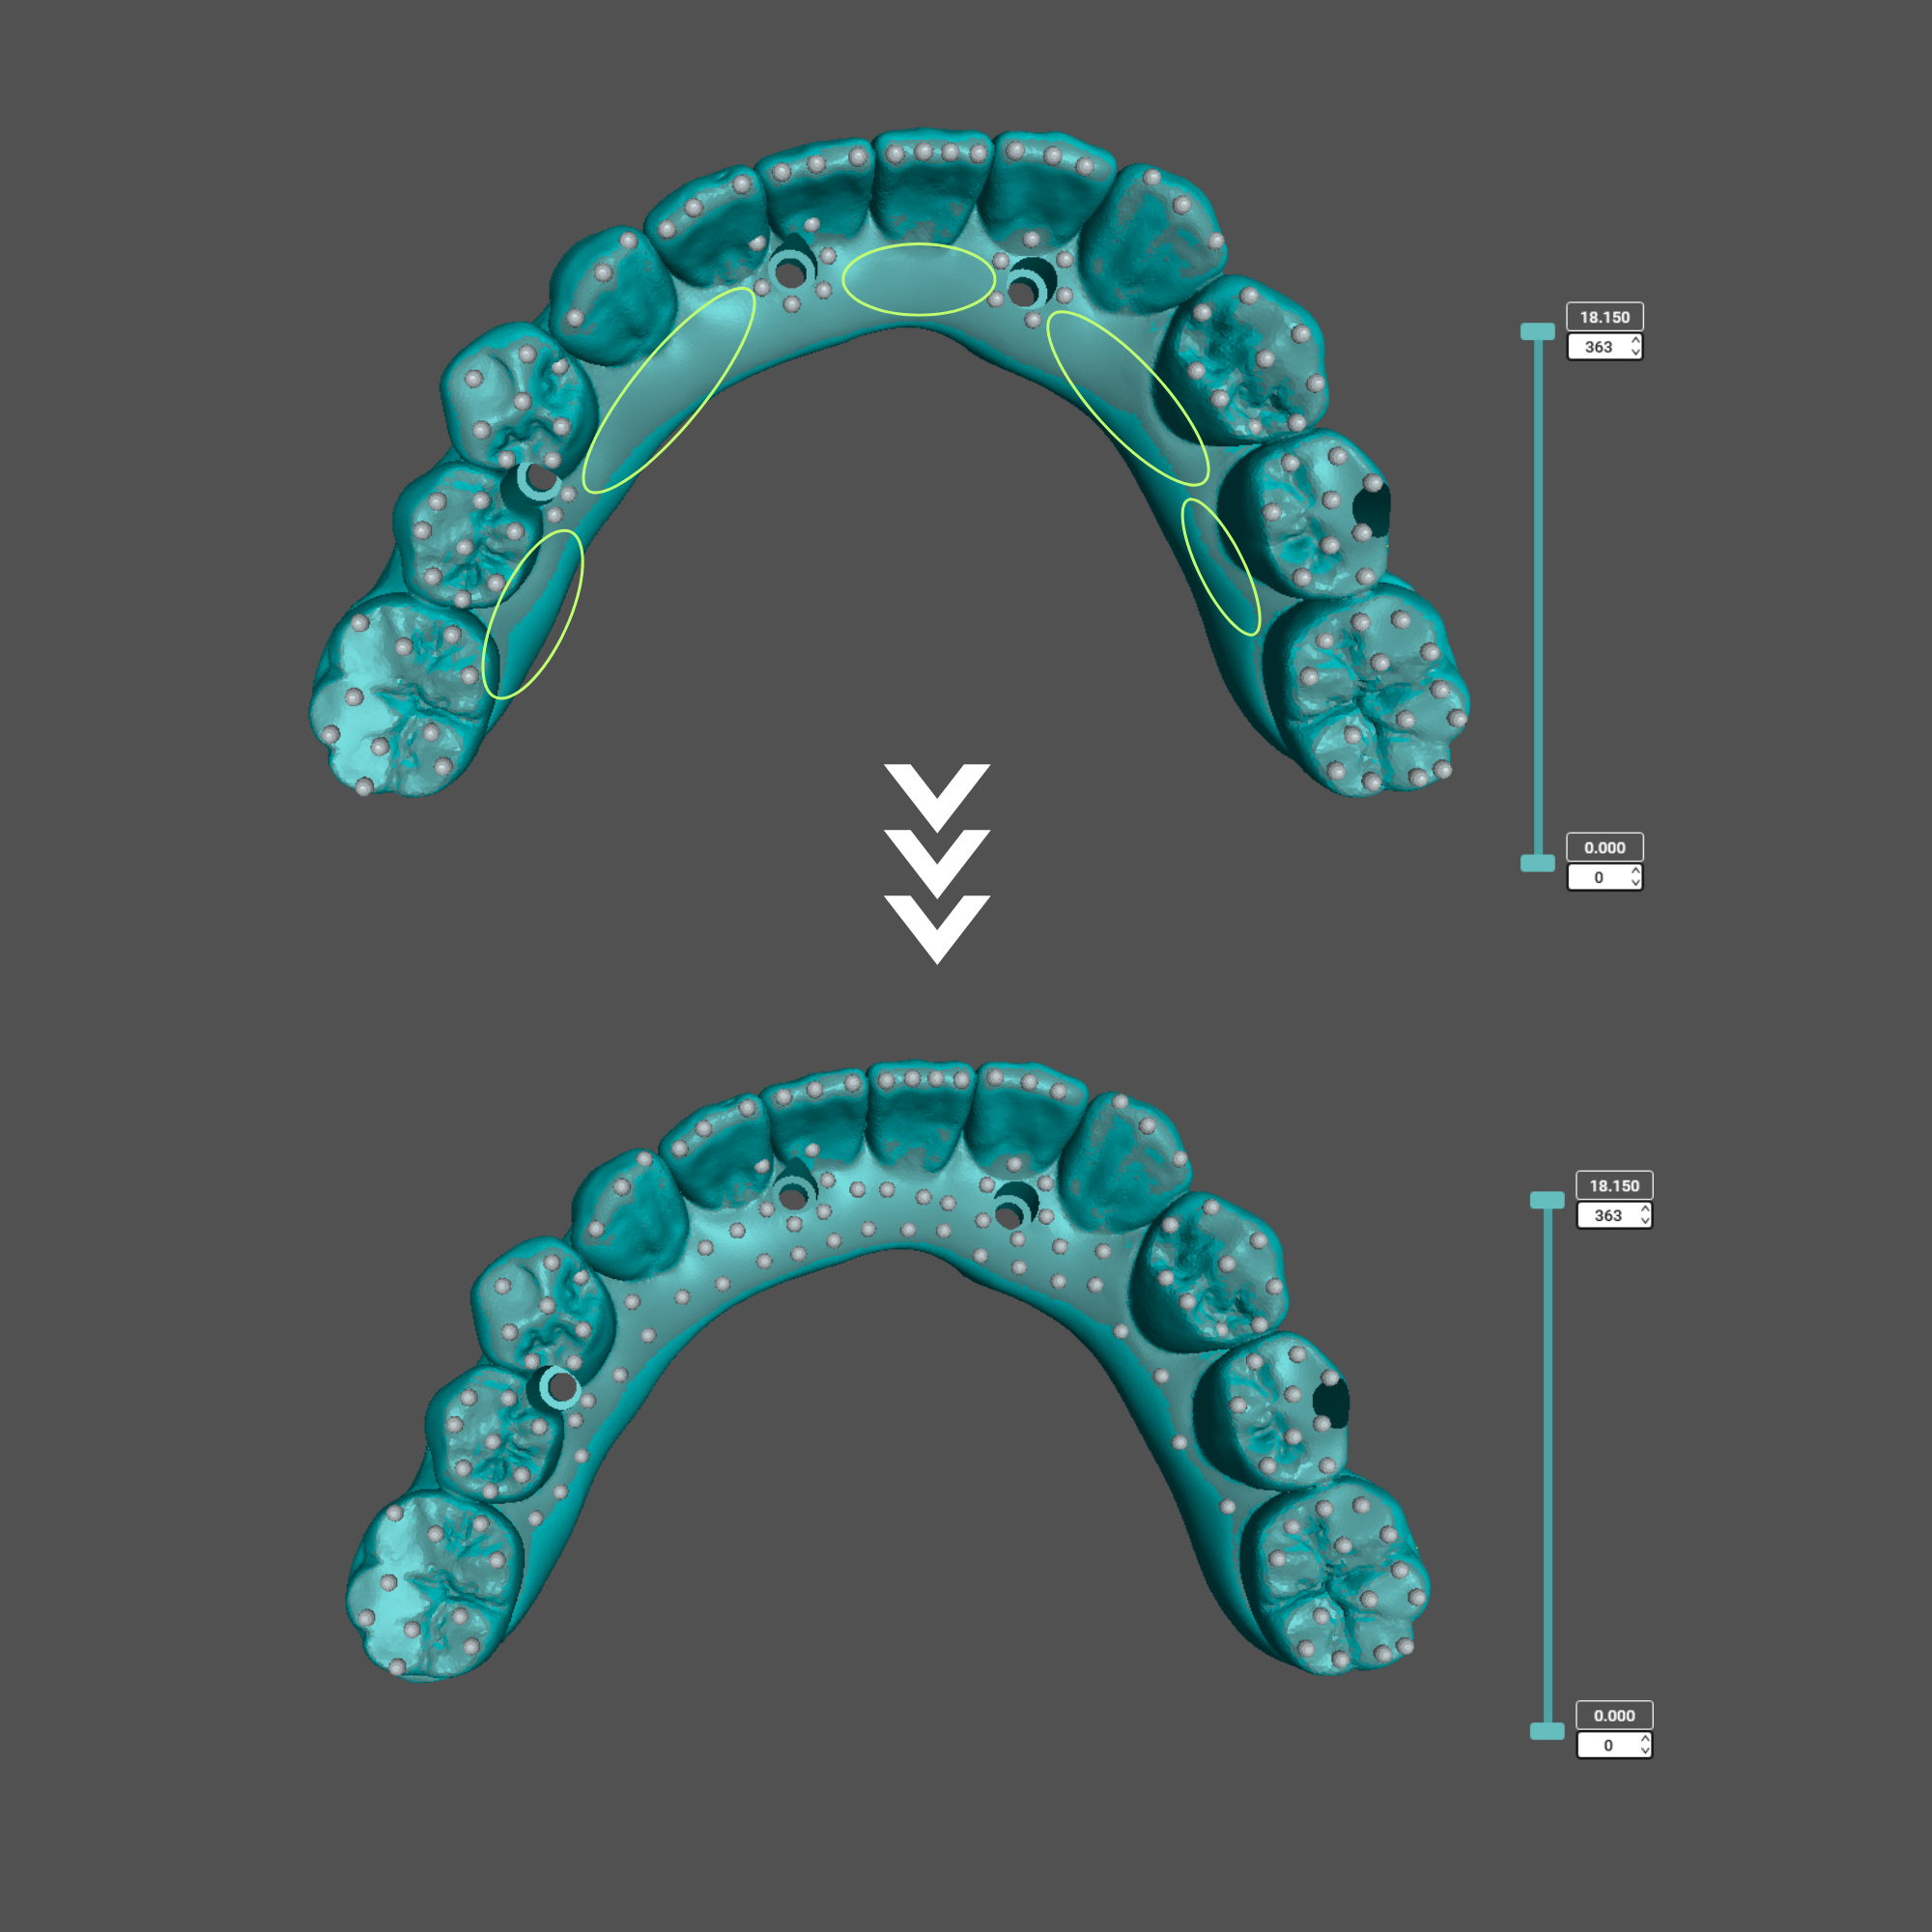
Wide Surfaces
Lastly, identify wide, flat areas of the model that haven’t been supported yet. Then, place additional supports 3 to 5 mm away from nearby existing supports.
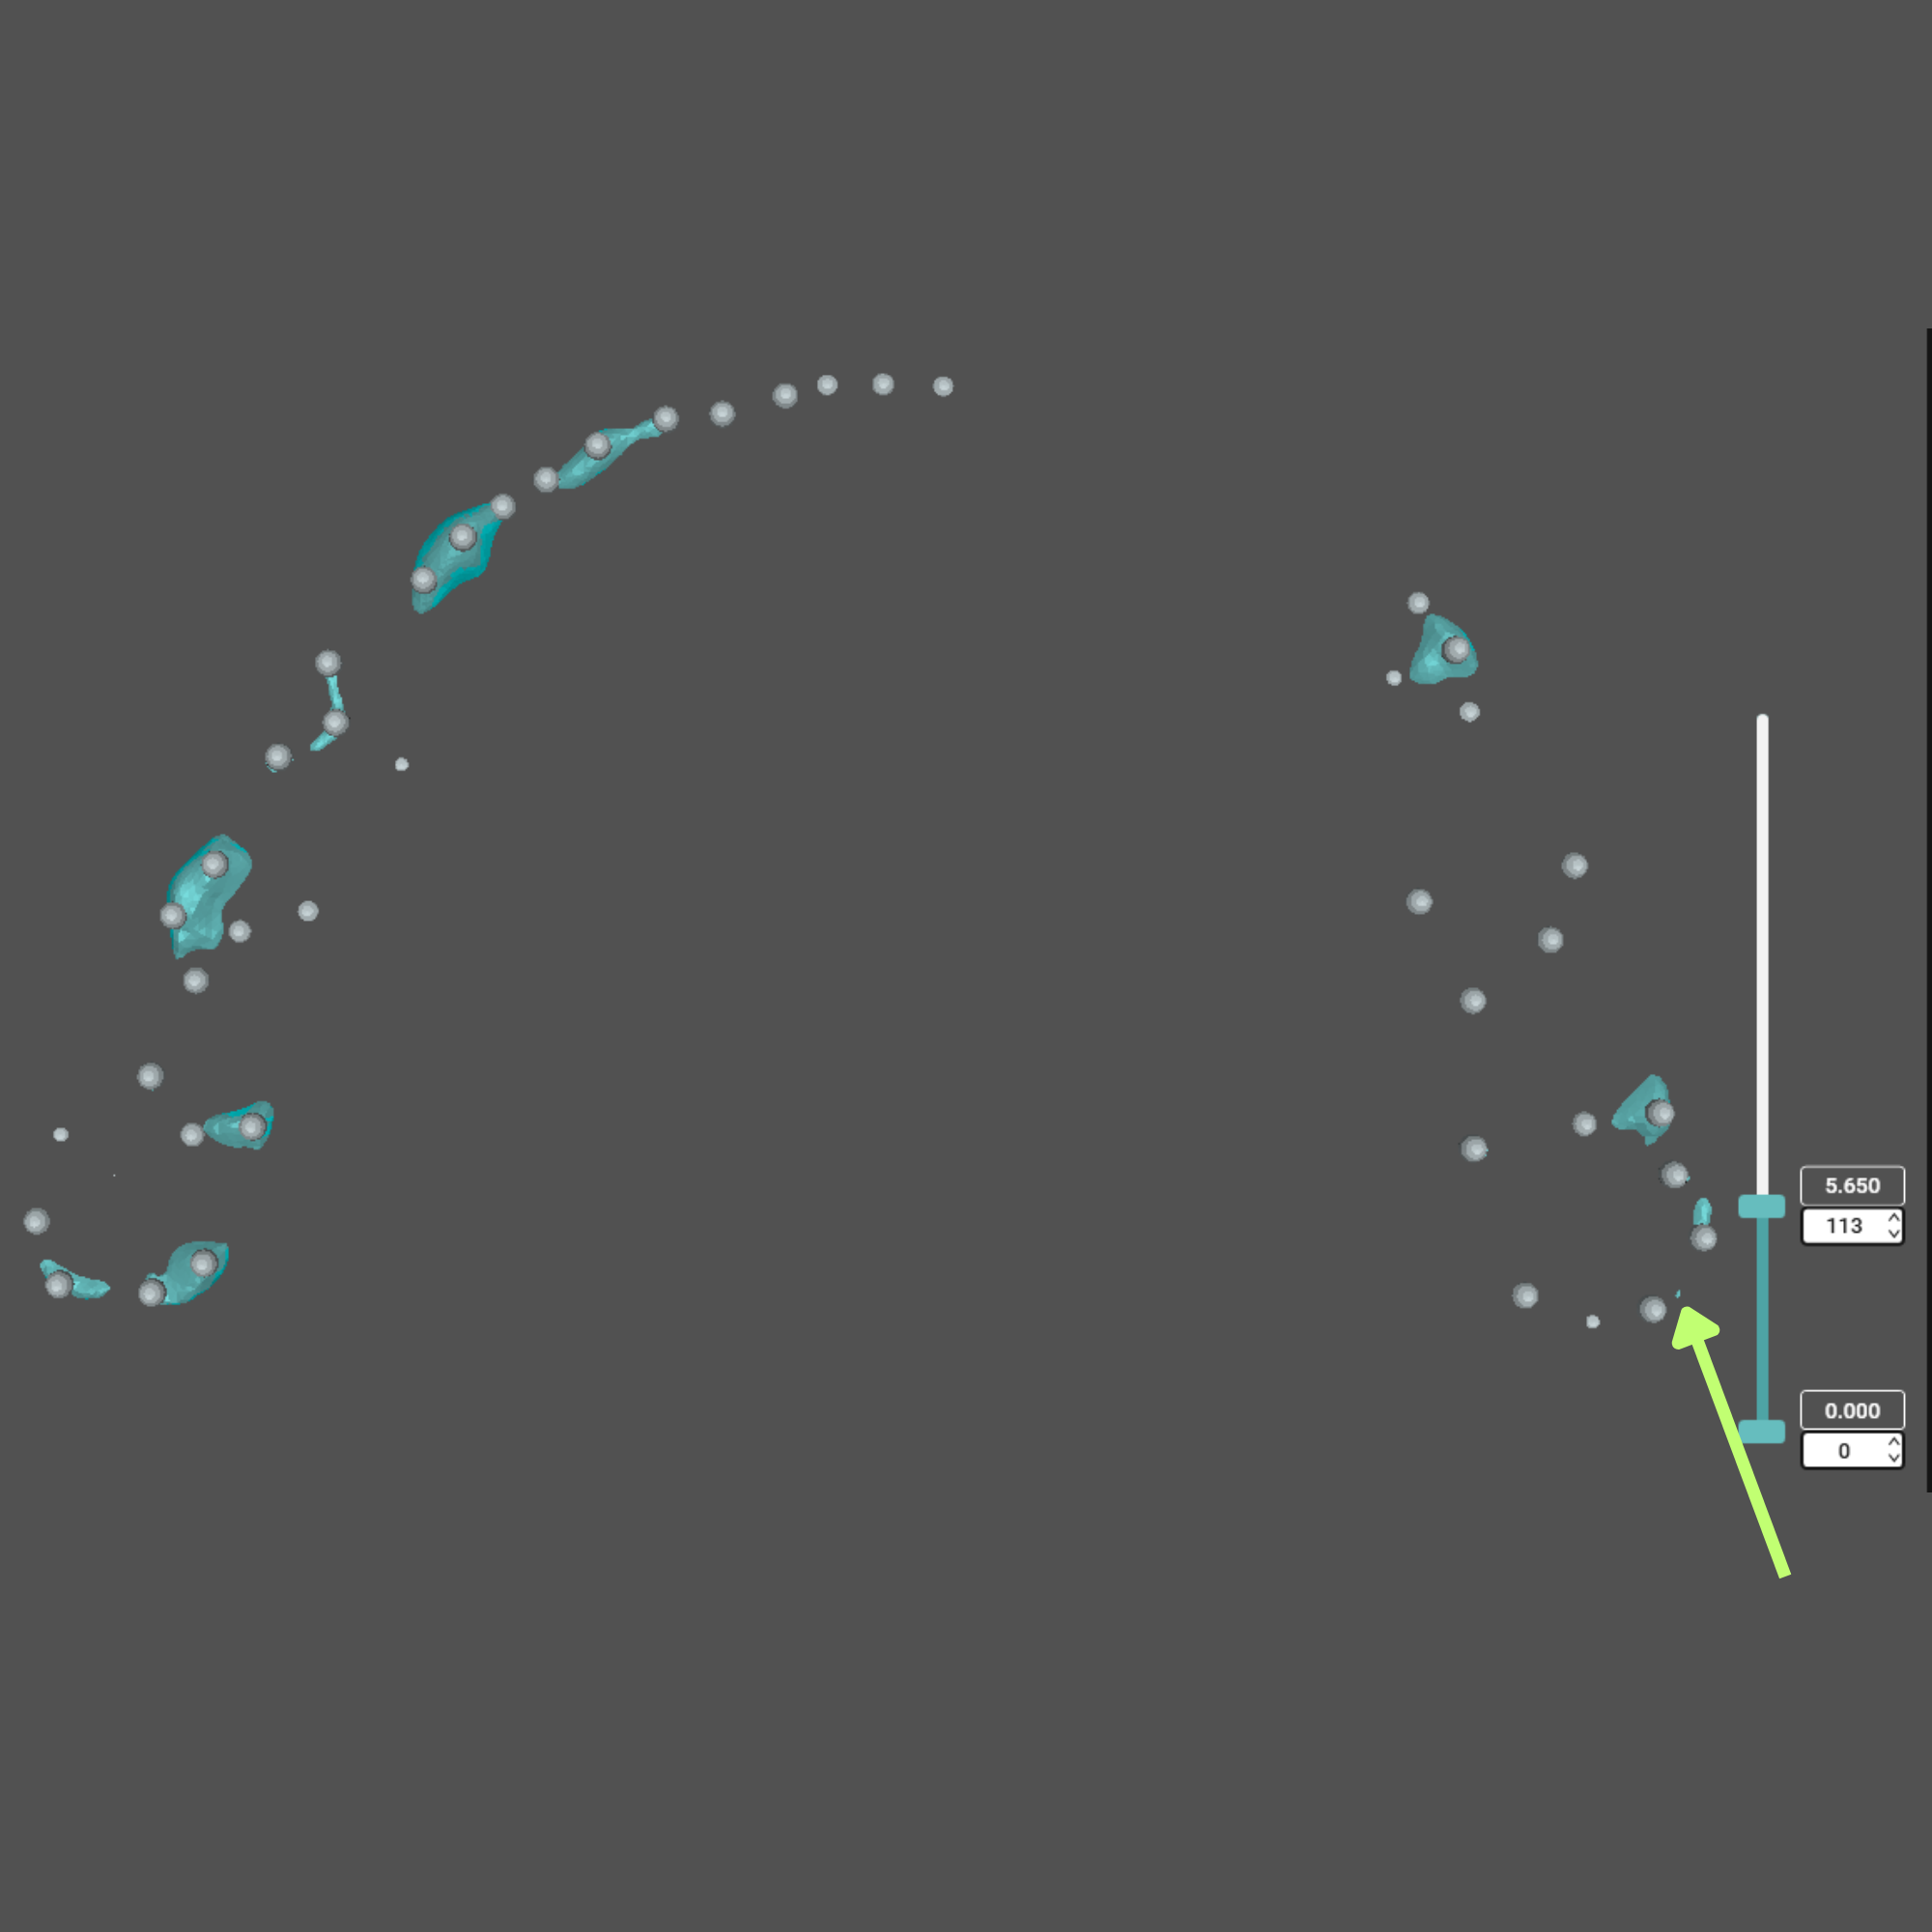
Watch Out for Island
Most of the time, the previous steps will cover all areas needing support. However, in very rare cases, you may find one or two isolated pixels or "islands" left unsupported.
You can usually catch them by scrolling through the layers and adding supports where they appear.
For instance, in the photo, we found a tiny pixel at layer 113, which could lead to inaccuracies in the print. Therefore, we need to add a support on this tiny spot.
Anterior Teeth
Add about three supports per tooth: One on the mesioincisal angle, one in the center, and one on the distoincisal angle.
Molars and Premolars
Generally, we want to place support on each cusp tip of the molars and premolar teeth.
Then, add additional supports spaced around 3 to 5 mm apart to prevents layer shifting, especially when printing with higher speed.
Screw Channels
Add supports circling the outer edge of each cylinder hole.
Wide Surfaces
Lastly, identify wide, flat areas of the model that haven’t been supported yet. Then, place additional supports 3 to 5 mm away from nearby existing supports.
Watch Out for Island
Most of the time, the previous steps will cover all areas needing support. However, in very rare cases, you may find one or two isolated pixels or "islands" left unsupported.
You can usually catch them by scrolling through the layers and adding supports where they appear.
For instance, in the photo, we found a tiny pixel at layer 113, which could lead to inaccuracies in the print. Therefore, we need to add a support on this tiny spot.
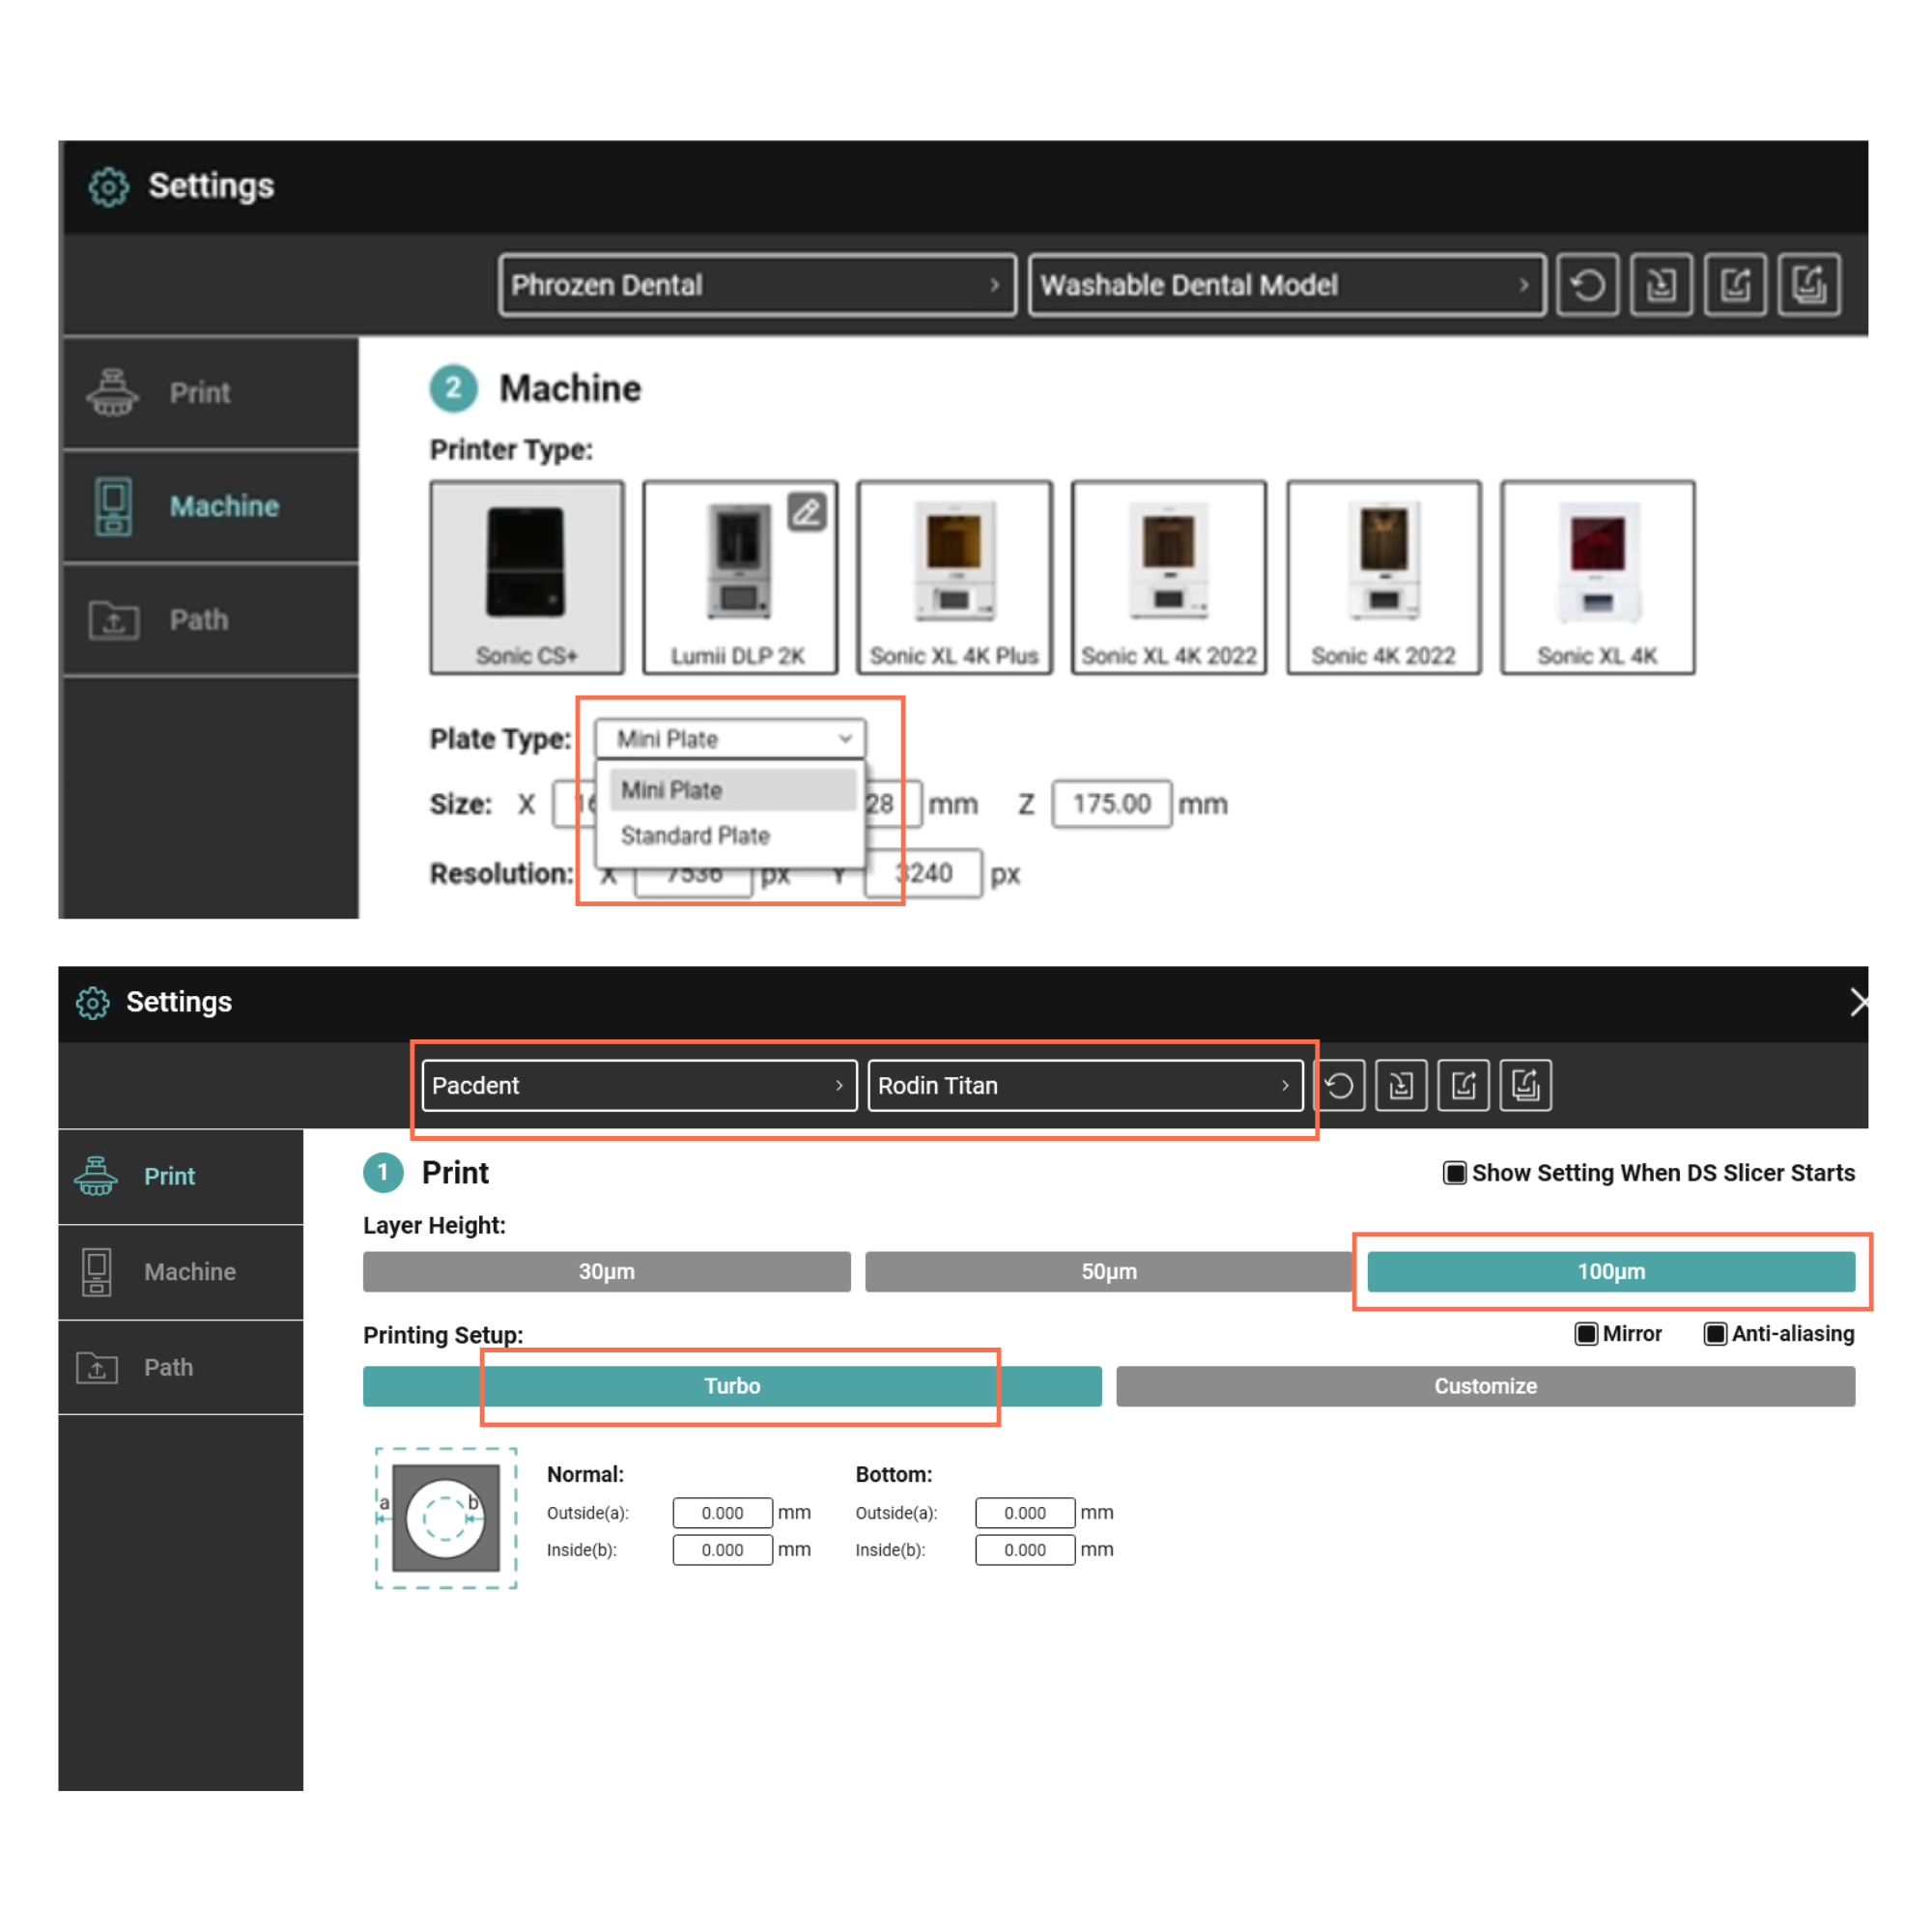
4.4 Print Settings
In DS Slicer, you don’t need to spend time manually adjusting every parameter. Instead, you can simply choose the resin brand, layer height, and print setup.
For All-on-X cases, our recommended setup is the CS+ Mini Plate with the Turbo mode and a 100 µm layer height. This combination helps significantly reduce print time while maintaining both accuracy and durability, making it well-suited for same-day provisional restorations.
4.5 Slice and File Transfer
After completing the orientation, supports, and resin settings, click the "Single Para Slice" button to slice your model. Once the slicing process is finished, give your file a name and click "Save".
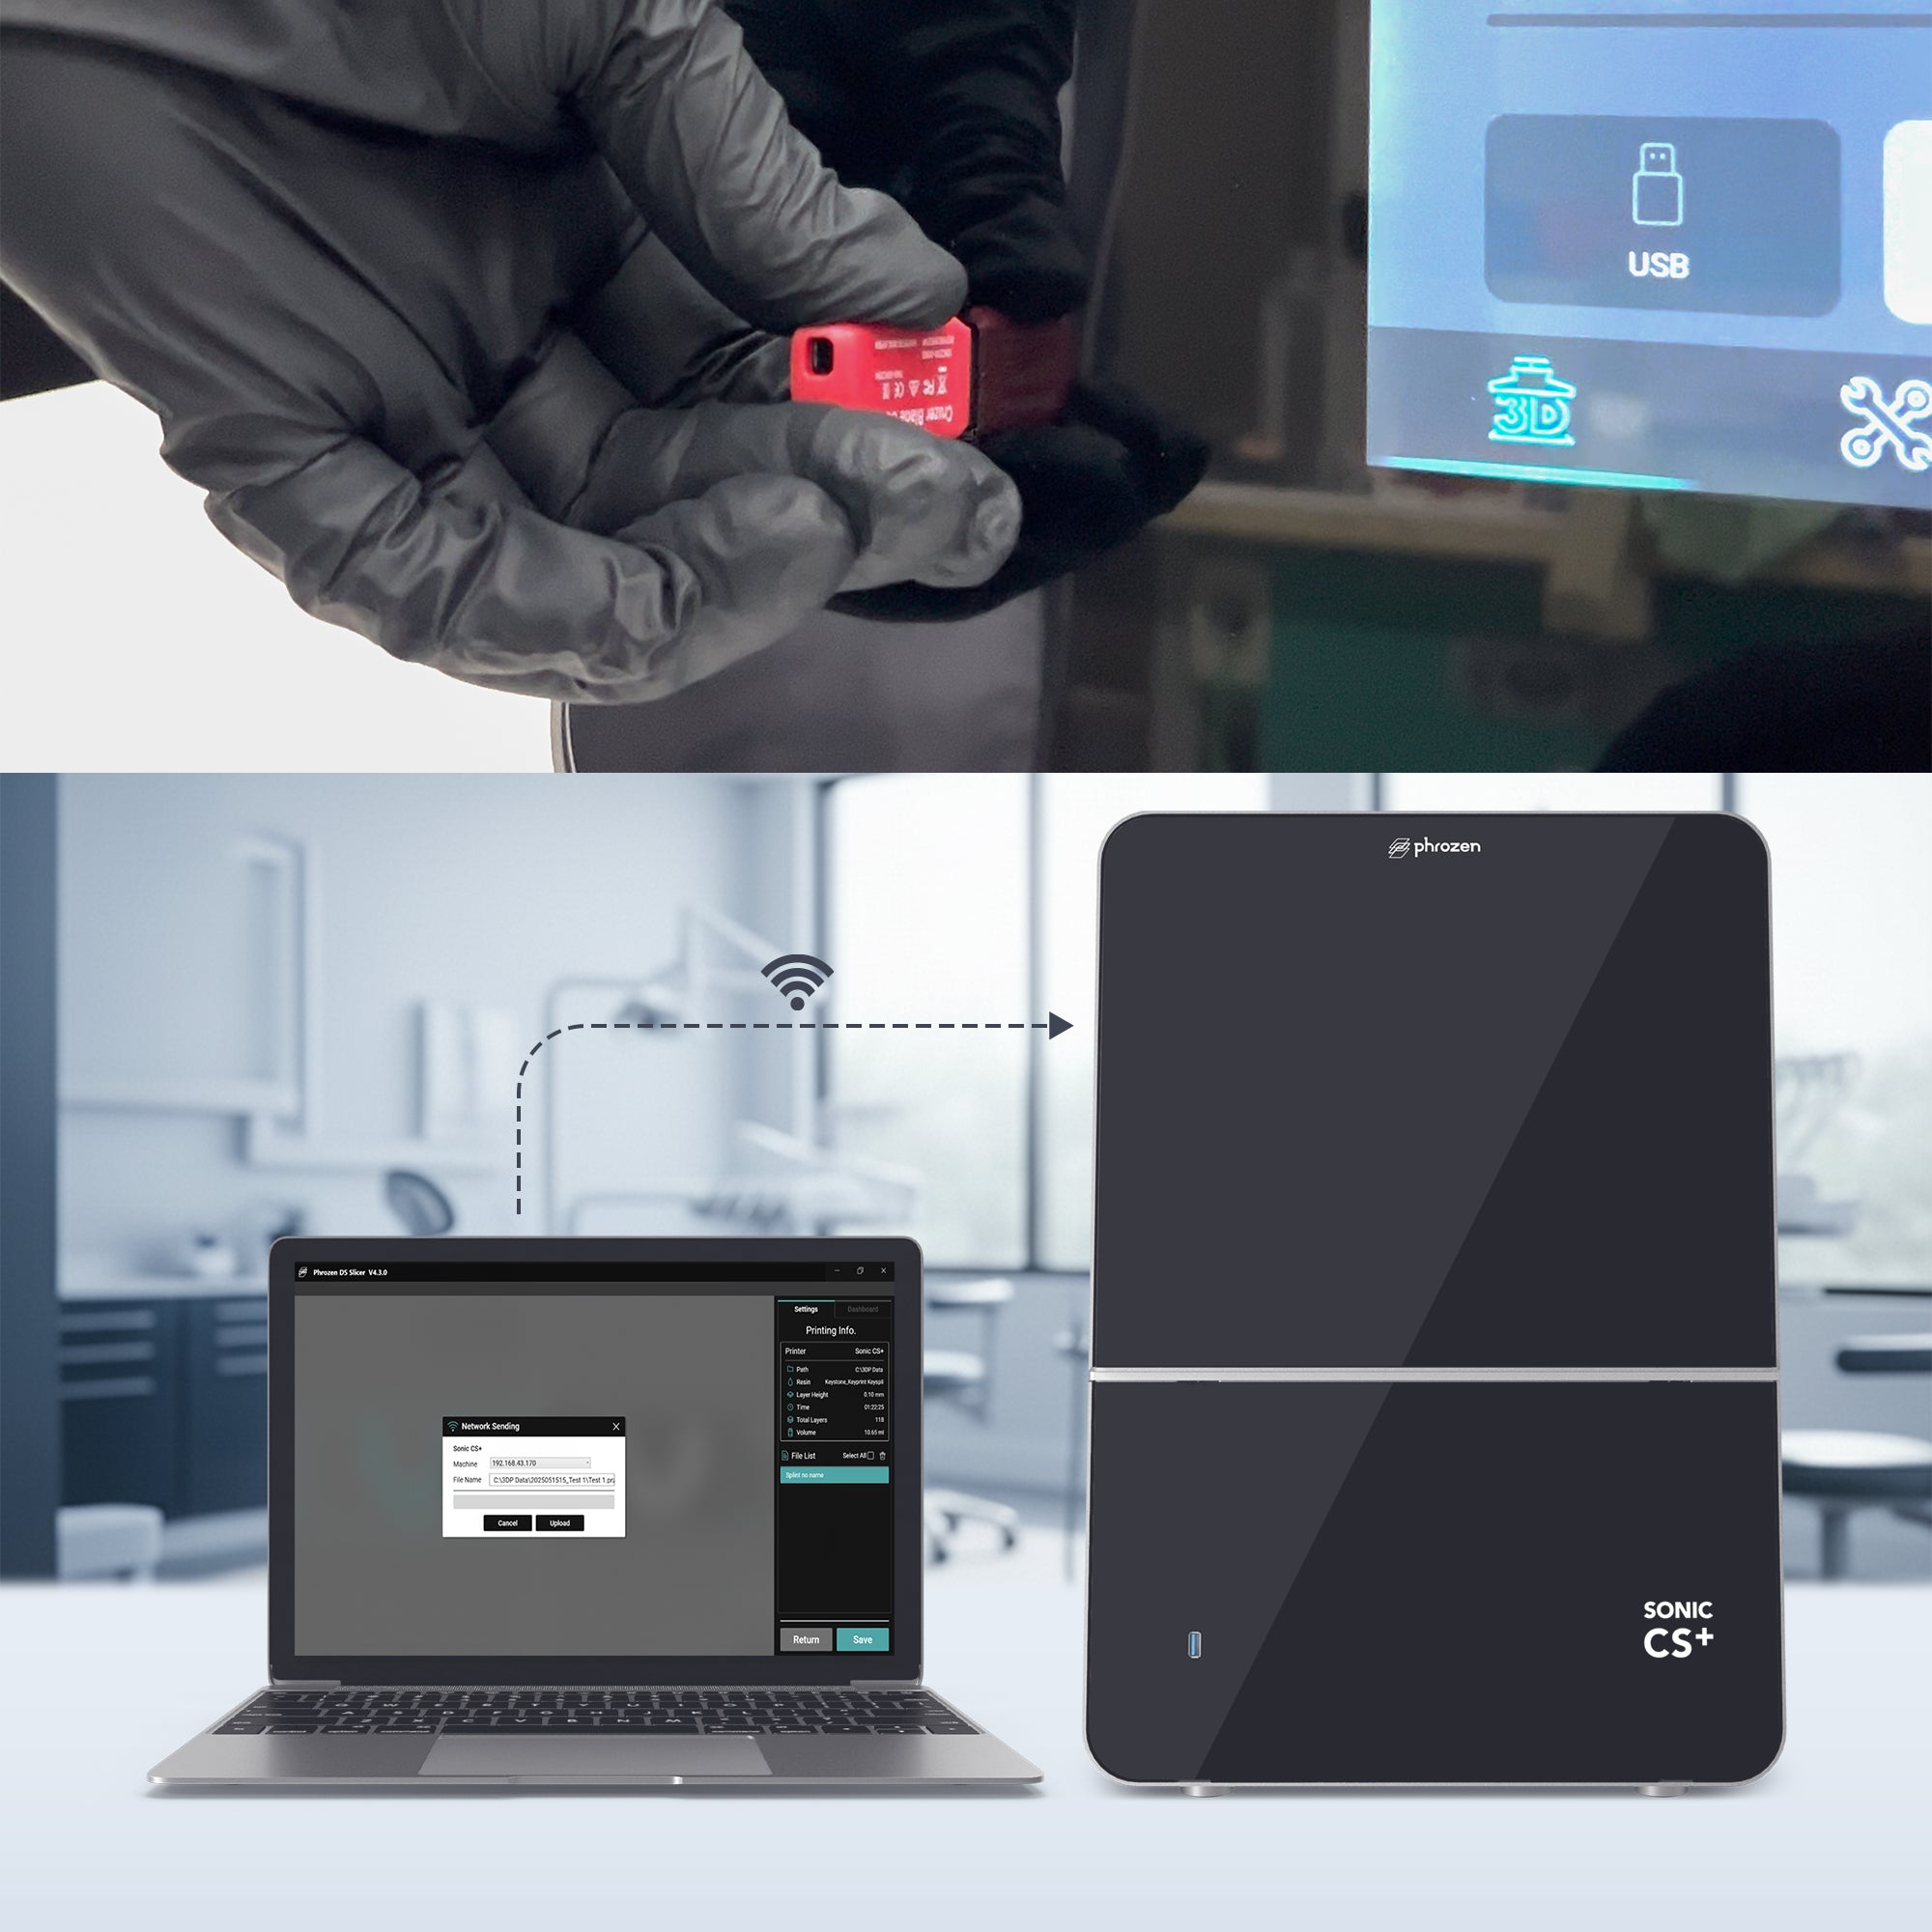
From there, you can either save the file to a USB drive or send it directly to your printer over Wi-Fi using Network Sending.
4.4 Print Settings
In DS Slicer, you don’t need to spend time manually adjusting every parameter. Instead, you can simply choose the resin brand, layer height, and print setup.
For All-on-X cases, our recommended setup is the CS+ Mini Plate with the Turbo mode and a 100 µm layer height. This combination helps significantly reduce print time while maintaining both accuracy and durability, making it well-suited for same-day provisional restorations.
4.5 Slice and File Transfer
After completing the orientation, supports, and resin settings, click the "Single Para Slice" button to slice your model. Once the slicing process is finished, give your file a name and click "Save".
From there, you can either save the file to a USB drive or send it directly to your printer over Wi-Fi using Network Sending.
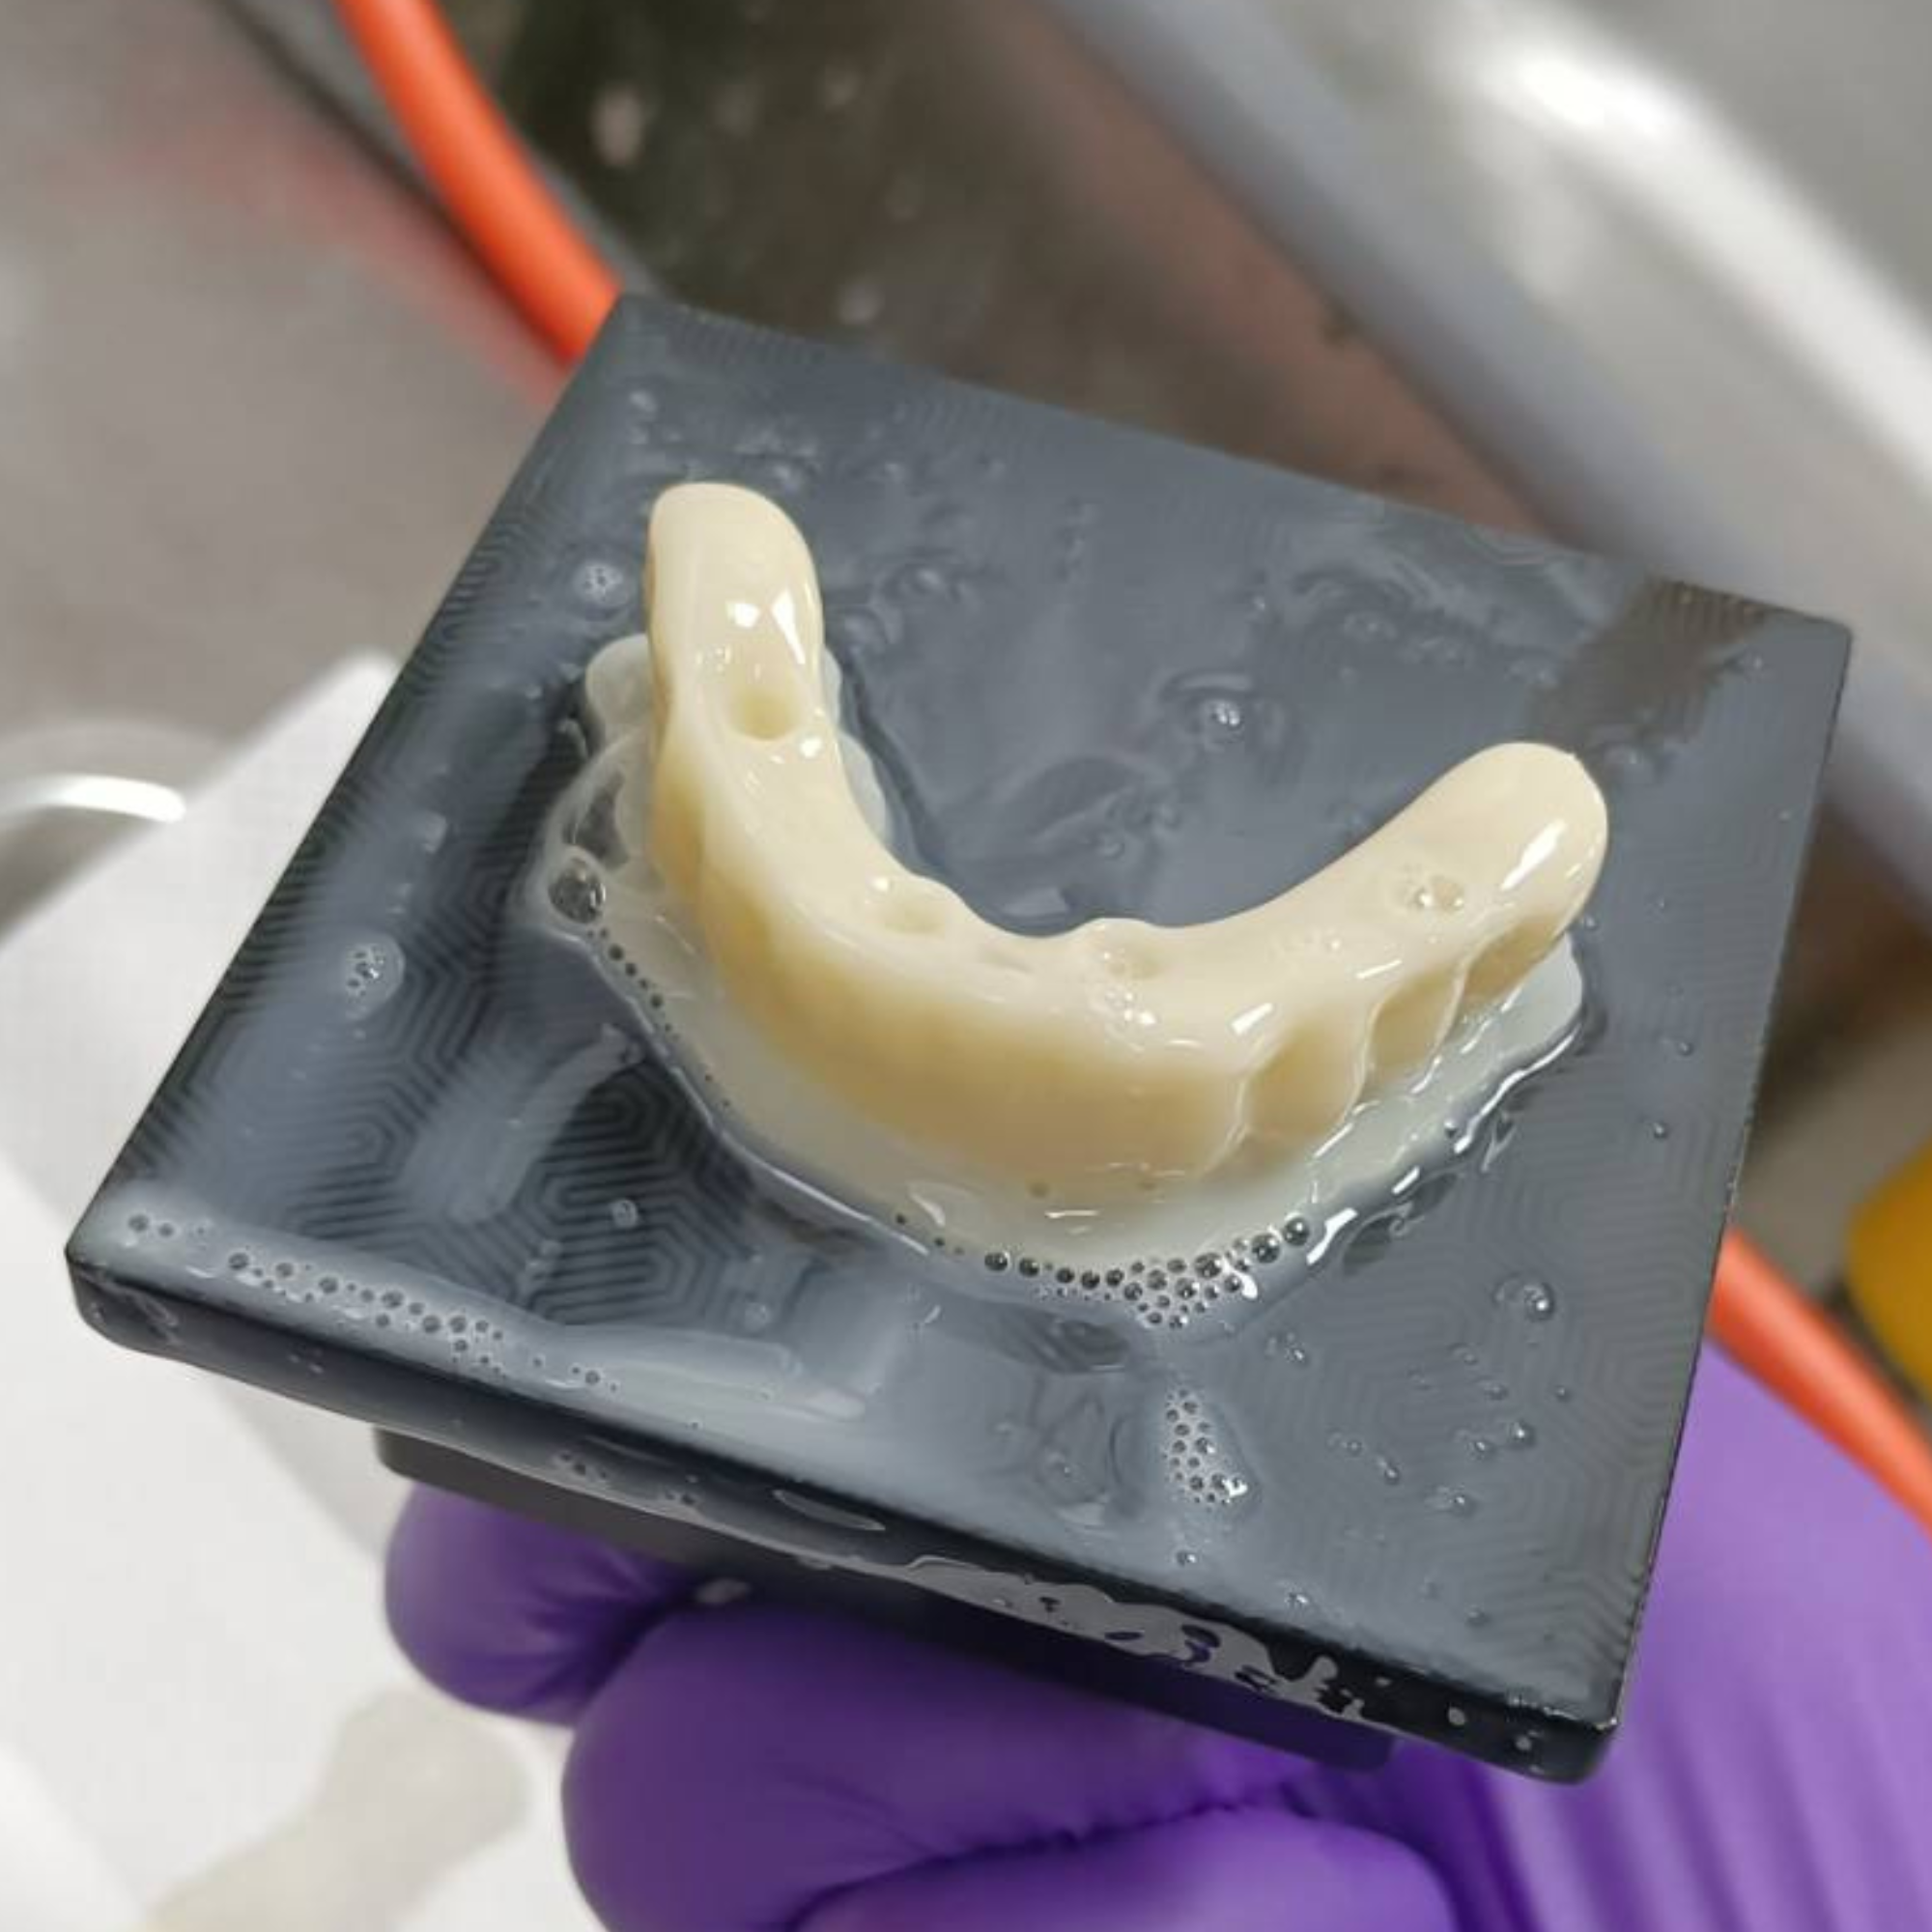
Step 5. Printing the All-on-X Provisionals
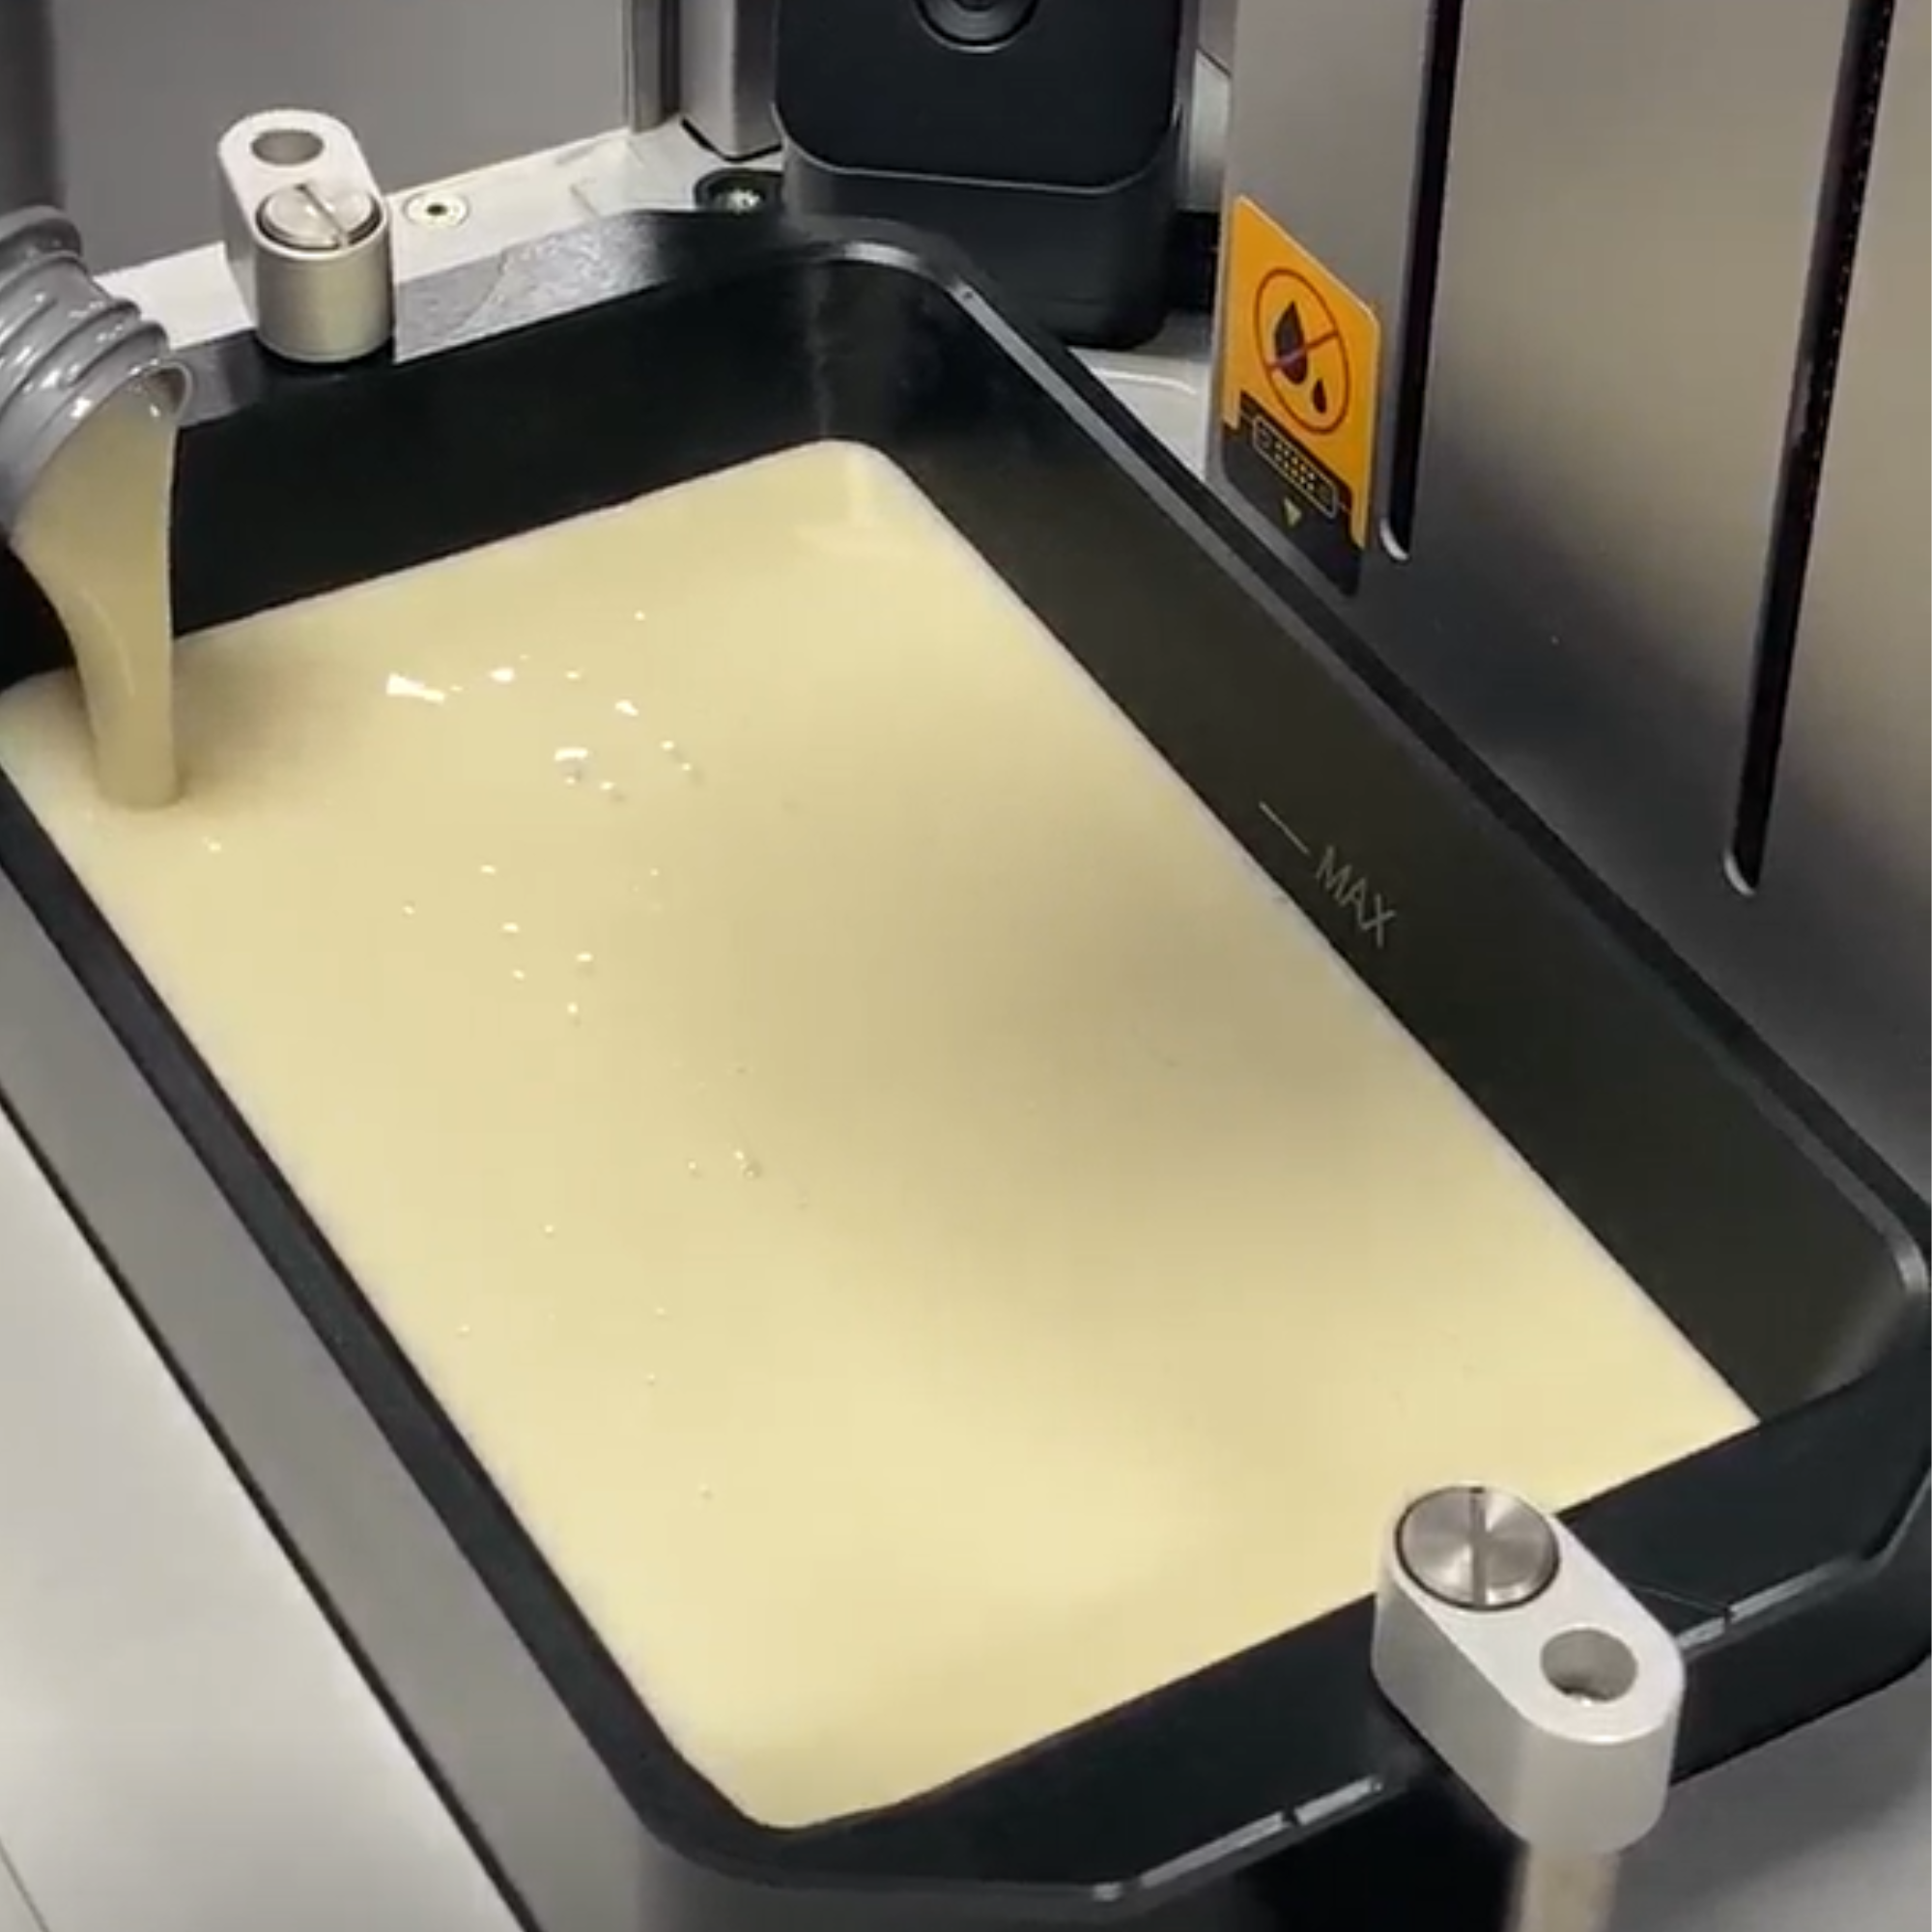
5.1 Pouring the Resin
Fill the vat to about half to three-quarters of capacity. Avoid overfilling past the max line, as this can lead to spills during printing.
5.2 Starting the Print Job
Via USB: Insert the USB, select the file on the printer, and press "Print" to start the printing process. You can also copy files directly into the printer’s memory for future use.
Via Network Sending: After completing step 4.5, click "Network Sending", then select your printer’s IP address in the pop-up window. Finally, click "Upload" to begin the printing process.
💡Reminder: Before using the network sending function, make sure your Sonic CS+ printer has been added to DS Slicer.
Faster Chairside Delivery
With the Sonic CS+ dental 3D printer, you can print All-on-X provisionals in 22 minutes or less, enabling same-day treatments that let patients leave your clinic with a confident smile.
Step 6. Post-Processing
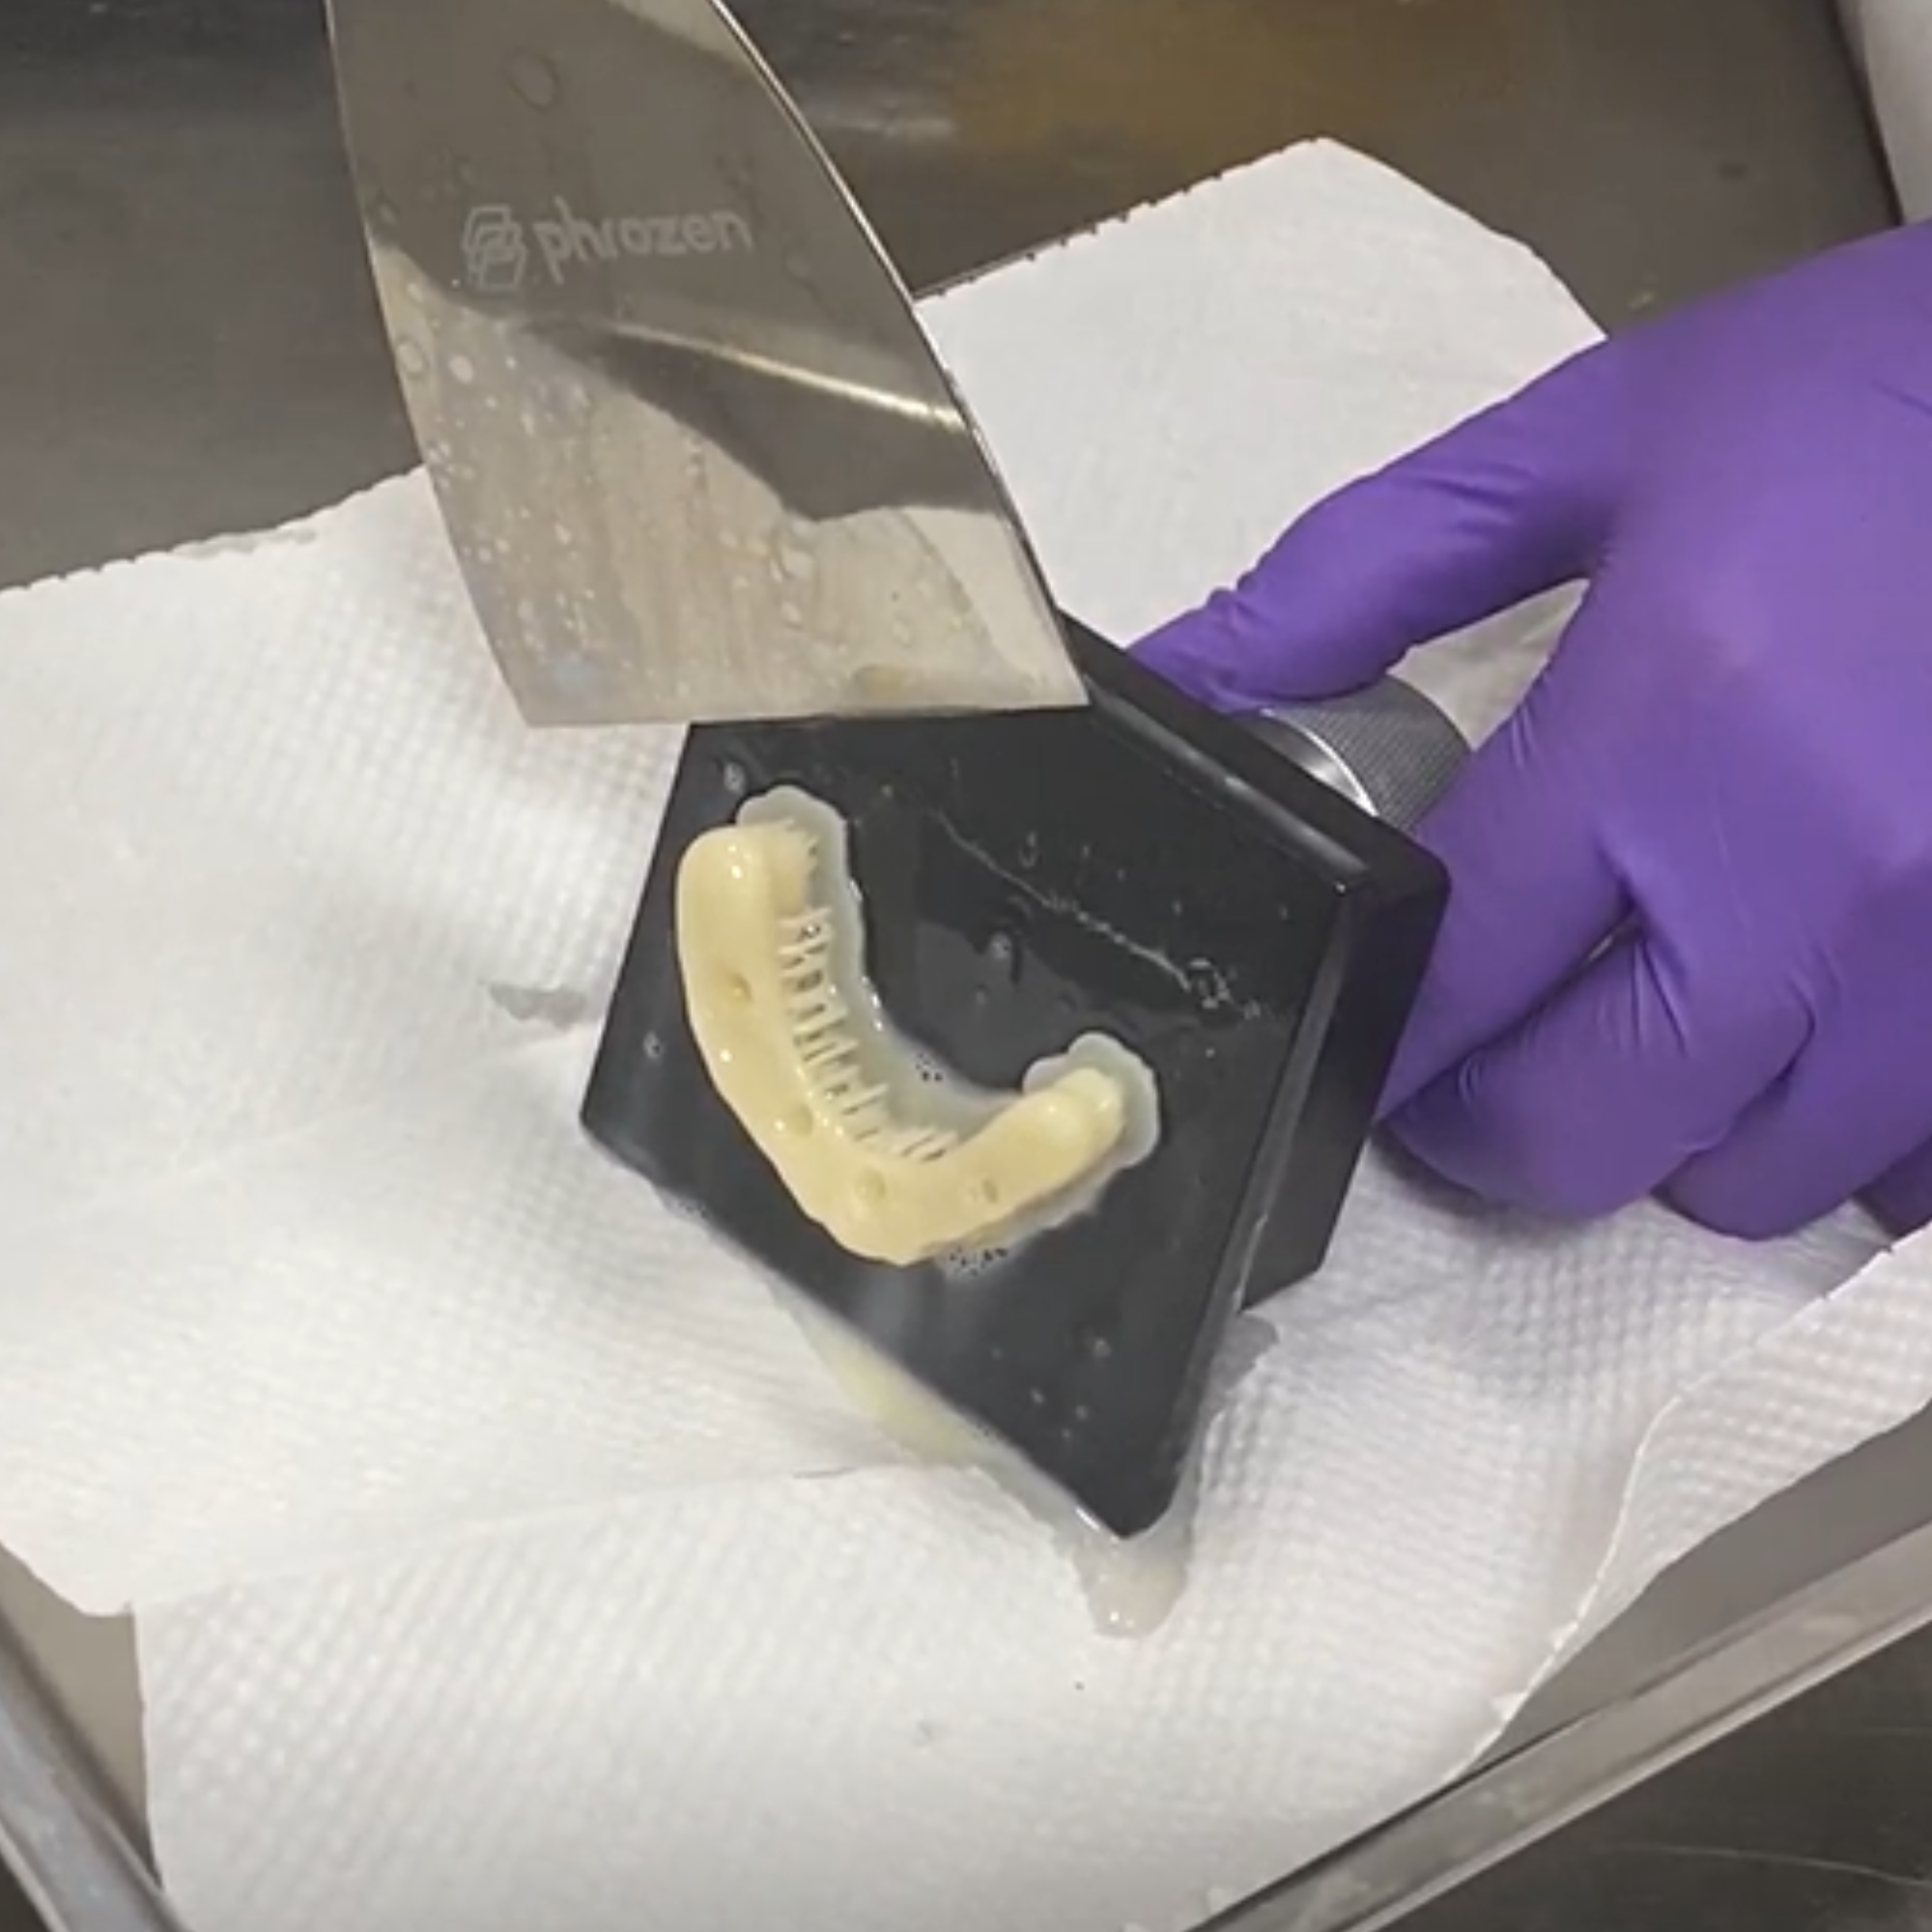
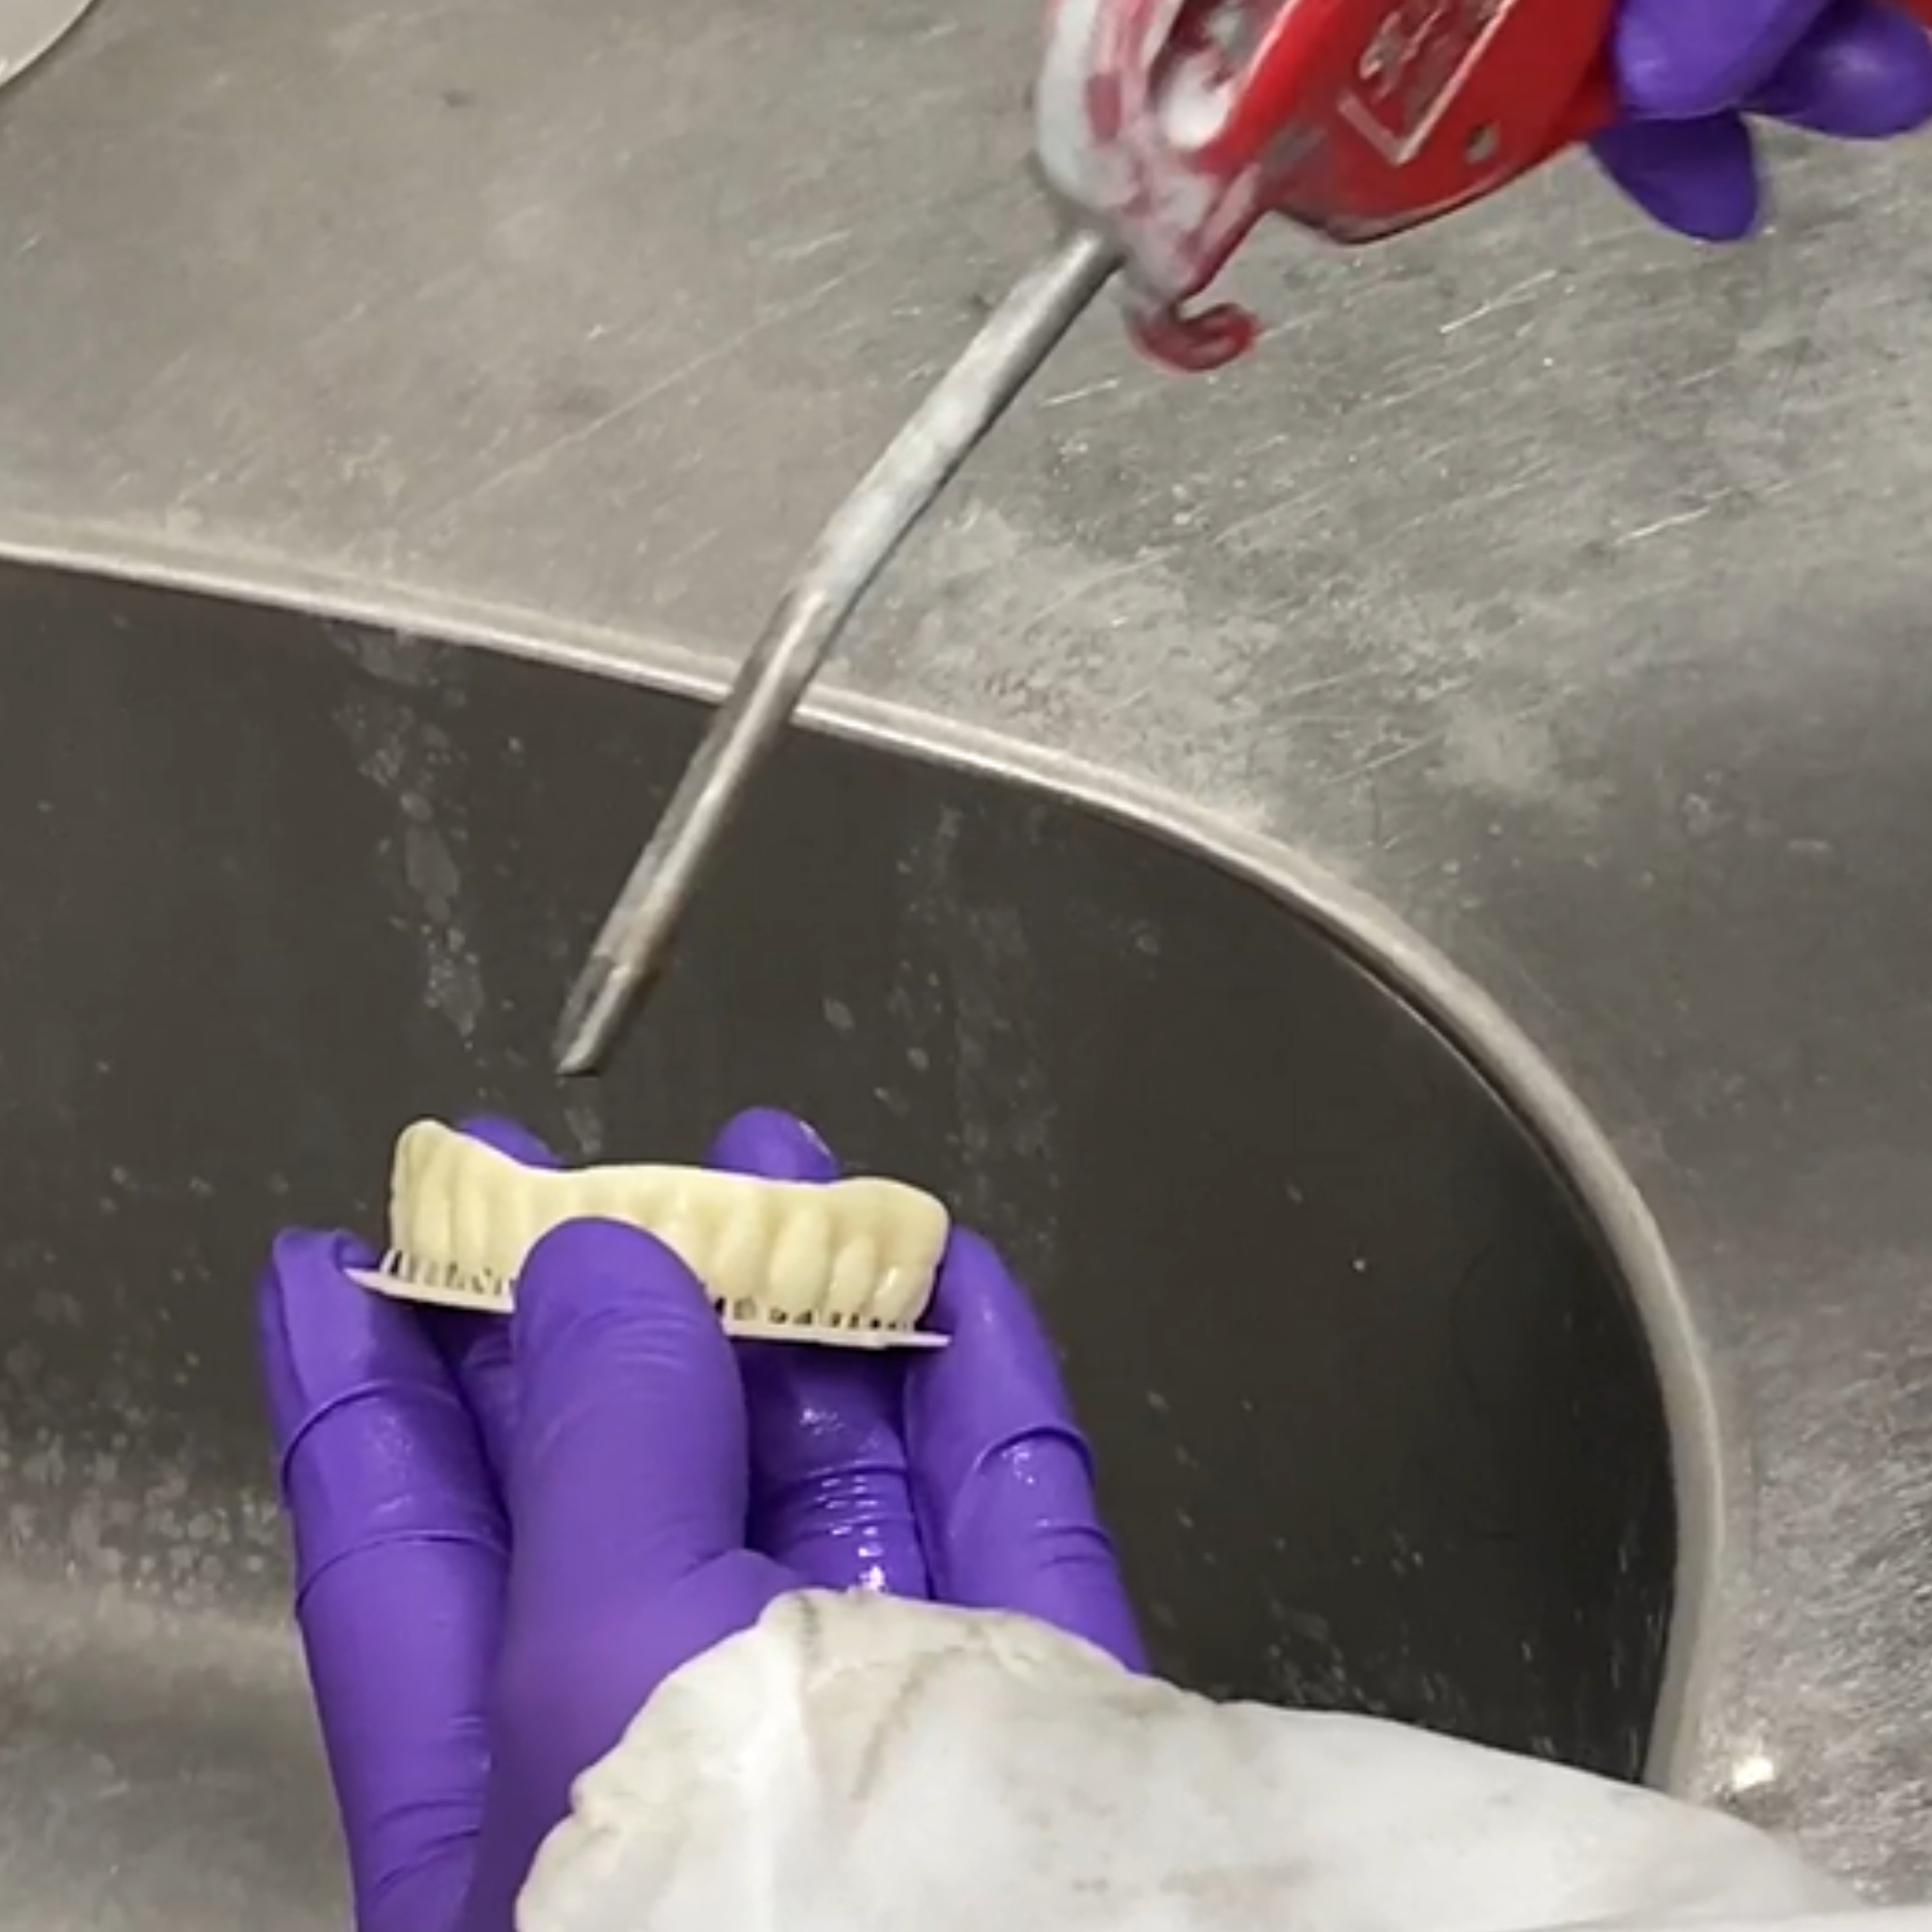
6.1 Safe Model Removal
Use a metal scraper to detach the model from the build plate. Apply steady, light, and even pressure to prevent accidental cracks or injury.
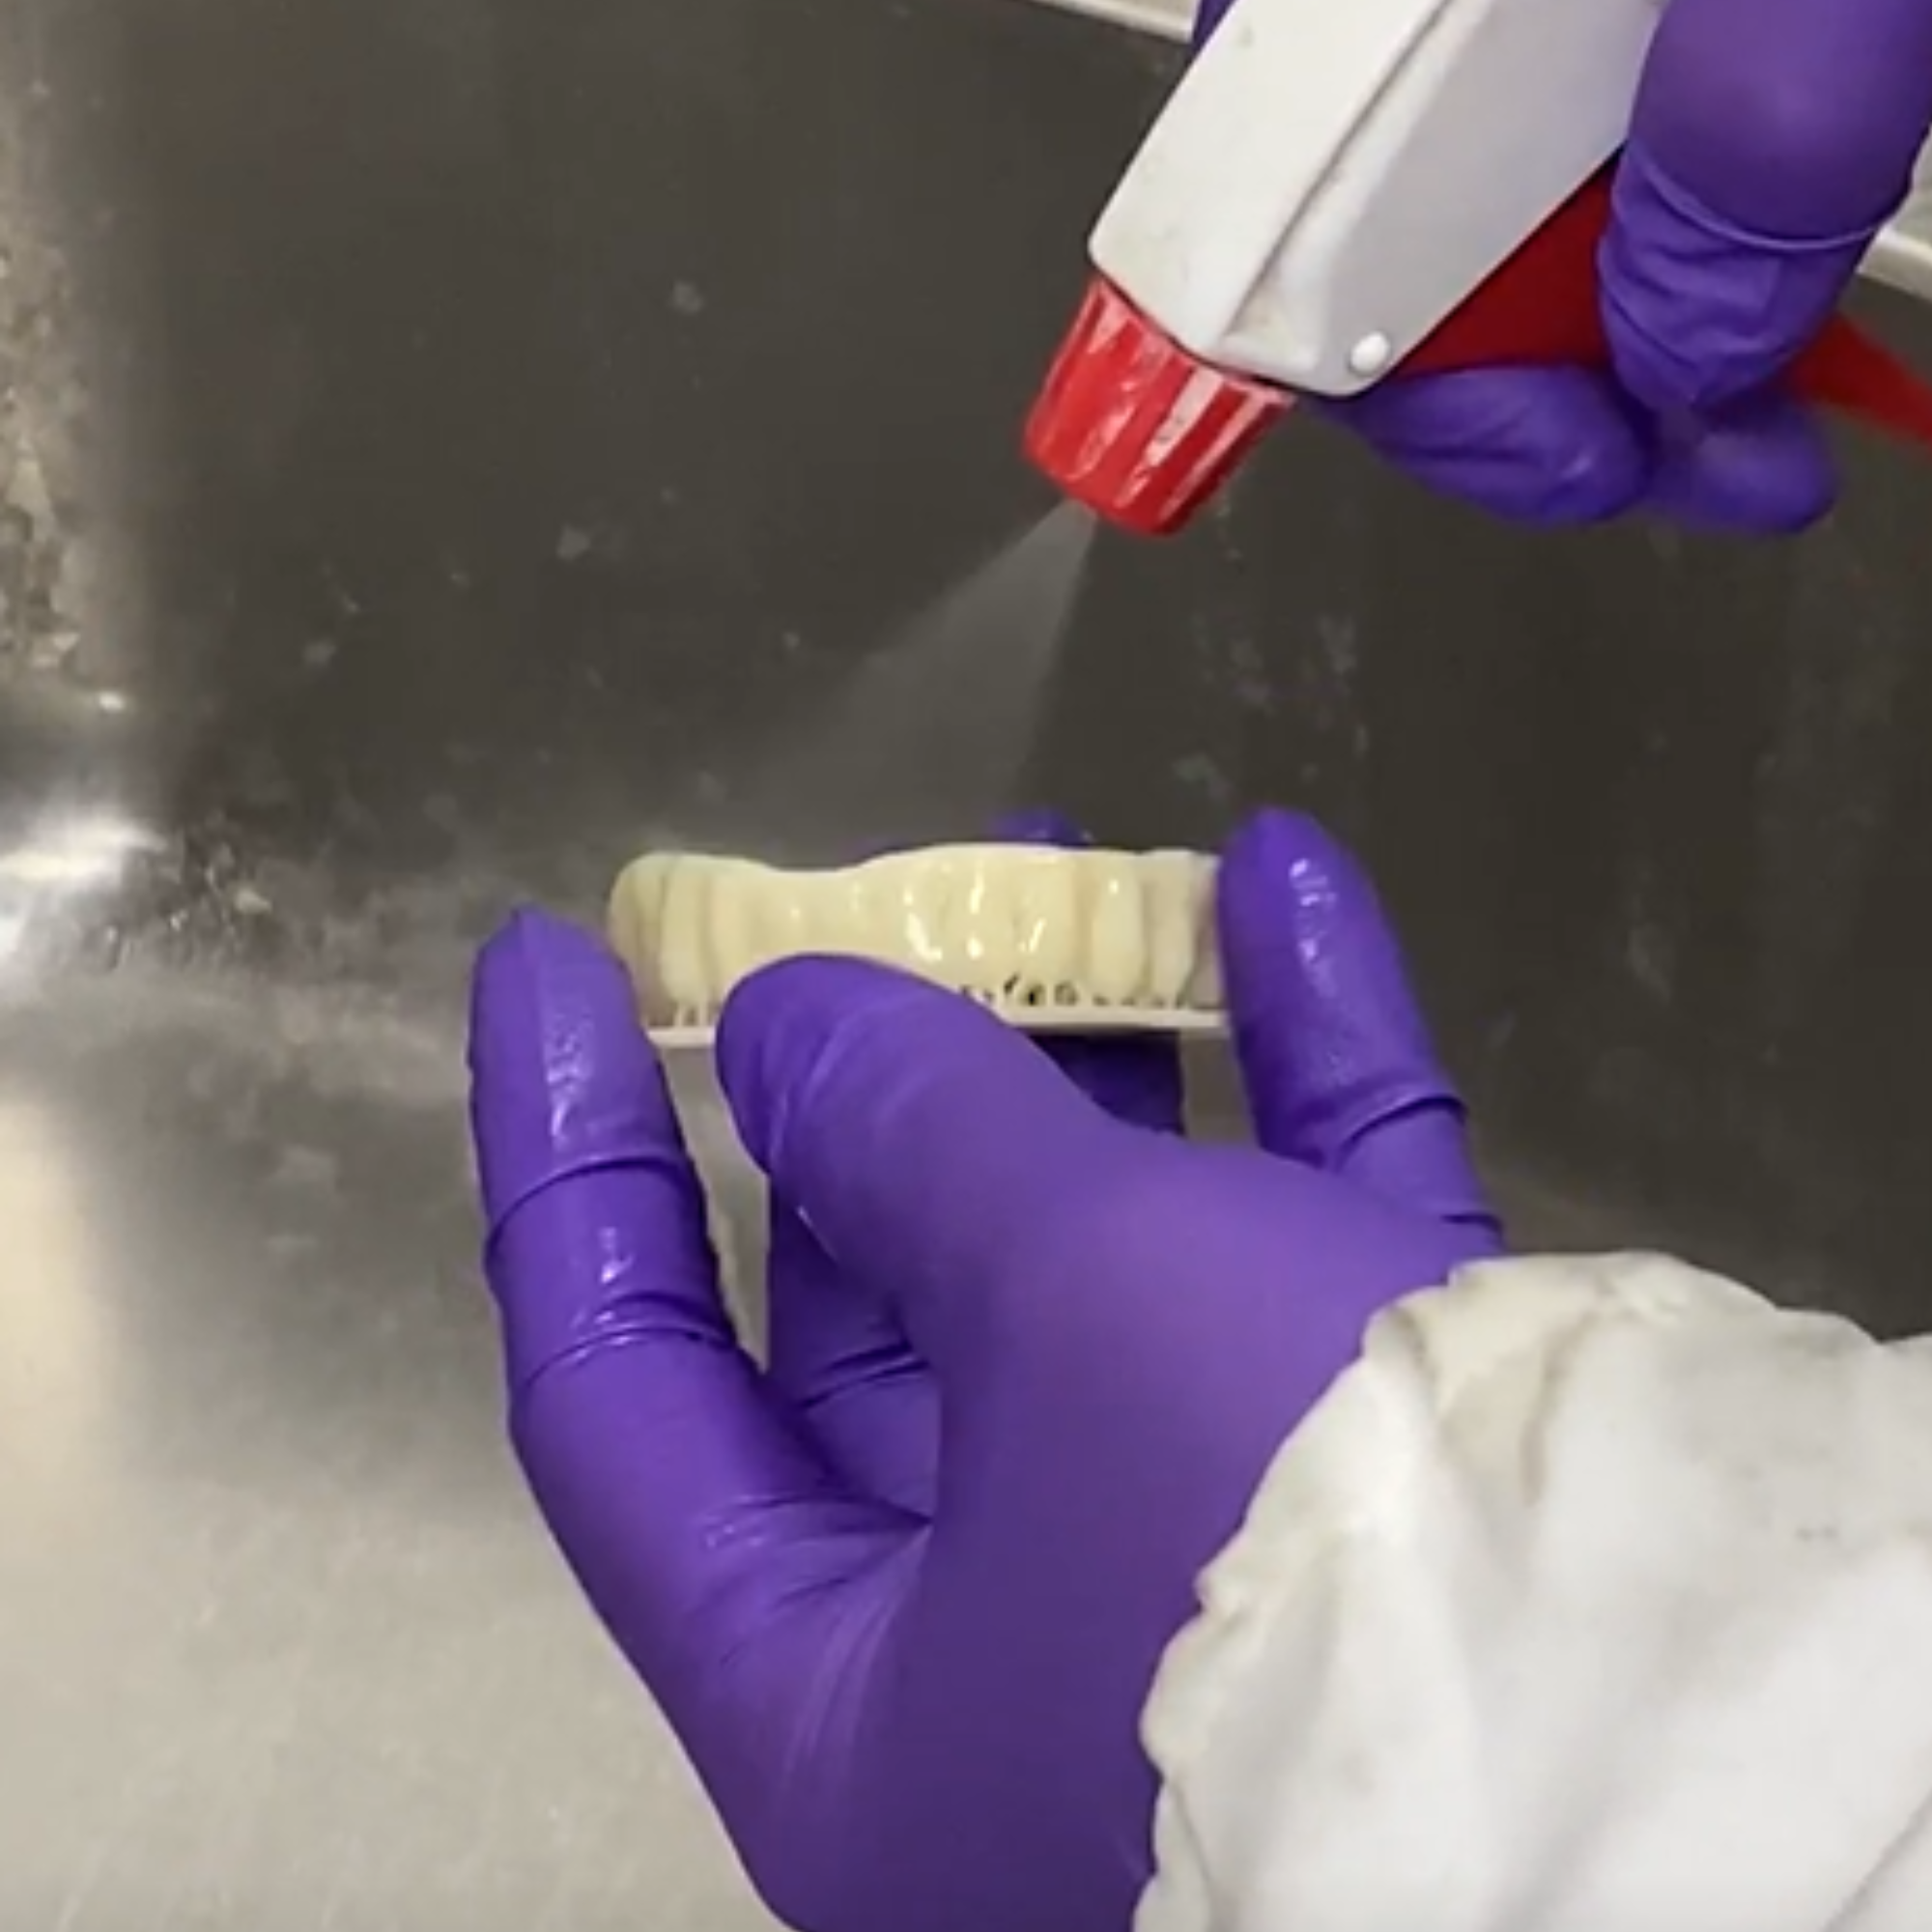
6.2 Removing Residual Resin
To ensure the biocompatibility and longevity of 3D printed All-on-X, it is crucial to follow the cleaning instructions provided by the resin manufacturer carefully. What follows is a general cleaning guide for reference:
- Brush detailed areas (embrasures, grooves, intaglio) with a toothbrush dipped in 99% IPA.
- Lightly spray the print with 99% IPA for faster cleanup.
- Use compressed air to clear away excess resin.
- Repeat until the model surface is free of residual resin.
6.3 Drying
Before post-curing, thoroughly dry the model using a compressed air gun. Any residual IPA or moisture can disrupt the curing process and lead to uneven light penetration, which may weaken the final properties of your printed parts.
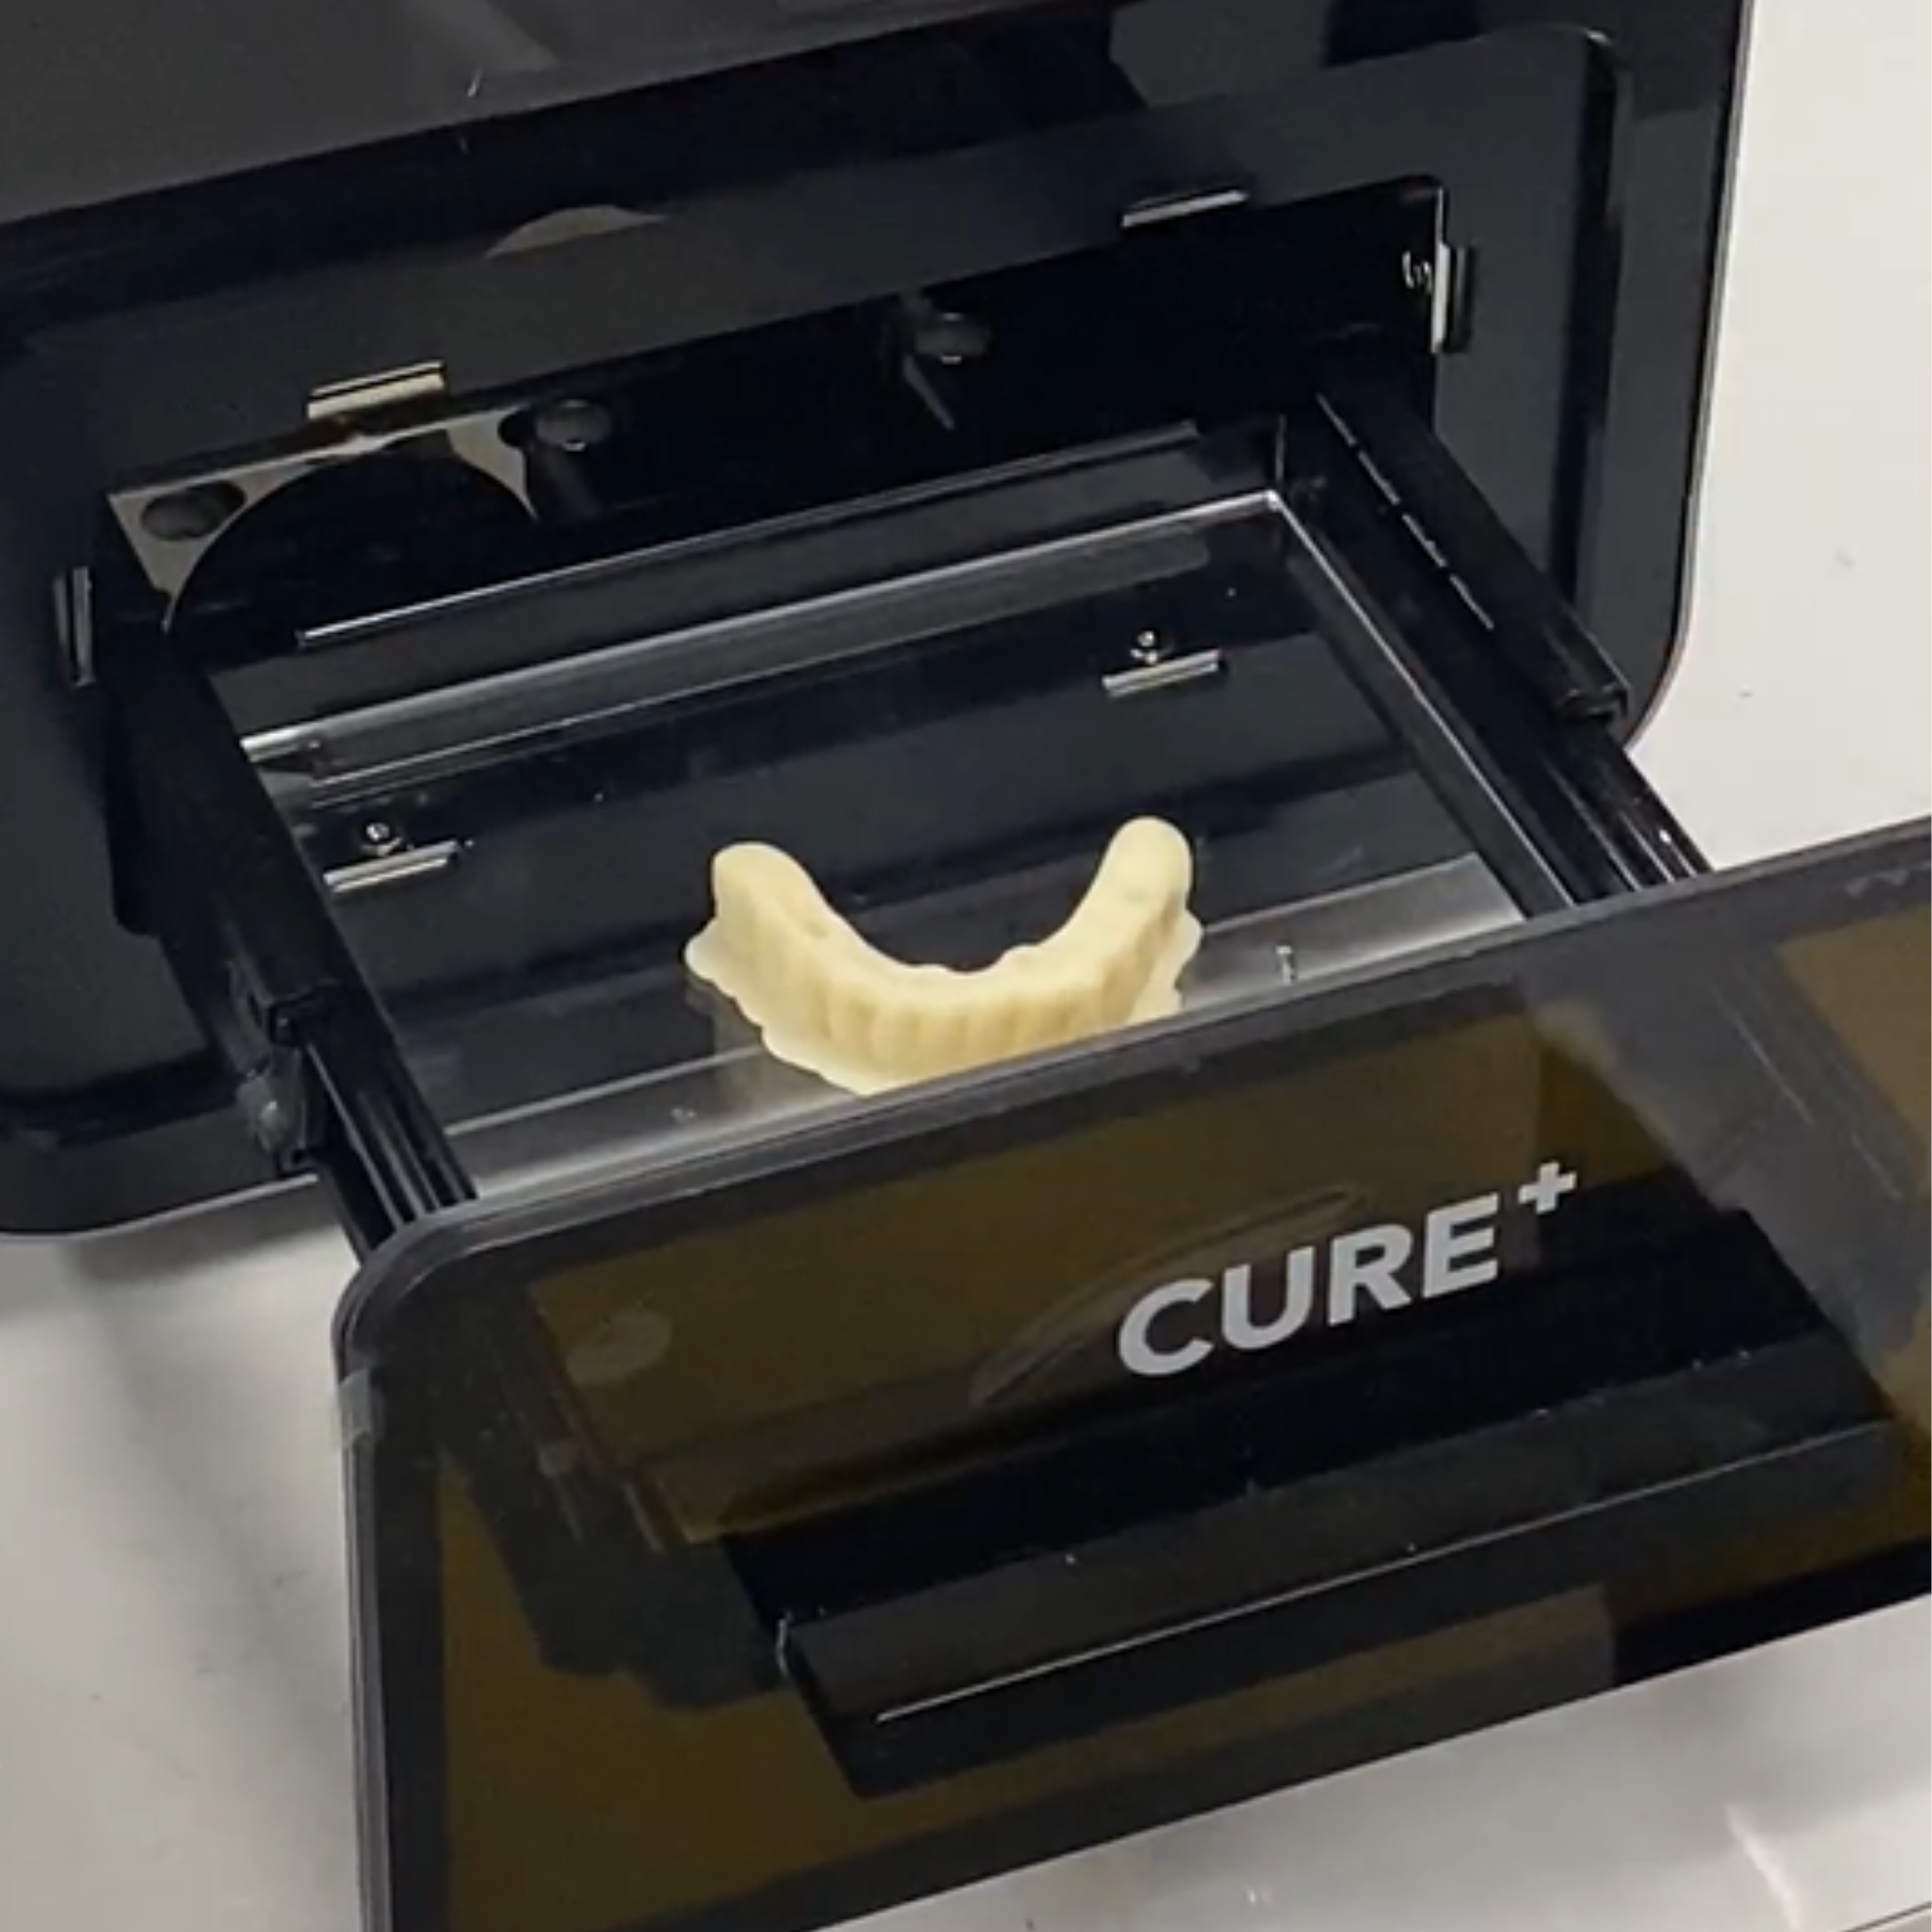
6.4 Post-Curing
Place the printed all-on x in a curing unit, such as the Phrozen CURE+. Select the preset curing profile for your resin and run a complete cycle to ensure optimal strength, durability, and biocompatibility.
6.1 Safe Model Removal
Use a metal scraper to detach the model from the build plate. Apply steady, light, and even pressure to prevent accidental cracks or injury.
6.2 Removing Residual Resin
To ensure the biocompatibility and longevity of 3D printed All-on-X, it is crucial to follow the cleaning instructions provided by the resin manufacturer carefully. What follows is a general cleaning guide for reference:
- Brush detailed areas (embrasures, grooves, intaglio) with a toothbrush dipped in 99% IPA.
- Lightly spray the print with 99% IPA for faster cleanup.
- Use compressed air to clear away excess resin.
- Repeat until the model surface is free of residual resin.
6.3 Drying
Before post-curing, thoroughly dry the model using a compressed air gun. Any residual IPA or moisture can disrupt the curing process and lead to uneven light penetration, which may weaken the final properties of your printed parts.
6.4 Post-Curing
Place the printed all-on x in a curing unit, such as the Phrozen CURE+. Select the preset curing profile for your resin and run a complete cycle to ensure optimal strength, durability, and biocompatibility.
Step 7. Finishing
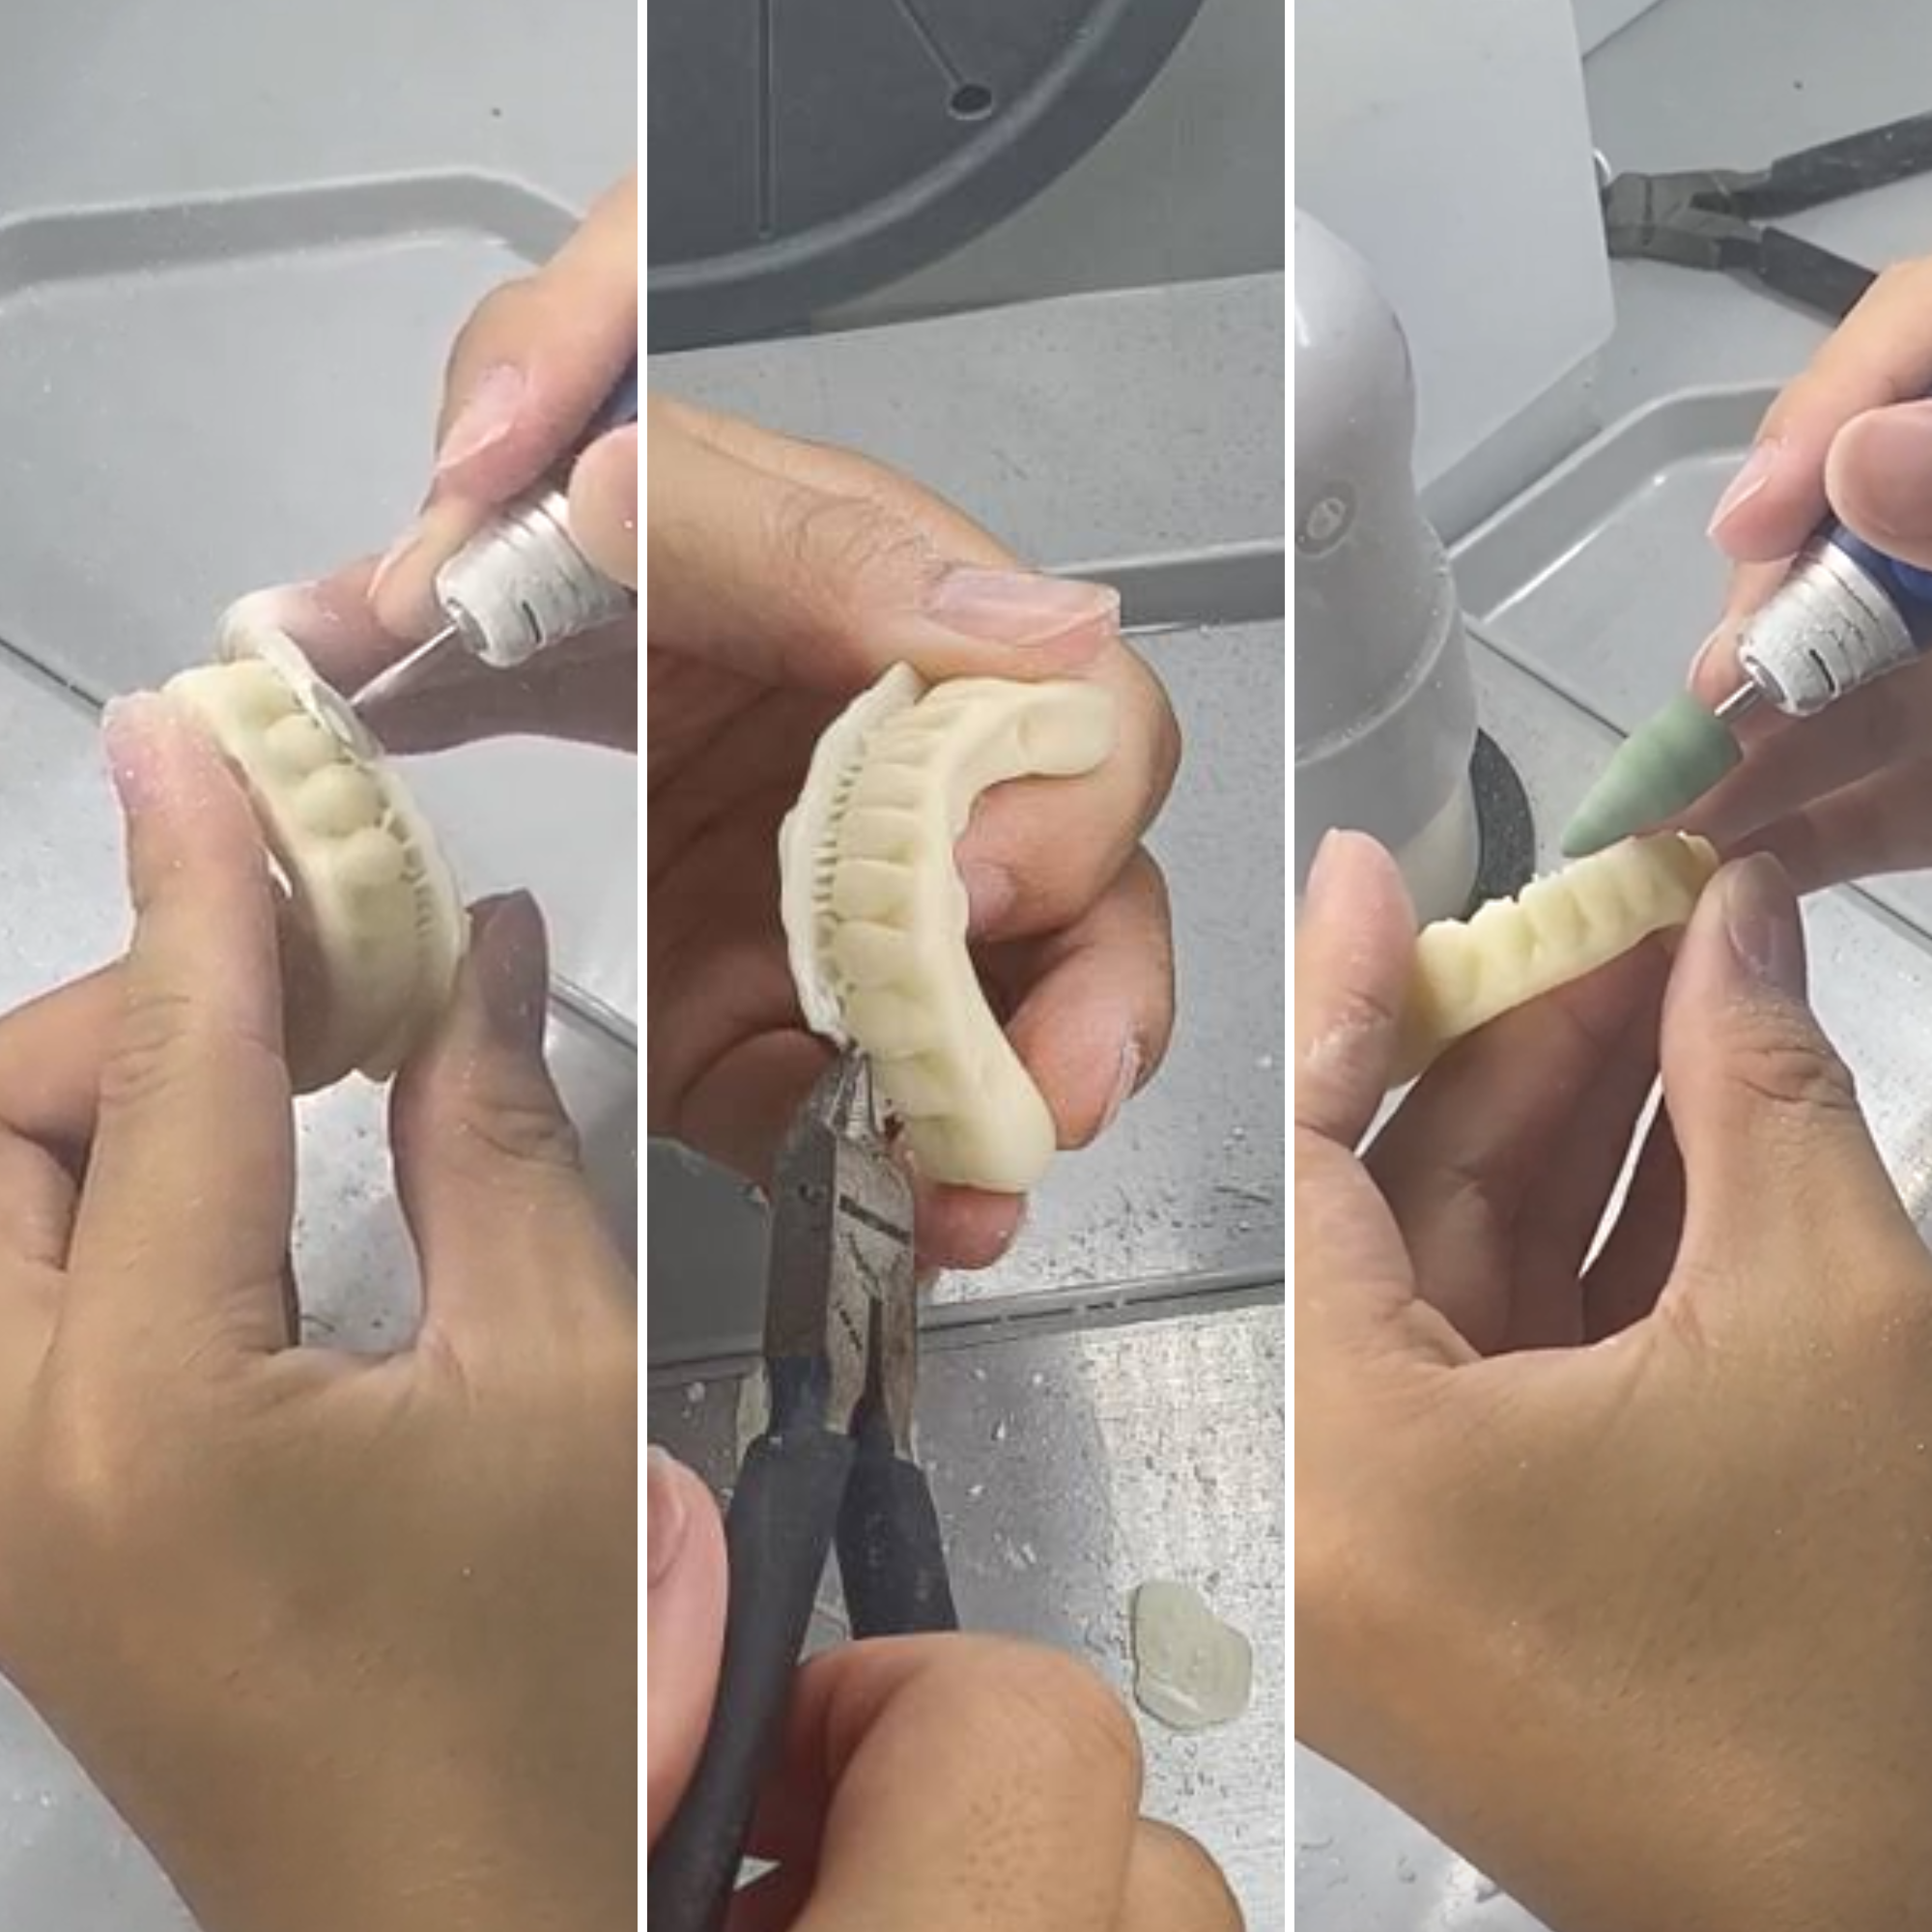
7.1 Removing Supports
- Use flush cutters and a diamond disc to trim supports close to the surface.
- Smooth leftover support marks with a dull carbide bur on a low-speed handpiece.
- Refine occlusal adjustments or contouring with ceramic wheels, carbide, or diamond burs.
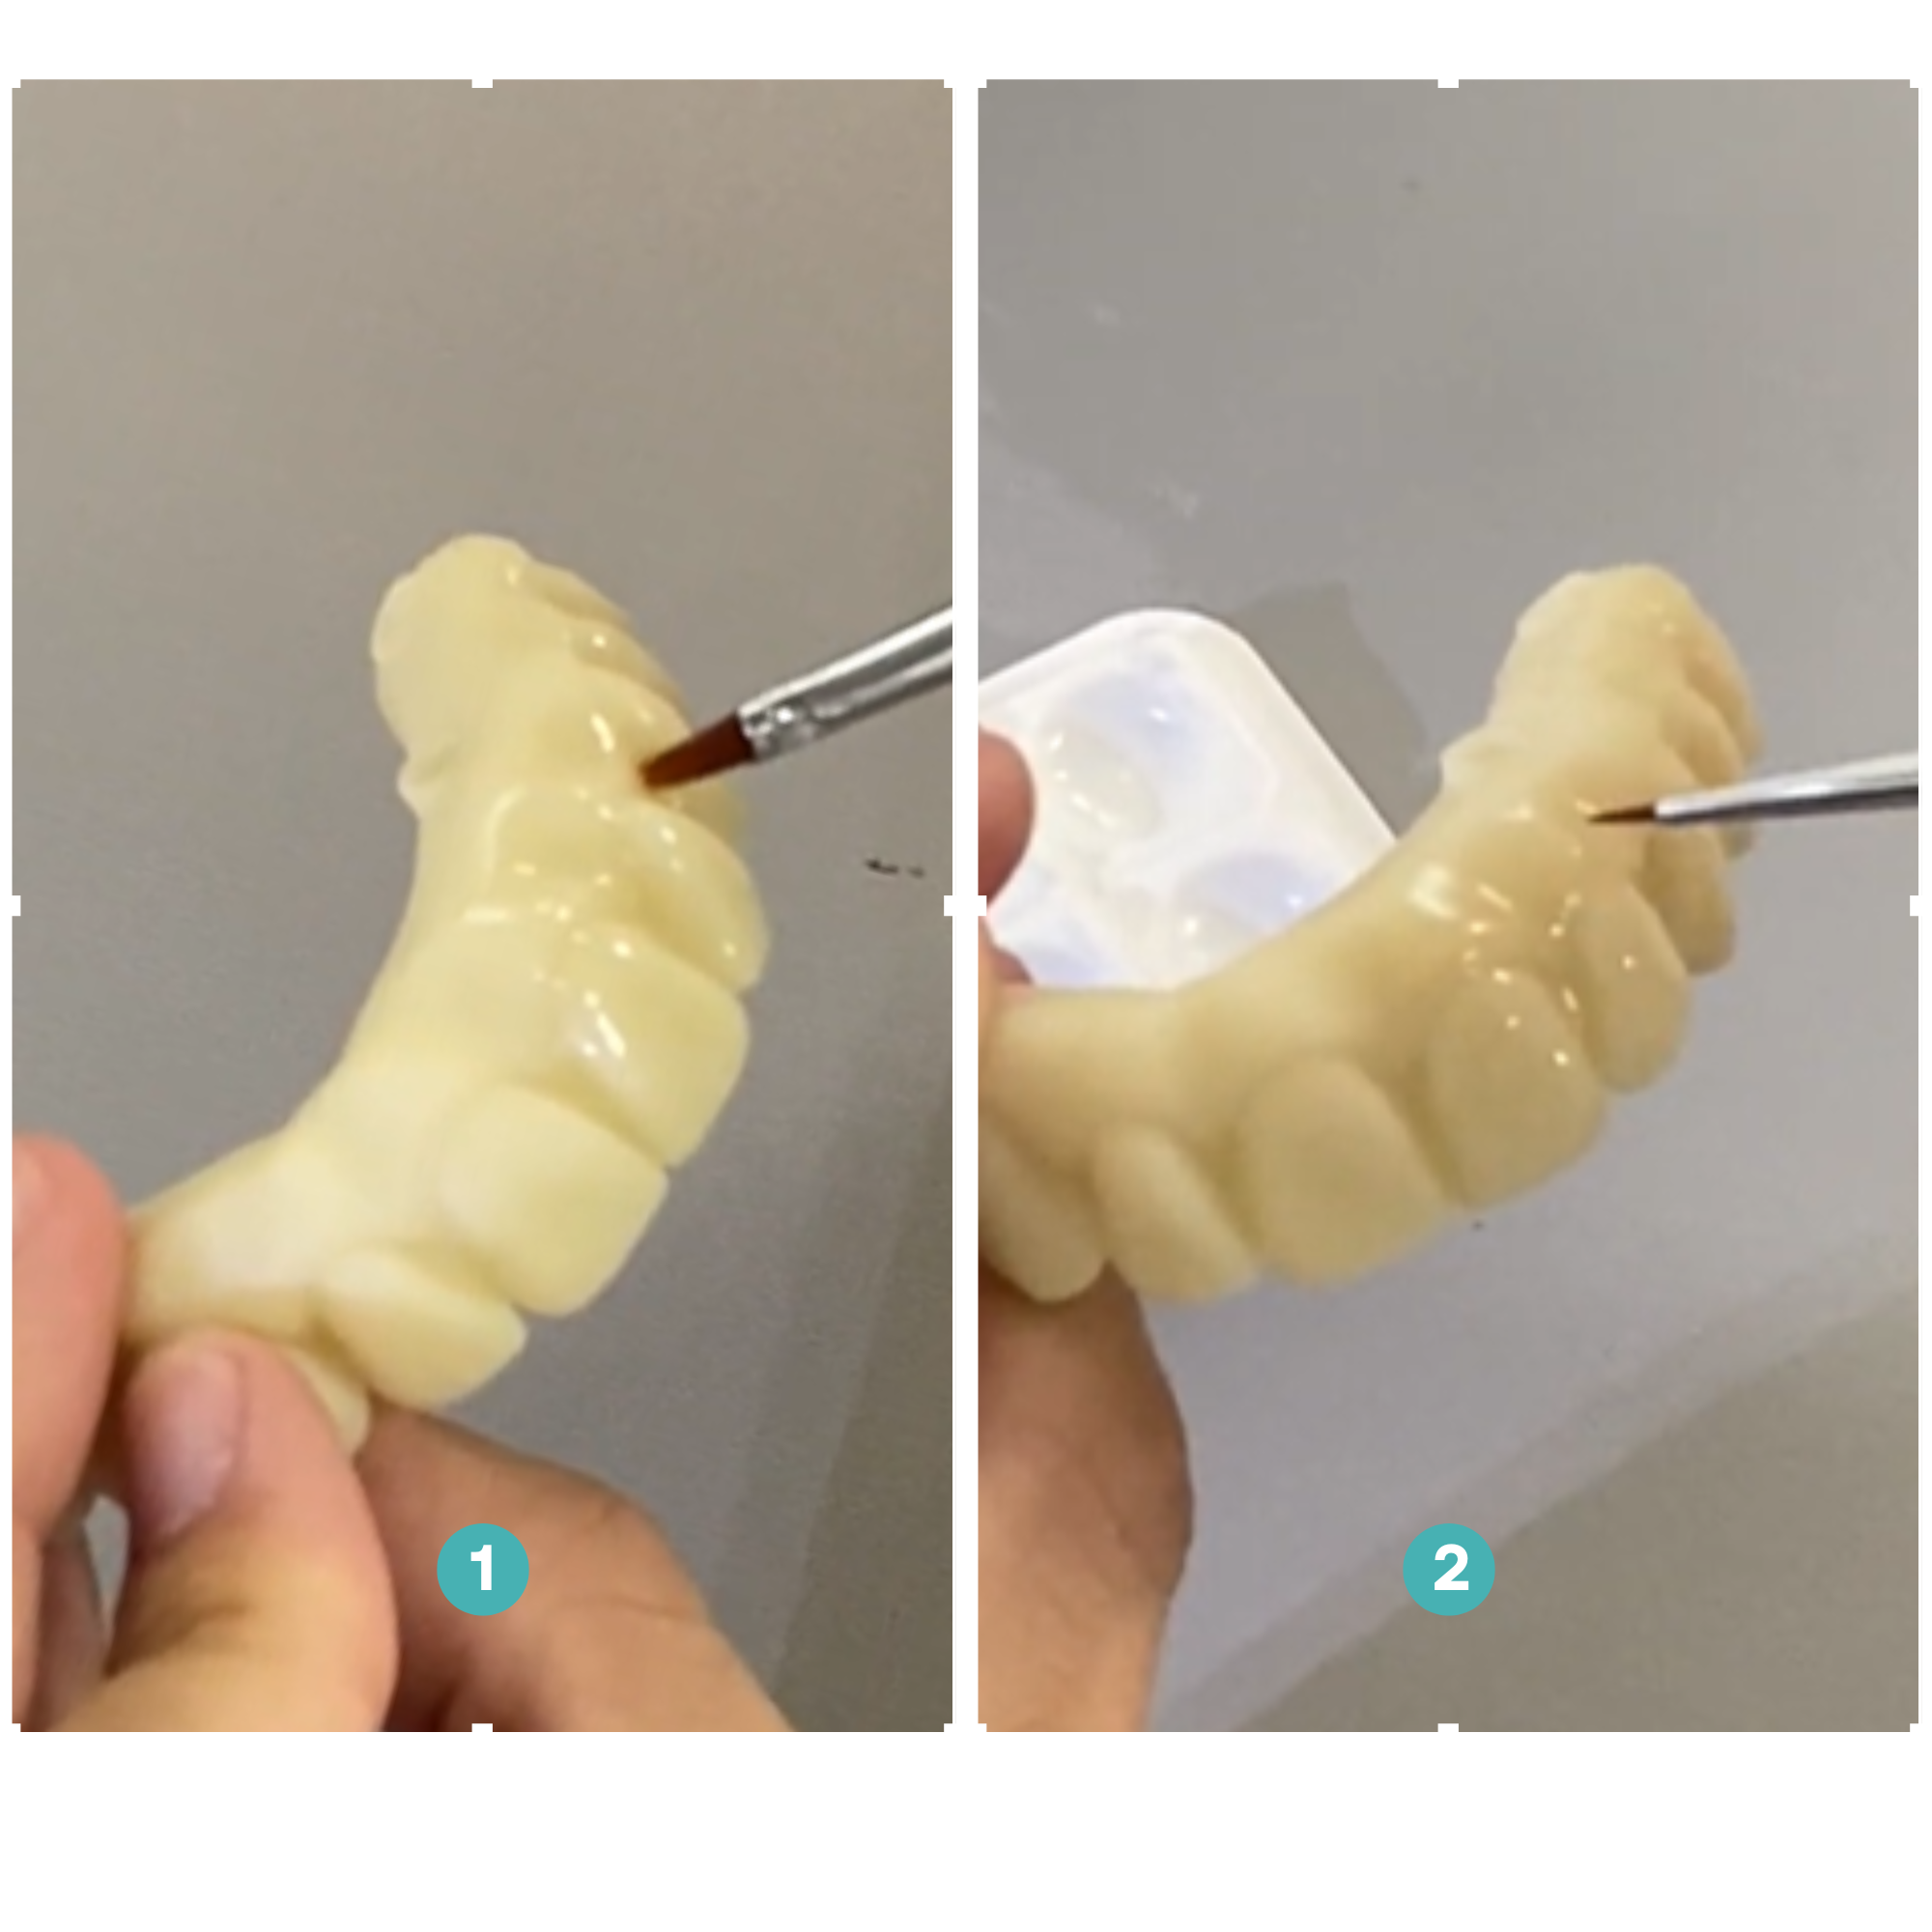
7.2 Staining and Glazing
Step 1: Start by applying a thin, even coat of "clear” paint across all teeth.
Step 2: Add a small amount of "gray" to the incisal side. You can also apply a touch of “pink-orange” at the gingiva area as needed to create a a layered esthetic.
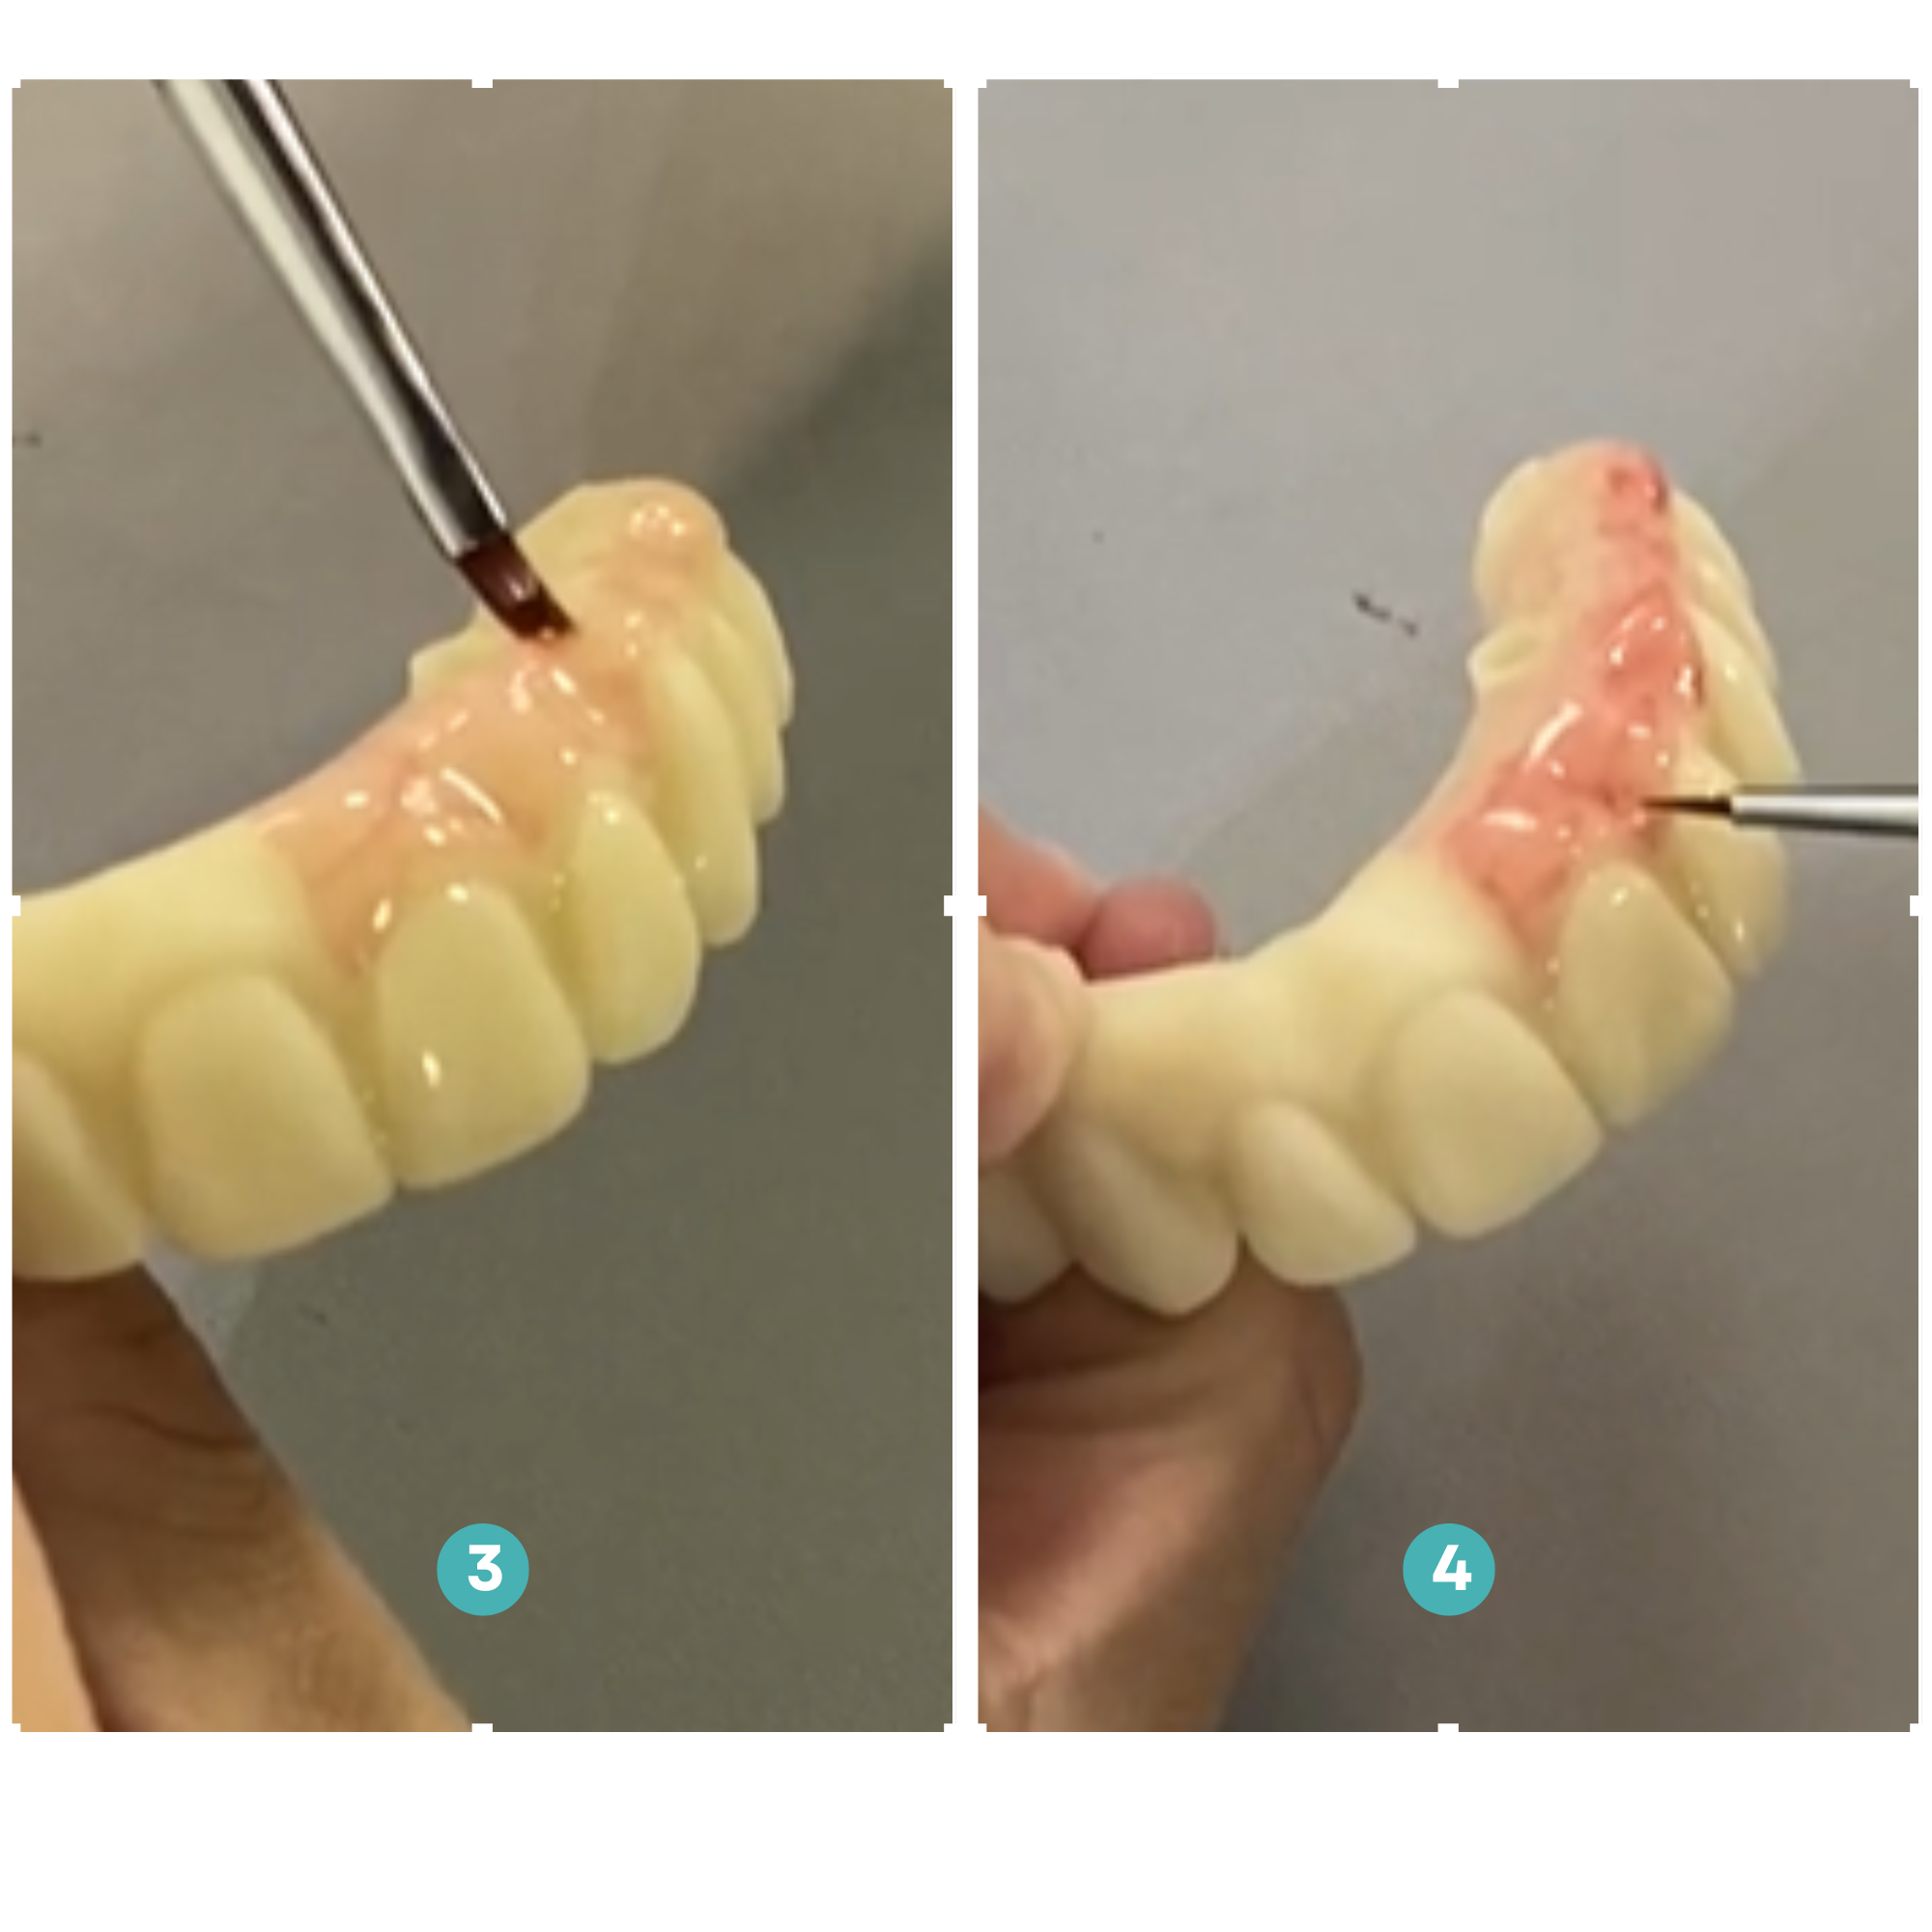
7.2 Staining and Glazing
Step 3: Apply a thin layer of "pink" over the gingiva areas. This acts as the base layer for natural tissue color.
Step 4: Combine "pink" and "red" together to create the final gingiva shade.
7.2 Staining and Glazing
Step 5: Apply a proper amount of "brown" to the occlusal cavity. This highlights occlusal anatomy and increases visual depth.
Step 6: For a final touch, add a small amount of "blue" along the incisal side. This creates a translucent and more natural enamel effect look.
7.1 Removing Supports
- Use flush cutters and a diamond disc to trim supports close to the surface.
- Smooth leftover support marks with a dull carbide bur on a low-speed handpiece.
- Refine occlusal adjustments or contouring with ceramic wheels, carbide, or diamond burs.
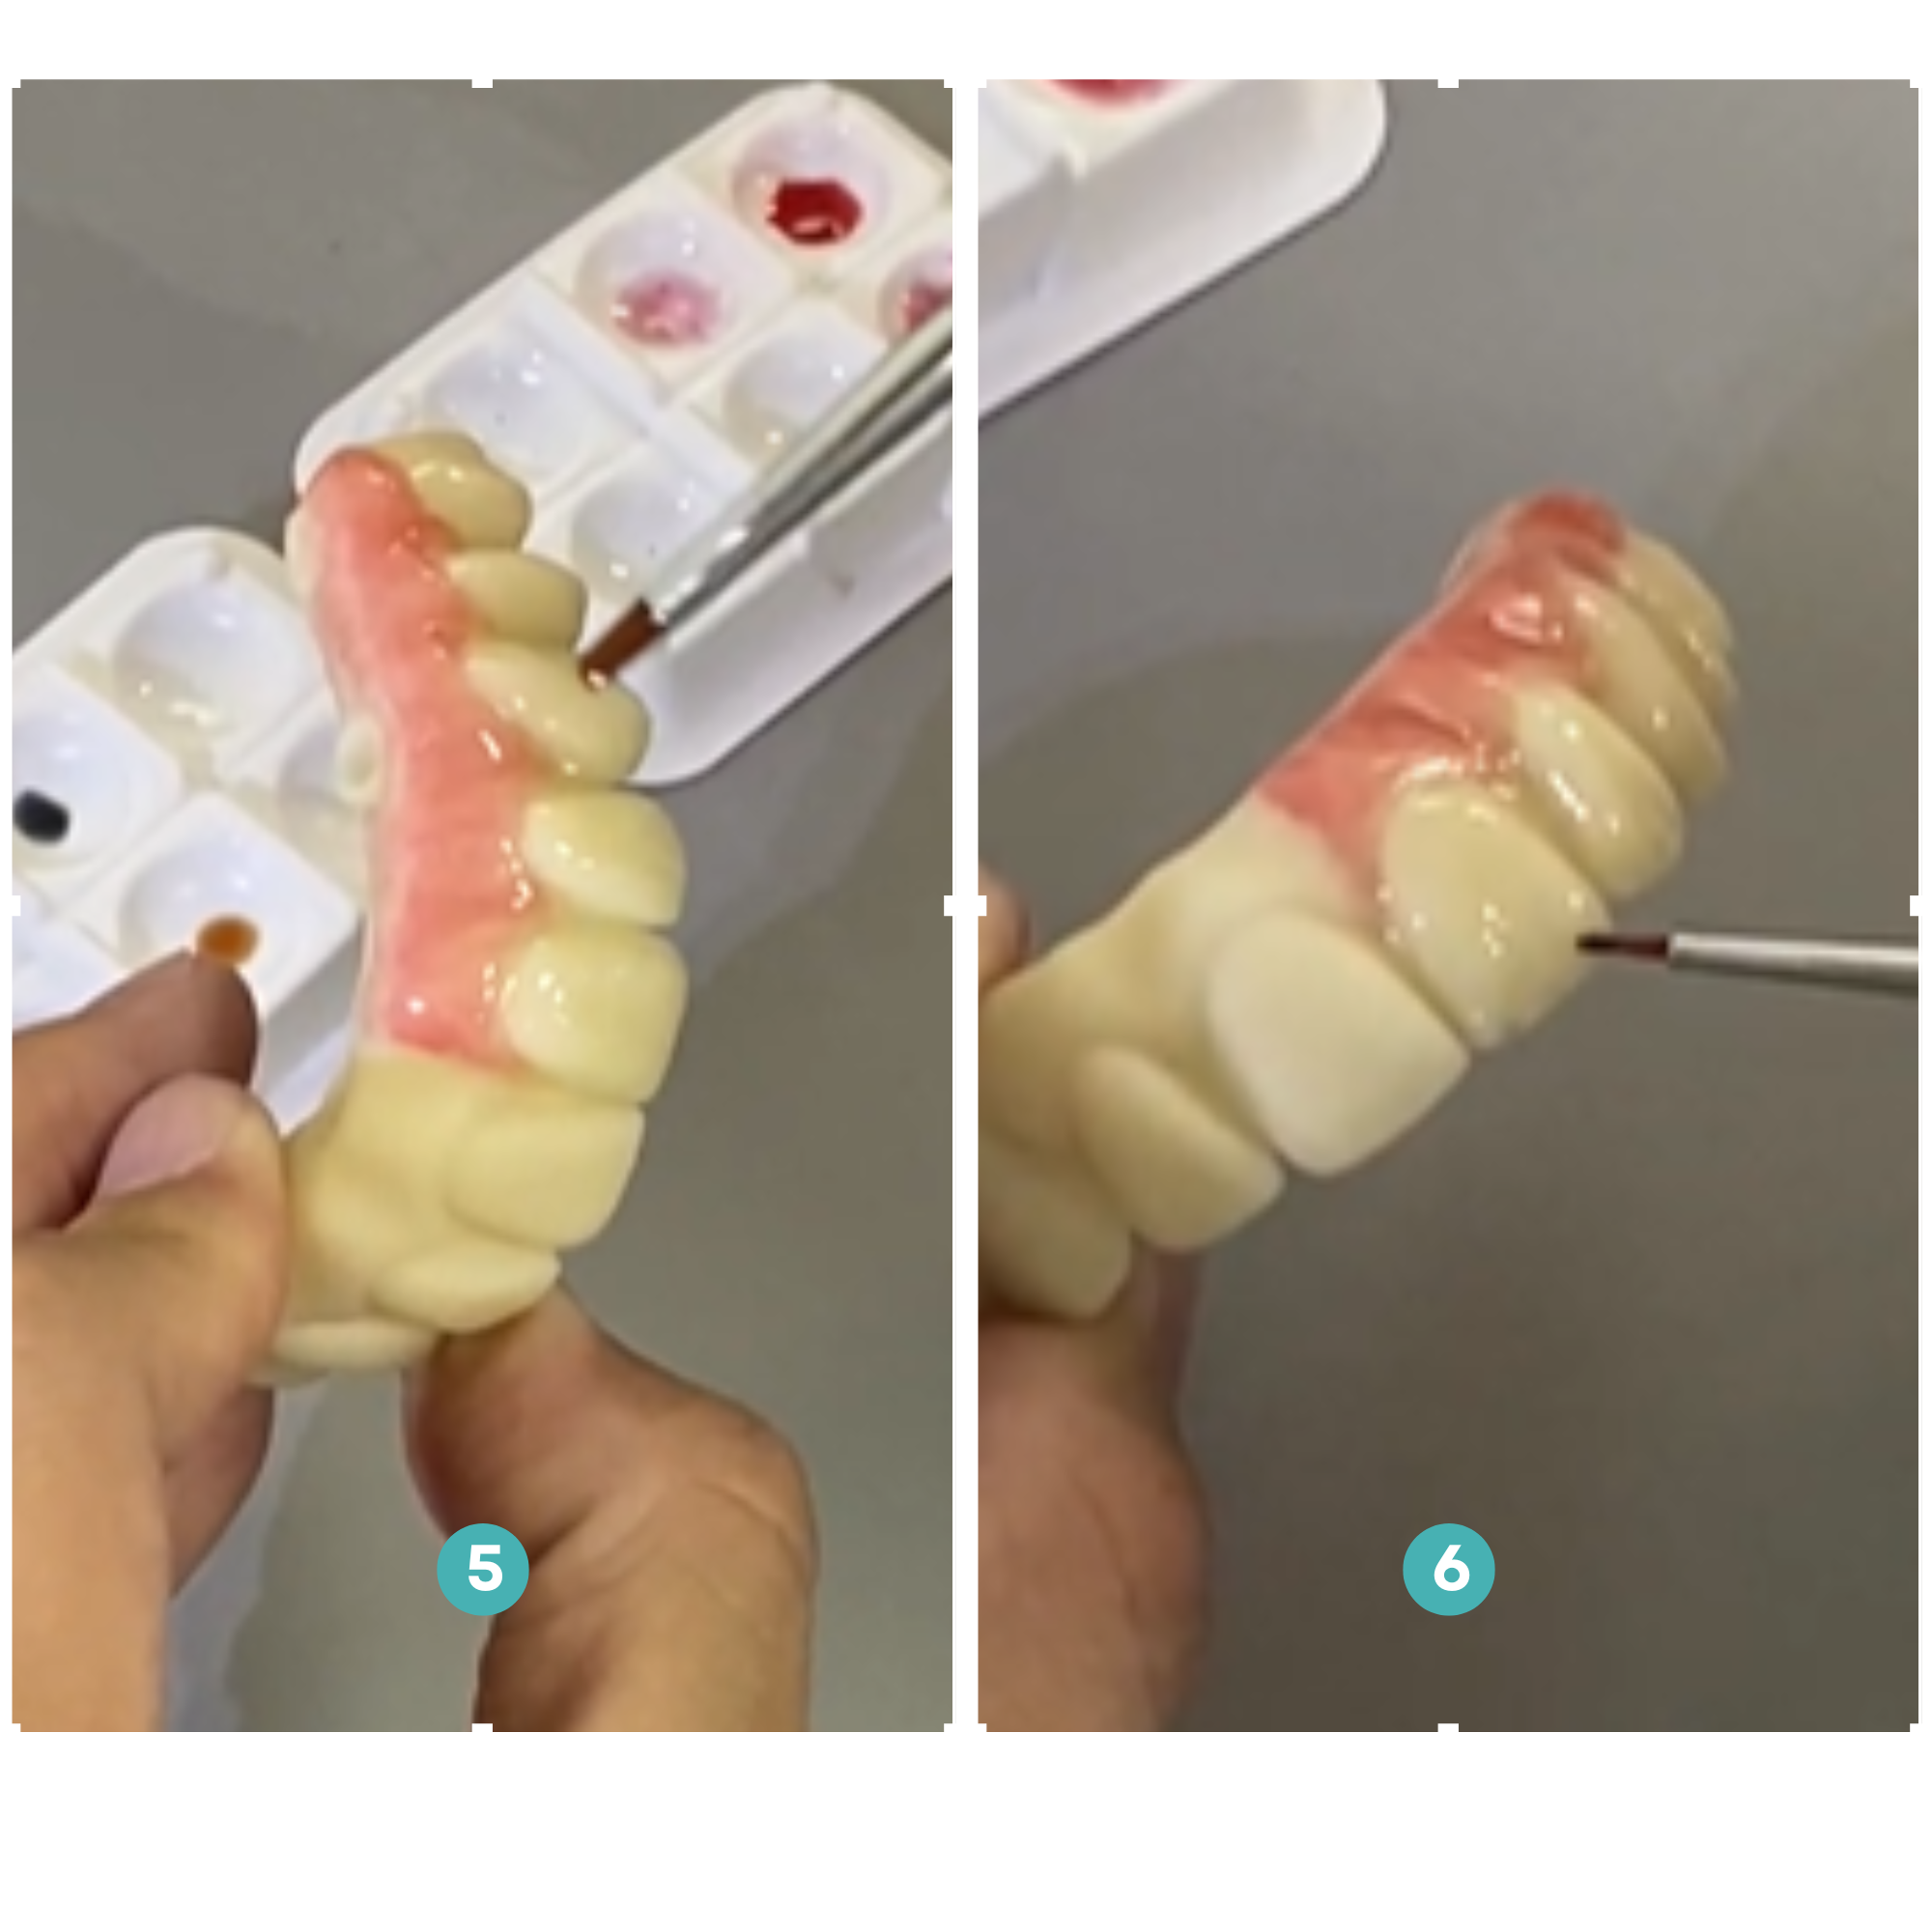
7.2 Staining and Glazing
Step 1: Start by applying a thin, even coat of "clear” paint across all teeth.
Step 2: Add a small amount of "gray" to the incisal side. You can also apply a touch of “pink-orange” at the gingiva area as needed to create a a layered esthetic.
7.2 Staining and Glazing
Step 3: Apply a thin layer of "pink" over the gingiva areas. This acts as the base layer for natural tissue color.
Step 4: Combine "pink" and "red" together to create the final gingiva shade.
7.2 Staining and Glazing
Step 5: Apply a proper amount of "brown" to the occlusal cavity. This highlights occlusal anatomy and increases visual depth.
Step 6: For a final touch, add a small amount of "blue" along the incisal side. This creates a translucent and more natural enamel effect look.

Wrapping Up
Accessible Excellence at Scale
By following this guide—from scanning to finishing—we hope you can quickly master the workflow of 3D printing All-on-X provisional restoration and deliver same-day restorations that are accurate, durable, and loved by your patients.
Wrapping Up
Accessible Excellence at Scale
By following this guide—from scanning to finishing—we hope you can quickly master the workflow of 3D printing All-on-X provisional restoration and deliver same-day restorations that are accurate, durable, and loved by your patients.

Sonic LS+
Accessible Excellence at Scale
Achieve reliable and repeatable results for large batch printing. Prevent costly reworks, avoid schedule delays, and reduce material waste with predictable,clinically-accurate prints every time.
Buy LS+