Before printing, you may need to check the status of your Sonic XL 4K 2022’s LCD screen. This is to ensure that both the UV lights and the Mono-LCD screen are functioning properly. We will guide you through the steps of performing an LCD test and how you can read it:
There are 3 modes to choose from. Make sure to test your LCD screen in the following order:
- LIGHT UP ENTIRE LCD SCREEN
- BLACKENED LCD SCREEN
- LCD GRID
*Caution! DO NOT look directly into the light. Improper exposure to UV light may cause painful eye and/or skin injuries.
MODE 1: LIGHT UP ENTIRE LCD SCREEN

On the touch panel, click on LCD TEST, then click on LIGHT UP ENTIRE LCD SCREEN
The LCD screen should be lit up completely. This is to make sure that the LCD screen lights up completely and that there are no black spots.
MODE 2: BLACKENED LCD SCREEN

On the touch panel, click on LCD TEST. This time, make sure to click on BLACKENED LCD SCREEN.
The light on the LCD screen should be covered up completely. This is to make sure that there are no light spots and that the LCD screen is capable of covering up the light.
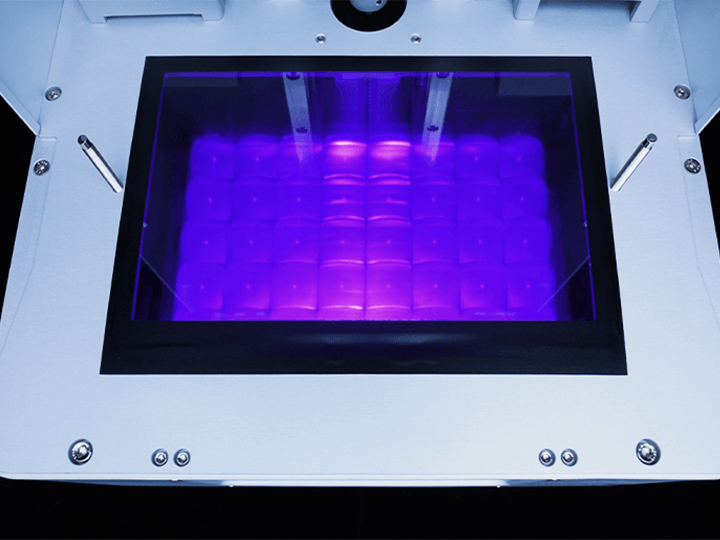
MODE 3: LCD GRID

On the touch panel, click on LCD TEST, then click on LCD GRID.
A grid should be displayed on the LCD screen. Run this test to make sure the UV lights are functioning properly.
LCD Test is Complete
After all 3 modes have been displayed correctly on your LCD screen, this means that your LCD screen is functioning properly. The LCD test is now complete.
It’s time to proceed onto the next step: Z-axis Calibration.
